
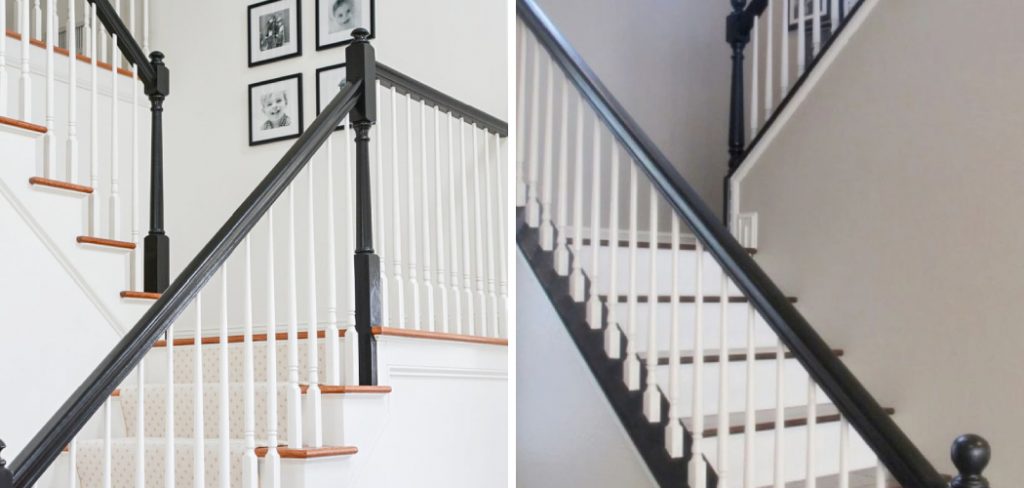
Are you looking to add a fresh coat of paint to your balusters? Painting balusters is a great way to revitalize your home and give it a new look. In this guide, we will go through the steps on how to paint balusters in an easy and effective manner.
Painting balusters can be a rewarding DIY project that not only enhances the aesthetic appeal of your staircase or railing but also protects the wood from wear and tear. Whether you are looking to freshen up existing balusters or to add a new color to match your decor, proper preparation and technique are essential for achieving a professional-looking finish.
In this guide, we will walk you through the necessary steps, from selecting the right materials to applying the final coat, ensuring a smooth and durable result.
What Will You Need?
Before you begin painting balusters, ensure you have all the necessary materials. Here’s a list of everything you’ll need:
- Painter’s tape
- Drop cloth or plastic sheeting
- Paintbrushes (angled and straight)
- Primer
- Paint (oil-based or latex)
- Sandpaper (medium grit)
- Tack cloth/rag
- Bucket of warm water with mild soap
Once you have gathered all the required materials, you can begin painting.
10 Easy Steps on How to Paint Balusters
Step 1: Prepare the Area
Preparation is key to achieving a smooth and professional finish when painting balusters. Start by protecting the surrounding area. Place a drop cloth or plastic sheeting on the floor beneath the balusters to catch any drips or spills. Using painter’s tape, carefully mask any adjacent areas you do not want to paint, such as the handrail or the baseboard.
Step 2: Sand the Balusters
Once the balusters are clean and dry, the next step is to sand them. Sanding is essential because it helps the primer and paint adhere better to the surface. Use medium-grit sandpaper to lightly sand each baluster, focusing on any rough areas or old paint that might be peeling. After sanding, wipe down the balusters again with a tack cloth to remove all dust and debris.
Step 3: Apply Primer
Priming the balusters is crucial for achieving a durable and long-lasting finish. Choose a high-quality primer that is suitable for the type of paint you will be using, whether it is oil-based or latex. Using an angled paintbrush, carefully apply a thin, even coat of primer to each baluster. Make sure to cover all surfaces, including any decorative details.

Allow the primer to dry completely as per the manufacturer’s instructions, which usually takes a few hours. The primer will create a smooth and even base for the paint, ensuring better adhesion and more vibrant color. If necessary, lightly sand the primed surfaces with fine-grit sandpaper to smooth out any imperfections, and then wipe away any dust with a tack cloth.
Step 4: Apply the First Coat of Paint
With the primer fully dry and the surface smooth, it’s time to apply the first coat of paint. Choose a high-quality paint that complements your decor, whether it is oil-based for a durable finish or latex for easier cleanup. Using a clean, angled paintbrush, start at the top of each baluster and work your way down, applying a thin and even coat of paint.
Be patient and take your time to ensure that you cover all surfaces, including any intricate details or crevices. Avoid applying too much paint at once to prevent drips and runs. Allow the first coat of paint to dry thoroughly according to the manufacturer’s instructions, typically 4-6 hours, before proceeding to the next step.
Step 5: Apply the Second Coat of Paint
After allowing the first coat of paint to dry thoroughly, you can apply the second coat. This step is crucial for achieving a rich, even color and ensuring the durability of the finish. Using a clean, angled paintbrush, apply the second coat in the same manner as the first, starting at the top of each baluster and working your way down.
Be meticulous in covering all surfaces and paying special attention to any intricate details. Applying a thin, even layer will help prevent drips and runs, resulting in a more professional look. Allow the second coat to dry completely according to the manufacturer’s guidelines, usually 24 hours before assessing if any touch-ups are needed.
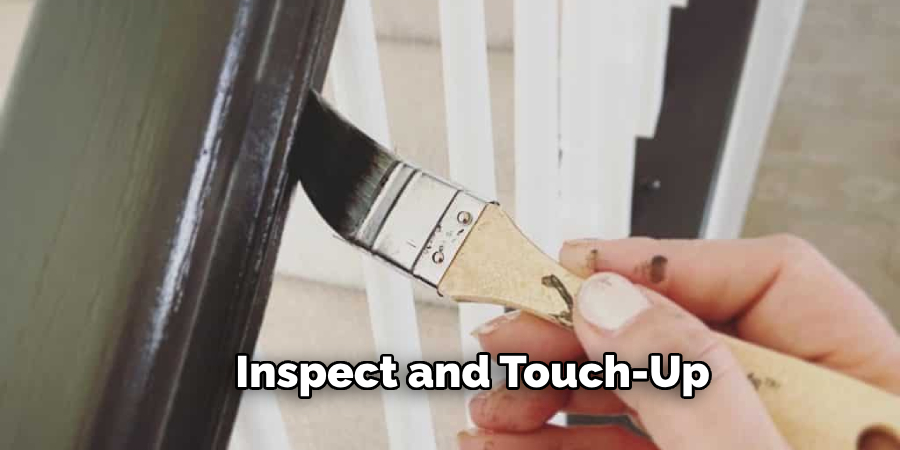
Step 6: Inspect and Touch-Up
Once the second coat of paint has dried completely, it is time to inspect your work. Carefully examine each baluster for any missed spots, uneven areas, or drips. If you find any imperfections, use fine-grit sandpaper to smooth them out and wipe away any dust with a tack cloth. Then, apply a touch-up coat of paint as necessary to achieve a flawless finish. Paying close attention to these details will ensure that your balusters have a professional and polished appearance.
Step 7: Remove Painter’s Tape
With the paint fully dry and your touch-ups complete, it’s time to remove the painter’s tape. This step must be done carefully to ensure that the clean lines you’ve achieved are not disturbed. Starting at one end, slowly peel the tape away from the surface at a 45-degree angle. If the tape resists or begins to pull the paint, use a sharp utility knife to gently score the edge of the tape where it meets the paint. This will help prevent any paint from lifting off with the tape.
Step 8: Clean Up
After successfully removing the painter’s tape and confirming that the edges are clean and precise, it’s time to clean up your workspace. Begin by carefully folding and removing the drop cloth or plastic sheeting used to protect the floor, ensuring that no paint residue falls onto the floor. Dispose of or thoroughly clean the paintbrushes, buckets, and any other tools used during the painting process.
If you employ oil-based paint, use mineral spirits or paint thinner to clean your brushes; if you use latex paint, warm, soapy water should suffice. Make sure to store any leftover paint in a well-sealed container to prevent it from drying out, and keep it for future touch-ups. Properly disposing of any waste, such as used sandpaper and tack cloths, will help maintain a tidy and organized workspace for your next project.
Step 9: Reinstall Balusters
With the balusters fully painted and dry, the final step is to reinstall them. Carefully position each baluster back into its designated slot on the staircase. If you label them during removal, this process will be much simpler. Secure each baluster using the original screws or nails, ensuring they are firmly in place. Use a level to check that each baluster is straight and make any necessary adjustments. Once all balusters are reinstalled, step back and admire your work. The freshly painted balusters should now enhance the overall aesthetic of your staircase, creating a beautifully finished look.
Step 10: Final Inspection and Maintenance
After reinstalling all the balusters and ensuring they are securely in place, conduct a final inspection of your staircase. Check for any missed areas or minor imperfections on the balusters and make any necessary touch-ups. Keep a small brush and leftover paint handy for this task. Additionally, take a moment to clean any residual dust or debris from the installation process.
Establish a regular cleaning routine to maintain the fresh look of your painted balusters. Use a soft cloth and mild detergent to gently wipe down the balusters, freeing them from dust and grime. Avoid using harsh chemicals or abrasive cleaners that could damage the paint.
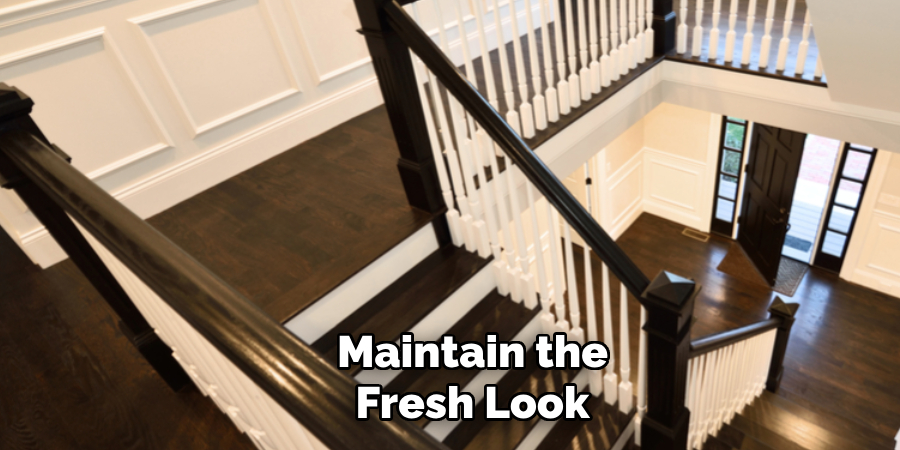
By following these maintenance steps, you can ensure that your beautifully painted balusters remain a striking feature of your staircase for years.
5 Things You Should Avoid
- Skipping Surface Preparation: Failing to properly clean and sand the balusters will result in poor paint adhesion and a rough finish. Always take the time to prepare your surface to ensure a smooth and durable paint job.
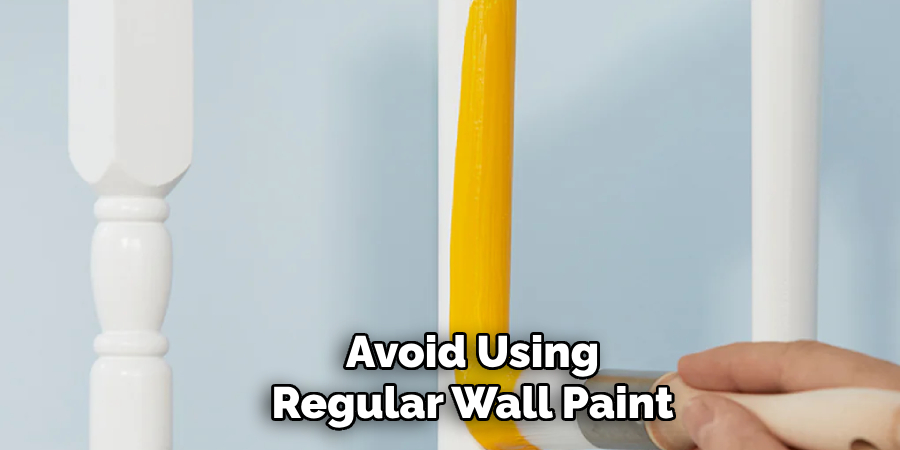
- Using the Wrong Type of Paint: Not all paints suit balusters. Avoid using regular wall paint; opt for a high-quality enamel or a paint specifically designed for trim and woodwork for better durability and appearance.
- Neglecting Primer: Skipping the primer can cause the paint to chip and peel over time. A good primer will provide a solid base, enhance paint adhesion, and ensure that the color remains vibrant and even.
- Applying Thick Coats: Applying too much paint at once can lead to drips, runs, and an uneven texture. To achieve a professional-looking finish, it’s crucial to apply multiple thin coats rather than one thick one.
- Ignoring Drying Times: Rushing the painting process by not allowing sufficient drying time between coats can ruin your hard work. Follow the manufacturer’s recommendations for drying times to ensure each layer is properly set before applying the next.
Conclusion
How to paint balusters requires careful preparation, the right materials, and patience to achieve a professional finish.
You can ensure a long-lasting and visually appealing result by avoiding common mistakes such as skipping surface preparation, using the wrong type of paint, neglecting primer, applying thick coats, and ignoring drying times. Take the time to properly sand and clean your surfaces, invest in high-quality paint and primer, and apply multiple thin layers while allowing adequate drying time between each coat.
Following these guidelines will help you transform your balusters, enhancing the overall aesthetic of your space. Happy painting!