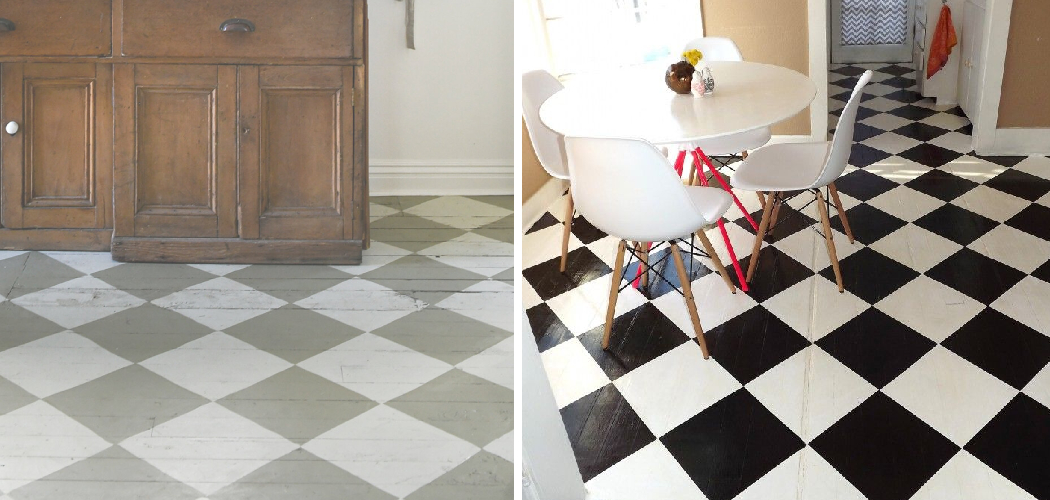
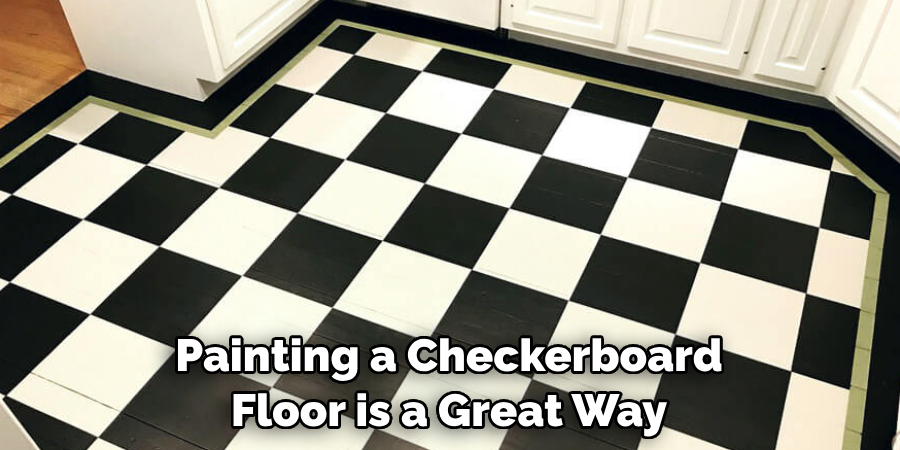
Painting a checkerboard floor is an easy way to add some colors and patterns to any room in the house. Whether you’re looking for something subtle or bright and eye-catching, this DIY project will show you how to upgrade any floor space with the classic look of a checkered pattern.
With just a few supplies, patience, and basic painting techniques on how to paint a checkerboard floor, you can create a beautiful piece of décor that will last for years to come. Read on for detailed instructions on how to get started!

What is a Checkerboard Floor?
A checkerboard floor is a classic pattern consisting of alternating squares of two colors. The pattern creates an artistic look that can be used to define different areas in a room, or it can add some visual interest to any space. It’s a great way to add some color and pattern to any room in your house. But before you begin, make sure you have the right supplies and tools for the job.
What You Will Need
- Tape Measure
- Pencil
- Painter’s Tape
- Paint Roller
- Paint Tray
- Paint
- Primer (Optional)
10 Step-by-step Guides on How to Paint a Checkerboard Floor
Step 1: Measure the Room
Before you start painting, measure the room and check for any obstacles that may affect your painting. Make sure to take into account any furniture or appliances that may get in your way. It’s also important to make sure that you have enough paint for the entire area. This will help you get more accurate measurements and prevent any wasted paint. It also helps to mark the measurements on your floor with a pencil for easy reference.
Step 2: Layout Your Pattern
Once you’ve measured out the space, use a pencil to draw the outline of your pattern on the floor. If you’re working on a large space, you can use painter’s tape to help you create straight lines.
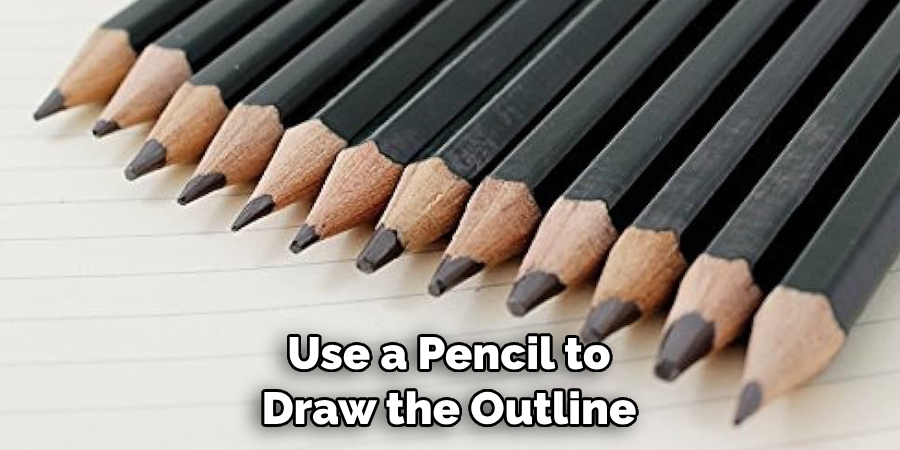
It’s important to make sure the pattern is symmetrical and looks good in the space. If you’re not sure how to draw the pattern, there are plenty of free templates online that can help you get started.
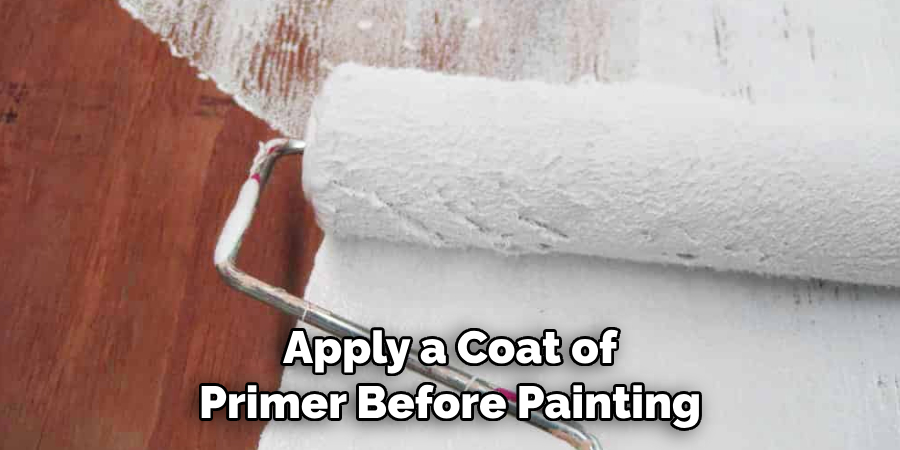
Step 3: Apply Primer (Optional)
For best results, it’s recommended that you apply a coat of primer before painting the checkerboard floor. This will help ensure an even finish and allow your paint to adhere to the surface better. Apply the primer using a paint roller and allow it to dry completely before continuing. It’s important to follow the manufacturer’s instructions for best results.
Step 4: Paint the First Color
Once your primer has dried, it’s time to begin painting. Start by painting the first color on the checkerboard pattern. Use a paint roller to apply an even coat and allow it to dry completely before applying the second color.
You can also use a paintbrush to clean up any edges or hard-to-reach spots. This will ensure a crisp, clean look. It’s important to take your time and be patient when painting, as this will help ensure a professional-looking finish.
Step 5: Paint the Second Color
Once your first color has dried, you can start on the second color. Follow the same steps as above and make sure to use a paint roller for even coverage. Allow the second color to dry completely before continuing. You may need to do several coats of paint in order to get the desired look.
You can also use a paintbrush to clean up any edges or hard-to-reach spots. But don’t forget to use painter’s tape around the edges to ensure a neat finish.
Step 6: Apply a Clear Coat (Optional)
If you would like to protect your newly painted checkerboard floor, you can apply a clear coat of polyurethane or varnish after all your colors have dried. This will help protect the surface from dirt and wear and tear. It’s important to follow the manufacturer’s instructions for best results.
You may need to do several coats of the clear coat in order to get the desired look. It’s also important to make sure the floor is completely dry before applying the clear coat.
Step 7: Allow the Floor to Dry Completely
Once you’ve finished painting and added a clear coat, if desired, allow the entire surface to dry completely before walking on it. This will help ensure that your checkerboard pattern doesn’t smudge or get damaged in any way. You can also add felt pads to the bottom of furniture so that it doesn’t scratch or damage your newly painted floor.
Step 8: Clean Up
Once the floor has dried completely, clean up any remaining paint or primer. Make sure to dispose of any leftover material properly and follow all safety guidelines for the materials you’ve used. It’s also a good idea to put down a protective mat or rug in the area to protect your newly painted checkerboard floor. But if you’re looking for a more permanent solution, there are plenty of options available.
Step 9: Enjoy Your New Checkerboard Floor
Your checkerboard floor is now ready for use! Enjoy your newly decorated room and show off your DIY skills to all of your friends and family. It’s a great way to add some color and pattern to any space and it’s sure to be admired by everyone who visits. You can also experiment with different color combinations and patterns to create a unique look. It’s just a matter of being creative and having fun with it!
Step 10: Proper Maintenance
Regular maintenance will help keep your checkerboard floor looking its best for years to come. Make sure to regularly clean the surface with a damp cloth or mop, and avoid using abrasive cleaners or brushes. For more stubborn stains, you can use a mild soap and water solution.
Always be sure to follow the manufacturer’s instructions for best results. With proper care and maintenance, your checkerboard floor will remain beautiful for years to come.

Following these simple steps, you can easily upgrade any floor space with the classic look of a checkered pattern. With just some tape measure, painter’s tape and paint you have all the supplies needed to create a unique piece of décor that will last for years to come. Best of luck with your DIY project!
Do You Need to Use Professionals?
If you’re not comfortable tackling the project yourself, there are professional painters who specialize in painting checkerboard floors. They can help you choose the right colors and patterns to fit your space, as well as provide advice on how best to prepare and paint the surface.
While it may cost more than doing it yourself, it can be worth the investment if you want to ensure a quality finish. Plus, they’ll be able to get the job done much faster than if you were to do it yourself. So if you’re looking for a professional touch, hiring a professional painter may be worth considering.
Tips
Here are a few tips to keep in mind when painting a checkerboard floor:
- Use High-quality Paint for Best Results.
- Make Sure to Allow Enough Time for Drying Between Coats.
- Use a Clear Coat to Protect the Surface from Wear and Tear.
- Clean Regularly with a Mild Soap and Water Solution.
- Avoid Abrasive Cleaners or Brushes.
These tips on how to paint a checkerboard floor will help ensure that your checkerboard floor looks great for years to come!
Frequently Asked Questions
Q1: How Do I Apply a Primer?
A1: Apply the primer using a paint roller and allow it to dry completely before continuing. It’s important to follow the manufacturer’s instructions for best results. It’s also a good idea to use a high-quality primer for best results.
Q2: How Long Does it Take for the Paint to Dry?
A2: It depends on the type of paint used and the temperature and humidity in the room. Generally, most paints will take up to 24 hours to dry completely. Make sure to allow enough time for the paint to dry before applying any additional coats or walking on it.
Q3: Can I Use a Different Pattern?
A3: Yes! While a checkerboard pattern is classic and timeless, there are many other patterns that you can use to create a unique look. Have fun experimenting with different shapes, colors and patterns to make your room stand out.
Q4: Do I Need to Seal the Floor?
A4: If you want to add an extra layer of protection, you can apply a clear coat of polyurethane or varnish after all your colors have dried. This will help protect the surface from dirt and wear and tear and keep it looking its best.
Conclusion
Painting a checkerboard floor is a great way to add character and personality to an otherwise dull space, but it’s important to remember that the painting process can be difficult if you don’t have the right tools and techniques. All it takes is a little patience, creativity, and the right colors to make your home look more exciting.
With the right preparation and knowledge on how to paint a checkerboard floor, you can easily make your desired checkerboard pattern on any hardwood surface with ease.
You’ll be proud of yourself for creating something beautiful, and even more delighted when your friends come over to visit. So grab your paintbrush today and spruce up any room with a stylish checkerboard pattern that everyone will admire!