Measuring floor registers is important to any home improvement or construction project. Knowing the right size register can save you time, money, and energy in the long run. It also ensures that the airflow from your heating and cooling system is properly distributed throughout your space. When measuring a new floor register, there are several things to consider, such as the opening size, the direction of airflow, and the register’s overall dimensions.
Measuring floor registers can be a great way to ensure that the size of your air ducts and vents will fit properly. It helps to ensure you get the most out of your heating and cooling system by having the right-sized vent for each area of your home. It also helps reduce energy costs by ensuring air is not wasted through oversized vents or ducts. You can find step-by-step instructions on how to measure floor registers in this blog article.
Step by Step Processes for How to Measure Floor Registers
Step 1: Inspect the Floor Registers
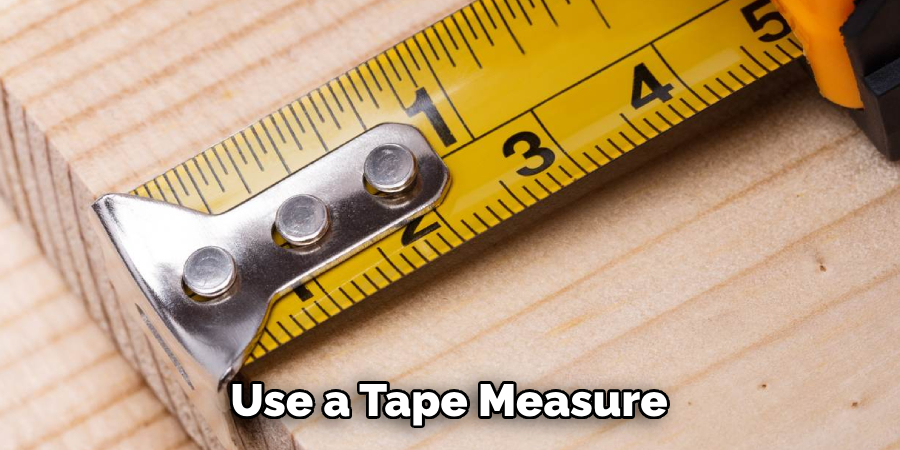
Before you can accurately measure the floor registers, you must inspect them to identify any obstructions that may affect your measurements. Once you have identified any obstructions, measure the frame size of the floor register. The width and length of this area should be measured with a tape measure.
Step 2: Measure the Height of the Floor Register Opening
Now you are ready to measure the height of the floor register opening. Carefully hold a tape measure against the top edge of the frame and record your measurement. After measuring the height, you must measure from left to right across the frame. This measurement will indicate the overall width of the floor register.
Step 3: Measure from Back to Front
Finally, measure from back to front through the opening to determine its length. After completing all of these measurements, review them carefully and ensure they match one another. This will ensure that the floor register fits perfectly within the space.
Step 4: Calculate Overall Dimensions
Once you have reviewed all of your measurements, add them up to arrive at the overall dimensions of the floor register. If you measure for a new ductwork system, subtract the size of the ducts from your measurements to be sure that the floor register will fit.
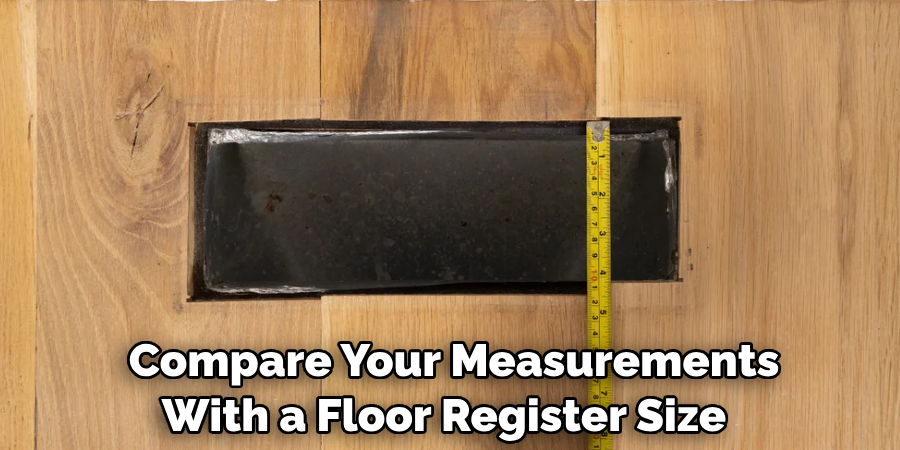
Step 5: Compare Measurements with Floor Register Size Chart
Now you can compare your measurements with a floor register size chart to identify which size floor register is right for you. Once you have identified the correct size, you can purchase and install the floor register. Make sure to follow all instructions carefully for a successful installation.
Following these simple steps, you can accurately measure floor registers and ensure they fit perfectly within your space.
Safety Precautions for How to Measure Floor Registers
- Make sure to wear protective clothing and safety equipment, such as gloves, glasses, and a mask, to protect yourself from any debris or dust coming from the floor registers.
- Measure the length of the register by measuring from one edge of the frame to another to determine the size of the register you need.
- To measure the width of the register, measure from one side of the frame to the other.
- Also, take note of any obstructions that may be in the way, such as a wall or furniture, and make sure to account for this when measuring the register.
- Make sure to measure twice to ensure accuracy before purchasing floor registers.
- It is also a good idea to measure the depth of the register in case you need one with a deeper frame.
- When cutting the floor registers, ensure it is done safely and accurately using appropriate tools such as saws and blades. This way, you can guarantee an even fit for your registers when installing them.
Following these safety precautions can help ensure that you measure floor registers efficiently and accurately. Doing so will help make the installation process much easier and stress-free.
What Are Some Potential Obstacles When Measuring a Floor Register?
When measuring a floor register, several potential obstacles can arise. One of the most common is the size and shape of the register itself. It may be difficult to determine the exact dimensions without taking careful measurements or having an appropriately sized template.
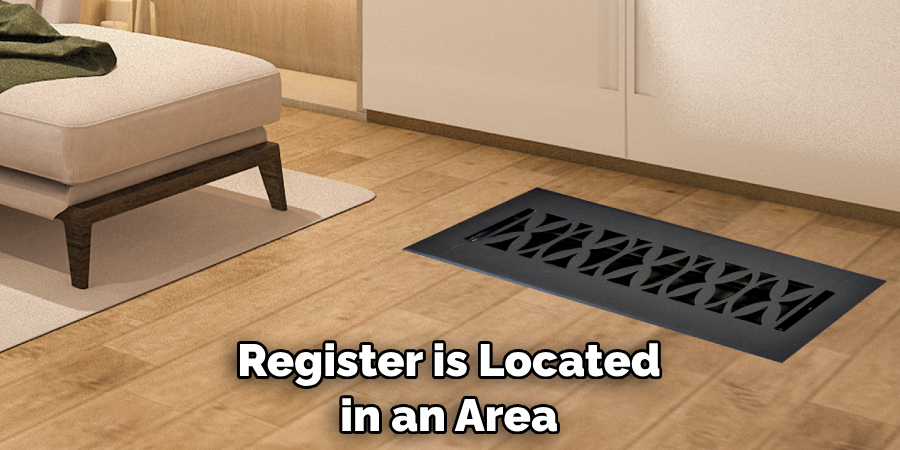
Additionally, if the register is located in an area with limited access or requires special tools for removal, this could be a challenge. In some cases, it may also be difficult to properly measure the register if obstructions or other items are in the way.
Another potential obstacle when measuring floor registers is determining the duct size that connects to the register. This site needs to be known to find and install a corresponding register. It is important to accurately measure the duct, including any curves or angles that may be present.
Additionally, the register’s depth should also be considered when shopping for replacement parts. Finally, it is important to note that measuring floor registers requires understanding basic math principles such as addition and subtraction.
How Should You Store Your Measurements to Reference Them Later on Easily?
When measuring floor registers, it is important to record the measurements accurately and store them in an organized way. This allows you to easily reference the measurements when purchasing new registers or adjusting existing ones. Depending on your preference, you can store your measurements on paper or electronically.
When using paper, make sure that you write down each measurement clearly and legibly so that you can easily read it later. To make it easier to reference, organize the measurements in a table format with columns for each measurement and rows for each register.
You can use a spreadsheet program such as Microsoft Excel or Google Sheets if you prefer electronic storage. Spreadsheets are especially helpful for organizing large amounts of data from multiple registers. Use separate columns for each measurement and rows for each register. No matter which method you choose, make sure that you double-check your measurements before storing them away. This will help ensure accuracy when referencing the measurements later on.
What is the Best Way to Document Your Measurements for Future Reference?
It is important to document your measurements of floor registers for future reference. This can be done in various ways, depending on what information needs to be recorded and the type of register being measured.
Measuring their dimensions is essential when dealing with ducted or cold air registers. You will need to know each register’s length, width, depth, and opening dimensions. Make sure to use a tape measure and record your measurements in inches.
For wall registers, you will need to document their height and width and the distance between the center of the register and the ceiling or floor. Again, make sure to use a tape measure when taking these measurements and record them in inches.
In addition to the measurements, it is also important to note the type of register being measured and any other pertinent information that may be useful for future reference. This could include things like the brand name, model number, color, or finish.
Are There Any Unique Considerations You Should Keep in Mind When Measuring a Floor Register in an Older Building?
When dealing with an older building, you should remember how the floor register was originally installed. This will help ensure that your measurements are accurate and that your new register will fit properly.
In some cases, it may be beneficial to remove the existing floor register so that you can measure its size and placement more accurately. Additionally, if replacing a floor register that uses a different type of vent cover or grille, you should measure the outside of the frame for more precise measurements.

Finally, if you are dealing with an irregularly sized hole in the floor or space between joists, always err on the side of caution and use slightly larger measurements than what is indicated by your current floor register.
By doing so, you can help ensure your new register will fit properly and won’t interfere with the room’s overall look. Overall, before you shop for a new floor register, take some time to measure your existing one accurately. This will go a long way in helping you find the right size and style that will work best for your needs.
Conclusion
In conclusion, measuring floor registers is important for any home or business owner. Measuring a register correctly will ensure the right size is installed to provide adequate airflow throughout the room. The main steps in measuring floor registers include determining the correct size, taking accurate measurements, and ensuring the new register fits properly into the space.
With these steps in mind, you can be sure that your new floor registers are the perfect fit for your space. I hope this article has been beneficial in learning how to measure floor registers. Make Sure the precautionary measures are followed chronologically.