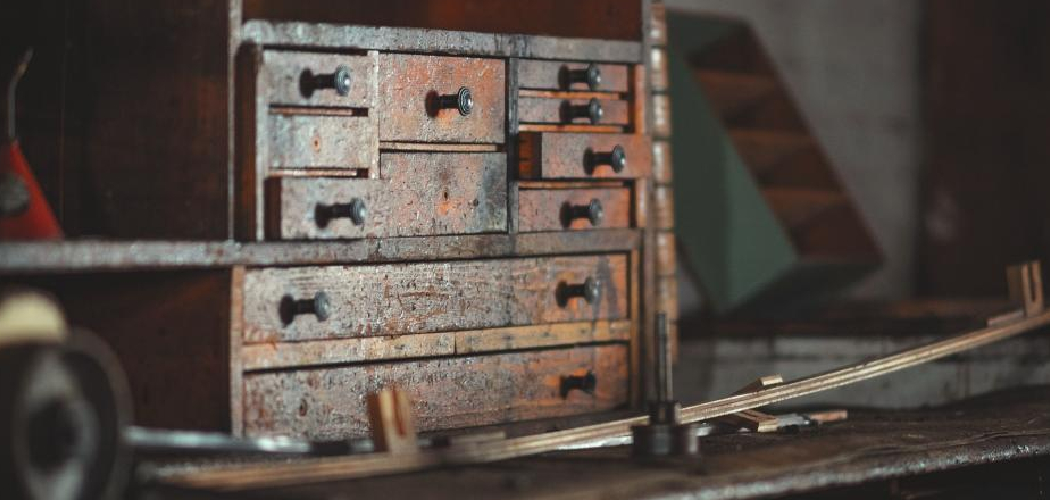
Making dresser drawers is a rewarding woodworking project that combines functionality with creativity, allowing you to customize the storage solutions for your home. Whether you’re building an entire dresser from scratch or replacing worn-out drawers in an existing piece, crafting your own drawers can significantly enhance the durability and aesthetic appeal of your furniture.

The process begins with careful planning and measurement to ensure each drawer fits perfectly within the dresser frame. Selecting the right materials is crucial, with plywood and solid wood being popular choices for their strength and finish. Once the dimensions are determined, precise cutting and assembly techniques are employed to create the drawer box, ensuring stability and smooth operation. Joinery methods such as dovetails or pocket screws add strength and a professional touch.
Adding drawer slides or runners ensures easy and reliable opening and closing. This guide will provide detailed steps for how to make dresser drawers, from initial design and material selection to cutting, assembling, and finishing your dresser drawers, empowering you to create customized storage that meets your needs and reflects your personal style.
Benefits of Making Dresser Drawers
Creating your own dresser drawers offers several benefits that go beyond simply having new storage solutions. Firstly, it provides a great opportunity to enhance your woodworking skills, giving you hands-on experience with measuring, cutting, and assembling wood. This can be particularly satisfying for those who enjoy DIY projects and want to improve their craftsmanship.
Additionally, making your own drawers allows for complete customization. You can choose the dimensions, materials, and finishes that perfectly match your existing furniture or personal preferences, ensuring a cohesive look in your home. Another significant advantage is the quality and durability of the finished product.
By selecting high-quality materials and using robust joinery techniques, you can create drawers that are far more durable and long-lasting than many store-bought alternatives. Lastly, building your own dresser drawers can be cost-effective, often saving money compared to purchasing pre-made options, especially if you already have some of the necessary tools and materials. This project not only results in functional and beautiful storage but also offers a sense of accomplishment and pride in creating something with your own hands.

Planning and Preparation
Before starting the construction of your dresser drawers, careful planning and preparation are essential to ensure a successful project. Begin by determining the dimensions required for your drawers, taking into account the available space in your dresser frame and the intended use of the drawers.
Accurate measurements are crucial, so take your time and measure multiple times to avoid any errors. Once you have your measurements, sketch out a detailed plan that includes the height, width, and depth of each drawer, as well as any additional features such as dividers or compartments.
Next, gather all the necessary materials and tools. For the materials, select high-quality plywood or solid wood based on your preferences and budget. Ensure that the wood you choose is free from warps and defects for a smooth and durable finish.
Common tools needed for this project include a table saw or circular saw for cutting, a miter saw for precise angles, clamps to hold pieces in place, wood glue, sandpaper for smoothing edges, and a drill with various bits for making holes.
10 Methods How to Make Dresser Drawers
1. Planning and Measuring
Before you begin constructing dresser drawers, careful planning and precise measurements are essential. Measure the dresser’s interior dimensions to determine the size of the drawers. Consider the depth, width, and height of each drawer, allowing for enough clearance for smooth operation. Create detailed sketches or use design software to visualize the drawers and their layout.
Planning ahead ensures that you have all the necessary materials and a clear blueprint to follow. Accurate measurements prevent issues with fitting and alignment, resulting in a professional-looking final product.

2. Selecting the Right Materials
Choosing the right materials is crucial for the durability and appearance of your dresser drawers. Common materials include solid wood, plywood, and MDF (medium-density fiberboard). Solid wood is ideal for a classic, high-quality look, while plywood offers stability and resistance to warping. MDF is cost-effective and provides a smooth surface for painting or veneering. Select materials that match the dresser’s existing structure and finish. Quality materials ensure that your drawers are sturdy and long-lasting, withstanding regular use.
3. Cutting the Wood
Once you have your materials and measurements, it’s time to cut the wood pieces for the drawer sides, front, back, and bottom. Use a table saw or circular saw for straight, accurate cuts. Ensure that all pieces are cut to the correct dimensions according to your plan. Label each piece to keep track of its placement during assembly. Cutting the wood accurately is fundamental to ensuring that the drawers fit together properly and slide smoothly in the dresser.
4. Constructing the Drawer Box
The next step is constructing the drawer box, which involves assembling the sides, front, and back pieces. Use wood glue and clamps to secure the joints, ensuring they are square and flush. Reinforce the joints with screws or nails for added strength. For a more refined look, consider using dovetail or box joints instead of basic butt joints. These joints provide greater durability and a professional finish. Constructing a sturdy drawer box is essential for the overall stability and functionality of the drawer.
5. Attaching the Drawer Bottom
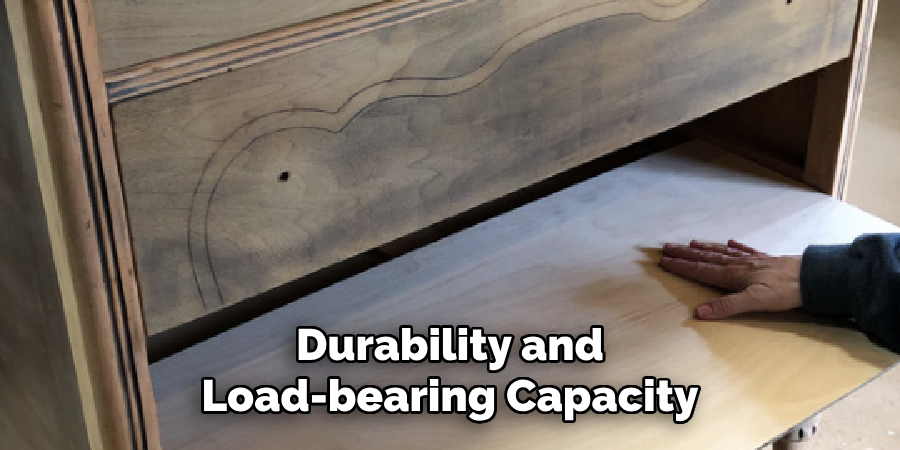
Attach the drawer bottom to complete the box structure. Cut the bottom piece to fit snugly within the assembled sides, front, and back. Use wood glue and small nails or screws to secure the bottom in place. Consider using plywood for the drawer bottom due to its strength and resistance to warping. Ensure the bottom is flush with the sides to provide a smooth surface for the drawer to rest on and slide easily. A securely attached drawer bottom adds to the durability and load-bearing capacity of the drawer.
6. Installing Drawer Slides
Drawer slides are essential for smooth and stable operation. Choose slides that match the weight and size of your drawers. There are various types of slides, including side-mounted, bottom-mounted, and undermount. Side-mounted slides are the most common and easiest to install.
Attach the slides to the sides of the drawer box and the inside of the dresser frame, following the manufacturer’s instructions. Ensure the slides are level and aligned for smooth operation. Properly installed drawer slides enhance the functionality and ease of use of your dresser drawers.
7. Finishing the Drawer Front
The drawer front is the most visible part of the drawer and significantly impacts the dresser’s overall look. Sand the front piece to smooth out any rough edges or imperfections. Apply a finish that matches the rest of the dresser, such as stain, paint, or varnish. If you prefer a more decorative touch, consider adding trim, molding, or decorative hardware.
Allow the finish to dry completely before attaching the front to the drawer box. Finishing the drawer front enhances the visual appeal and adds a polished, professional look to your project.
8. Attaching the Drawer Front
Attach the finished drawer front to the assembled drawer box. Use wood glue and clamps to position the front piece, ensuring it is aligned and level with the sides. Reinforce the attachment with screws from the inside of the drawer box. For a seamless look, countersink the screws and fill the holes with wood filler before sanding and touching up the finish. Properly attaching the drawer front ensures a secure fit and enhances the overall appearance of the drawer.
9. Installing Drawer Handles or Knobs
Handles or knobs are essential for opening and closing the drawers easily. Choose hardware that complements the dresser’s style and finish. Mark the position for each handle or knob, ensuring they are evenly spaced and aligned. Drill pilot holes for the screws, then attach the hardware securely.
Installing handles or knobs not only adds functionality but also serves as a decorative element that enhances the dresser’s overall design. Well-placed and securely attached hardware contributes to the ease of use and aesthetic appeal of the drawers.
10. Final Adjustments and Maintenance
Once the drawers are assembled and installed, make final adjustments to ensure they operate smoothly. Check for any misalignments or gaps and make necessary adjustments to the slides or joints. Apply a coat of wax or furniture polish to the drawer slides and contact points to reduce friction and enhance smooth operation.
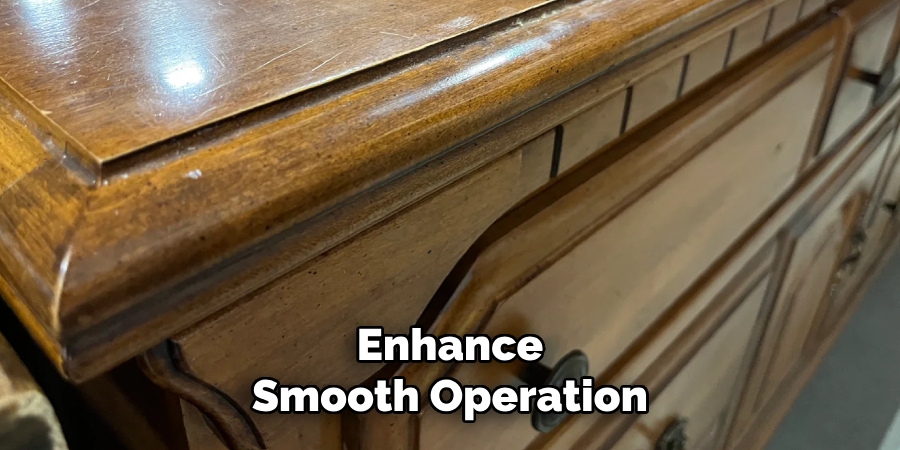
Regular maintenance, such as tightening screws and cleaning the slides, ensures the longevity and functionality of the drawers. Proper final adjustments and ongoing maintenance keep your dresser drawers in optimal condition, providing years of reliable use.
Conclusion
Creating custom dresser drawers is a rewarding woodworking project that enhances both the functionality and aesthetics of your furniture. The ten methods outlined—planning and measuring, selecting the right materials, cutting the wood, constructing the drawer box, attaching the drawer bottom, installing drawer slides, finishing the drawer front, attaching the drawer front, installing drawer handles or knobs, and making final adjustments and maintenance—provide a comprehensive guide to achieving professional results.
Thanks for reading, and we hope this has given you some inspiration on how to make dresser drawers!