
Do you want to maximize your small space without sacrificing comfort? Lofting your queen bed is a great way to get more storage and floor space while enjoying a good night’s rest. But how do you safely lift your heavy mattress up just the right height so that you can tuck away all of those extra items under it?

Don’t worry – with this step-by-step guide, lofting a queen bed is easier than ever! We’ll show you what supplies are necessary, how high to raise your bed frame, and any safety measures or precautions worth considering. So let’s get started on transforming your room and making use of vertical space – read on for our instructions on how to loft a queen bed like a pro!
Supplies You Will Need to Loft a Queen Bed
- A queen bed frame
- An adjustable ladder or stepladder
- Measuring tape
- Level
- Hex wrenches (if necessary)
- Tape measure
- Drill and screws
- Wall anchors (optional)
Step-by-Step Guidelines on How to Loft a Queen Bed
Step 1. Measure the Height of Your Room
Before you begin lofting your queen bed, it’s important to measure the height of your room. You don’t want the bed frame to hit the ceiling or be too low that it takes up valuable floor space. Measure from the top of the mattress to the floor and subtract a few inches so there is enough space between your bed and the ceiling.
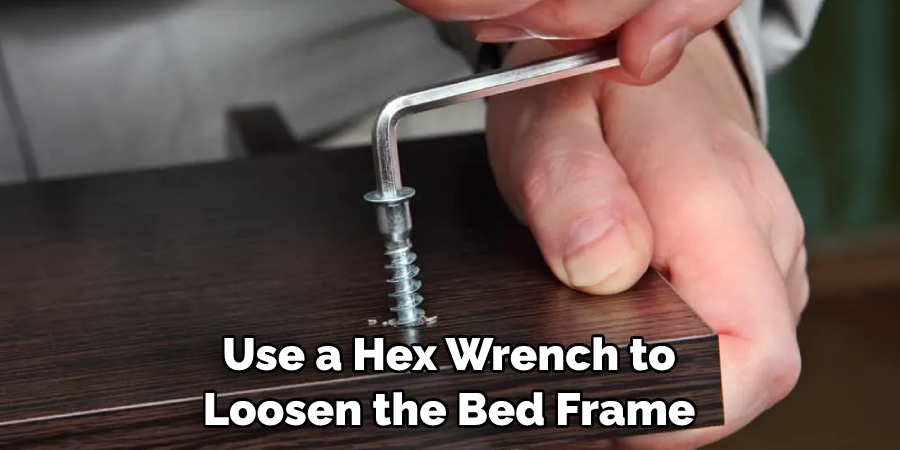
Step 2. Adjust Your Bed Frame to the Desired Height
Once you have your measurement, use a hex wrench to loosen the bed frame and adjust it to the desired height. Make sure that all of the legs are level so that your bed is evenly supported. You may need an extra set of hands for this step if you’re working alone. Adjusting the height of your bed frame can be tricky, so take your time and double-check that all of the legs are level.
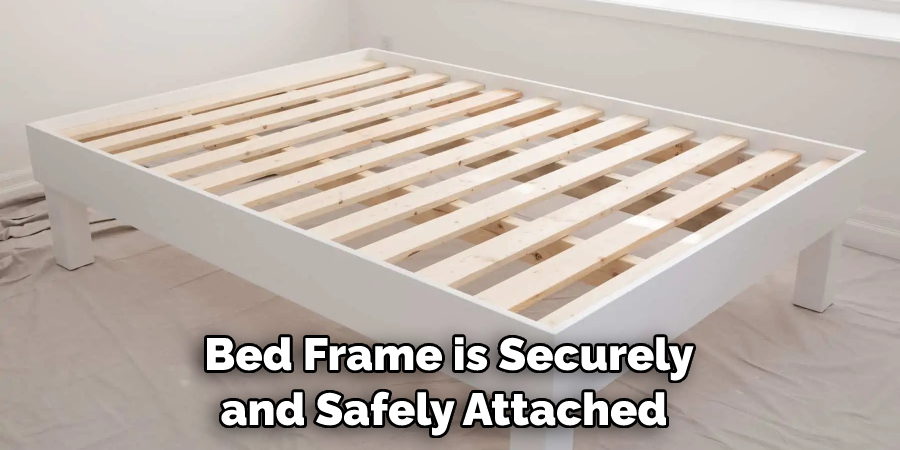
Step 3. Secure the Bed Frame With Screws
Once you have adjusted the bed frame to the desired height, it’s time to secure it in place with screws or wall anchors. For an extra layer of security, we suggest using both screw and wall anchors to prevent your bed from shifting or moving. In this step, it’s important to use the correct size and type of screw and ensure that they are screwed into a solid surface like wood or drywall.
Step 4. Place Your Mattress on the Bed Frame
Now that your bed frame is in place, it’s time to place your mattress on top of it. Make sure that the mattress is centered on the frame and place any bedding or comforters you plan to use on top of it. If you need assistance in this step, have a friend help you position your mattress correctly before moving on to the next step.
Step 5. Place Items Underneath Your Lofted Queen Bed
Now that your bed is in place, it’s time to make use of the extra storage space underneath. Place any items you would like to store under your lofted queen bed. This could include clothing, books, or any other belongings that can fit underneath your bed frame. Remember to leave a few inches between the bottom of the mattress and the items you place underneath it.
Congratulations – you have successfully lofted your queen bed! You should now have more floor space and extra storage for all of your belongings.
Additional Tips and Tricks to Loft a Queen Bed
1. Measure the room space and bed size before beginning the lofting process to ensure that you have enough clearance for your queen-sized bed lofted.

2. If you choose to use a standard bunk bed frame, make sure it’s strong enough to hold up a queen-sized mattress and any additional weight from bedding or people.
3. Use a ladder if the bed is high off the ground so that you can safely and easily access it.
4. Make sure to place furniture or objects underneath the lofted bed to prevent any accidents from happening if someone were to fall off of it.
5. Securely fasten all nuts and bolts in place to prevent any accidents from happening due to loose parts.
6. When choosing to bed, go with thinner materials or choose items that are specifically designed for lofted beds since they take up less space and will fit better on the top bunk.
7. Make sure to use a floor protector or a bed skirt underneath the lofted bed, as it will help protect your floor from any scratches or spills.
8. Add additional storage space by utilizing the area under the lofted bed for items such as extra blankets and pillows. This will make it easier to access these items when needed without having to get out of bed.
9. Finally, use safety rails on the lofted bed to prevent anyone from falling off during sleep or while getting in and out of bed. This will help keep everyone safe!
By following these tips and tricks, you can be sure your lofted queen-sized bed will remain stable, secure, and safe. With the extra storage space created by the lofted bed, you will also have plenty of room to store additional items that you may need while sleeping.
Lofting a queen-sized bed is a great way to maximize space and create a unique look in your bedroom. With the right tools, knowledge, and safety precautions, you can easily loft a queen-sized bed in no time!
Precautions Need to Follow for Lofting a Queen Bed
1. Make sure the bed frame is securely and safely attached to the wall before beginning your lofting process. Use the appropriate screws, brackets, or anchors for your wall type. Pay close attention to load limits on any attachments you use.
2. Carefully measure the dimensions of your space before purchasing a queen bed frame for lofting. Make sure the bed frame will fit in your space and have adequate clearance for any furniture like dressers or nightstands that you plan to place underneath it.
3. Consider safety when lifting a queen bed. Most people are not used to sleeping high off the ground, so make sure you install guardrails and secure ladders that are easy to use.
4. Weight is an important factor when lifting a queen bed. Make sure the structure you are building can support the weight of both the bed and any accessories like mattresses, box springs, blankets, or pillows.
5. Be mindful of electrical outlets and wiring when lifting a queen bed. Avoid placing your bed too close to outlets, and make sure any cords or electrical components are safely out of the way.
6. Check for stability after completing your lofting process. Shake the bed frame gently to ensure it feels secure and the attachments are still firmly in place. It’s also important to regularly check the structure every few months to make sure it’s still secure.
By following these precautions you can safely and securely loft your queen bed – giving you more space in your bedroom while creating a unique and stylish look! Happy lofting!
Frequently Asked Questions
Do I Need Any Special Skills to Loft a Queen Bed?
No special skills are needed to loft a queen bed, though it’s always best to read the instructions thoroughly before beginning. It is also helpful to have someone nearby who can give assistance if needed.
How Much Weight Can a Lofted Queen Bed Hold?
The weight a lofted queen bed can hold depends on the type of frame and materials used. Generally, it is recommended that no more than 200 pounds be placed on the frame. It is best to check with the manufacturer to confirm the weight limit for your specific bedframe.
Where Can I Get Additional Help Lofting a Queen Bed?
If you need additional help lofting a queen bed, there are several resources available. Many furniture stores provide installation services and can assist in lofting your bed. You can also search online for step-by-step instructions or watch tutorial videos to gain a better understanding of the process. Finally, local handyman services can be hired to complete the job.

Is Lofting a Queen Bed Difficult?
No, lofting a queen bed is not difficult, though it may take some time and effort. The process typically requires about two hours to complete from start to finish. If you are unsure of any part of the installation process, it is best to consult a professional for assistance.
Conclusion
Knowing how to loft a queen bed can be a great way to save space in your bedroom. Although it may seem like a daunting task, it is relatively straightforward and can often be completed with minimal tools and assistance.
To ensure you get the best results, make sure to read the instructions carefully and follow all safety recommendations. If you need additional help, there are many resources available including furniture stores, online tutorials, and local handyman services. With patience and attention to detail, you can easily loft your queen bed in no time!