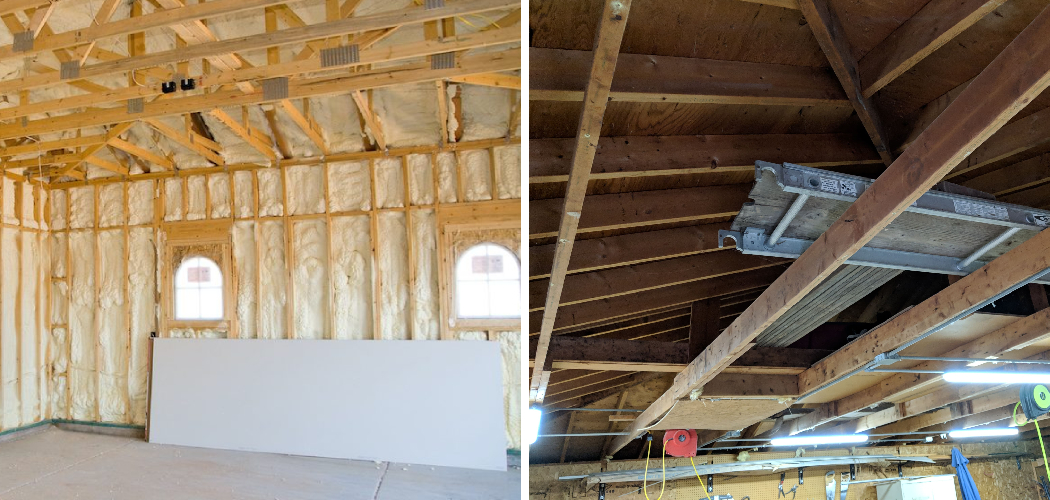
Insulating a garage ceiling is an invaluable project for homeowners looking to increase energy efficiency, reduce noise, and enhance the overall comfort of their home.
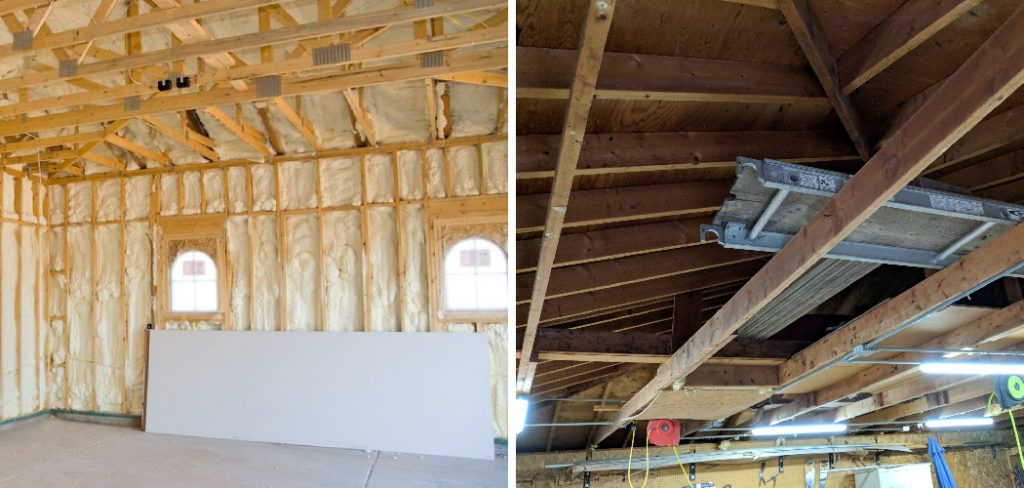
Whether your garage is a workshop, a storage area, or an extension of your living space, proper insulation can significantly improve the temperature control within this area, making it more functional throughout the year.
This guide on how to insulate a garage ceiling will provide you with the essential steps and tips for effectively insulating your garage ceiling, from selecting the right type of insulation material to the final installation process. With the correct approach, you can transform your garage into a more energy-efficient and comfortable space for whatever needs you may have.
What is the Importance of Insulating a Garage Ceiling?
Before we dive into the specific steps involved in insulating a garage ceiling, it’s crucial to understand why this project is essential. Here are some of the reasons why you should consider insulating your garage ceiling:
Increased Energy Efficiency:
A properly insulated garage ceiling can help reduce energy loss and improve the overall energy efficiency of your home. This means that your heating and cooling systems won’t have to work as hard to maintain a comfortable temperature, leading to lower energy bills.
Noise Reduction:
Insulation also acts as a sound barrier, helping to reduce noise transfer between your garage and the rest of your home. This is especially beneficial if you use your garage as a workshop or for other activities that generate loud noises.
Improved Comfort:
Insulating your garage ceiling can also make the area more comfortable, especially if you use it as an extension of your living space. It will help regulate the temperature and keep the space warmer in cold weather and cooler in hot weather.
Protection Against Moisture:
Garages are prone to moisture build-up due to various factors such as rain, snow, and humidity. Insulation can help prevent moisture from seeping into your garage, reducing the risk of mold and mildew growth.
Potential Increase in Home Value:
Properly insulated garages are becoming increasingly popular among homebuyers as they recognize the benefits that insulation provides. By insulating your garage ceiling, you may increase the overall value of your home when it comes time to sell.
Choosing the Right Insulation Material
When it comes to choosing the right insulation material for your garage ceiling, there are a few factors to consider:
R-Value:
R-value is a measure of an insulation material’s ability to resist heat flow. The higher the R-value, the more effective the insulation will be. The recommended R-value for garage ceilings is usually between R-30 and R-60, depending on your climate and the type of insulation.
Type of Insulation:
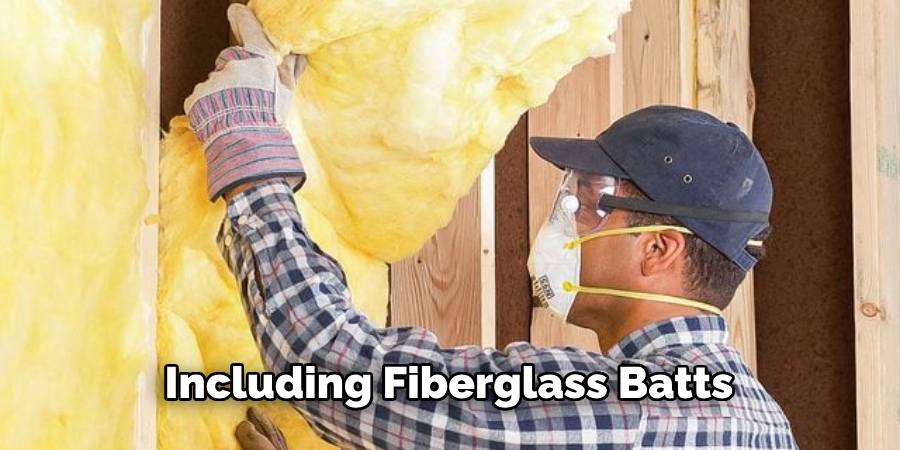
There are several types of insulation to choose from, including fiberglass batts, spray foam, and rigid foam boards. Fiberglass batts are affordable and easy to install, while spray foam provides better coverage and can fill in small gaps and cracks. Rigid foam boards are more expensive but offer higher R-values and better moisture resistance.
Vapor Barrier:
A vapor barrier is a material that prevents water vapor from passing through the insulation. This is essential in garages, as moisture can accumulate due to temperature changes. Depending on your climate, you may need a vapor barrier to prevent condensation.
Step-by-step Guidelines on How to Insulate a Garage Ceiling
Step 1: Measure the Area
Before you begin insulating your garage ceiling, the first step is to accurately measure the area that you intend to insulate. This will not only help you determine how much insulation material you will need but also enable you to calculate the cost of materials accurately.
Use a tape measure to get the length and width of your garage ceiling. Remember to also account for any irregularities or obstructions such as vents, light fixtures, or beams.
Note down these measurements and use them to estimate the total square footage of the ceiling. This step is crucial for ensuring that you purchase the right amount of insulation material without significant surplus or shortage.
Step 2: Choose the Right R-Value
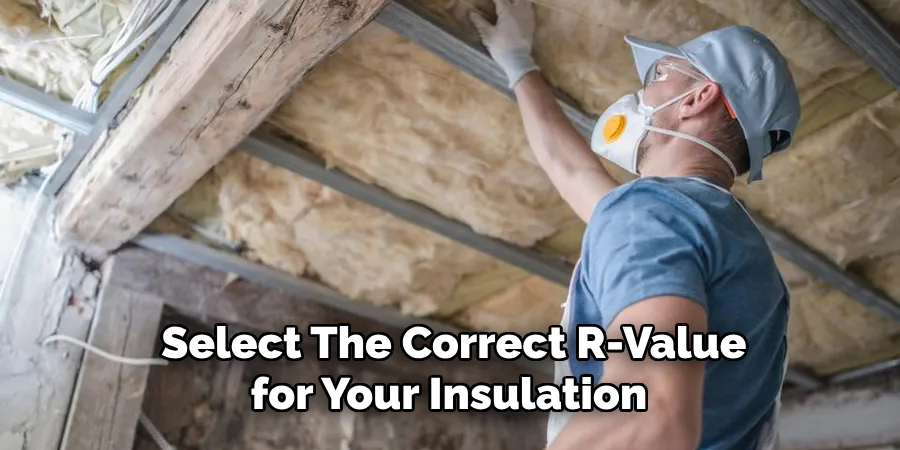
After measuring the area of your garage ceiling, the next step is to select the correct R-value for your insulation.
The R-value you need depends on your geographic location, as different climates require different levels of insulation to maintain energy efficiency.
Generally, colder climates demand a higher R-value for optimal thermal resistance. For garage ceilings, a typical recommendation ranges from R-30 to R-60.
It’s advisable to consult local building codes or an insulation professional to identify the appropriate R-value for your area.
This ensures that your garage is adequately insulated against external temperature extremes, enhancing its energy efficiency. Selecting the right R-value is a pivotal decision in achieving the desired comfort level and energy savings in your home.
Step 3: Choose the Right Insulation Material
After determining the R-value, the next step is to select the type of insulation material ideal for your garage ceiling.
Depending on your budget, climate, and personal preferences, you can choose from several options such as fiberglass batts, spray foam, and rigid foam boards. Each has its unique features that may make it more suitable for your specific needs.
You can also consider factors such as installation ease, durability, and moisture resistance when selecting your insulation material. It’s advisable to research each type thoroughly and compare their pros and cons before making a decision.
Step 4: Safety Measures
Before starting the installation process, it’s imperative to prioritize safety measures to prevent accidents and health issues. Insulating a garage ceiling involves handling materials that can irritate the skin, eyes, and respiratory system.

Therefore, wearing the right protective gear is crucial. Equip yourself with safety goggles, a dust mask or respirator, gloves, and long-sleeved clothing to shield your skin from fiberglass particles or chemical exposure, especially if you’re using spray foam insulation.
Additionally, ensure that the workspace is well-ventilated to minimize inhalation of airborne particles or fumes. If you’re working with tools or on a ladder, follow the manufacturer’s safety instructions closely to avoid falls or injuries.
Always have a first aid kit readily available in case of minor accidents. Taking these precautions will help ensure a safe and efficient installation process.
Step 5: Prepare the Work Area
Before the actual installation of the insulation, preparing the work area is a critical step. Start by clearing the garage of any vehicles, tools, or storage items to create ample space for the installation process.
Ensure the ceiling area is accessible and free from any obstacles that might hinder the installation. It’s also important to inspect the ceiling for any damages, leaks, or areas that may require repair before insulation can be installed.
Cleaning the surface of the ceiling will remove dust and debris, providing a better environment for the insulation to adhere to. If you’re using materials like spray foam that require a clean surface for optimal effectiveness, this step becomes even more crucial.
Additionally, cover any valuable items or surfaces in the garage with drop cloths or plastic sheeting to protect them from dust or spills during the insulation process. Proper preparation of the work area not only facilitates a smoother installation but also contributes to the overall success and efficiency of the project.
Step 6: Install Vapor Barrier (If Needed)
Depending on your climate and insulation material, you may need to install a vapor barrier to prevent moisture from accumulating in the garage. This is especially important for areas with high humidity levels or extreme temperature changes. Before installing the vapor barrier, make sure to inspect it for any tears or damages that could compromise its effectiveness.

If there are any obstructions such as pipes, vents, or light fixtures on the ceiling, use a utility knife to cut holes in the vapor barrier to accommodate them. Make sure to seal any gaps or overlaps with tape to ensure proper coverage and prevent moisture from seeping through. This step is crucial for maintaining the integrity of your insulation and preserving its effectiveness over time.
Step 7: Begin the Installation Process
Finally, it’s time to start installing your insulation. If you’re using fiberglass batts or rigid foam boards, follow the manufacturer’s instructions on how to cut them to fit the desired area accurately. For spray foam insulation, make sure to cover any exposed skin and follow the instructions for safe application. Avoid compressing the insulation material, as it can reduce its effectiveness.
Start at one end of the ceiling and work your way across, making sure to cover all areas evenly. If using more than one layer of insulation, stagger the seams to minimize gaps and increase coverage. For maximum effectiveness, ensure that there are no voids or areas left uninsulated.
Step 8: Finishing Touches
After the installation is complete, it’s essential to tidy up the work area and dispose of any leftover materials properly. If you’re using spray foam insulation, make sure to seal any gaps or cracks with caulk to prevent air leakage.
Finally, any fixtures or equipment that were removed before starting the project should be reinstalled. Congratulations, you have successfully insulated your garage ceiling and taken a step towards creating a more comfortable and energy-efficient space.
Regular maintenance and monitoring of the insulation will ensure its longevity and continued effectiveness in reducing energy costs. So, make sure to schedule routine checks and repairs, if necessary, to reap the full benefits of a well-insulated garage ceiling.
Following these steps on how to insulate a garage ceiling and taking the time to properly insulate your garage ceiling can make a significant difference in both the comfort of your home and your energy bills.
Don’t neglect this often overlooked space, as it plays a crucial role in keeping your home insulated and protected from external elements. With proper insulation, you can transform your garage into a functional and comfortable space that enhances the overall value and efficiency of your home. So don’t wait; start the process of insulating your garage ceiling today and enjoy the benefits for years to come.
Additional Garage Insulation Tips
To further enhance the energy efficiency and comfort of your garage, consider these additional tips:
Seal All Leaks:

Before installing insulation, meticulously check for and seal all leaks and drafts around doors, windows, and where walls meet the ceiling. This will prevent warm or cold air from escaping, maximizing the effectiveness of your insulation.
Choose the Right Insulation R-value:
The R-value of insulation measures its thermal resistance. Higher R-values indicate better insulating properties. For garages, especially those attached to your home or used as workshops, choosing insulation with the appropriate R-value for your climate zone can significantly improve temperature control.
Insulate Garage Doors:
Don’t forget the garage door. There are insulation kits specifically designed for garage doors that can help reduce energy loss through this large opening.
Consider Adding Radiant Barriers:
In hot climates, installing a radiant barrier along with traditional insulation can reflect heat away from the garage, keeping it cooler in the summer.
Look Up:
If your garage has an attic space or is under a room, make sure the ceiling/attic floor is also well insulated. Heat rises, and without proper insulation, it can escape out of the garage and affect the temperature of the entire home.
Lighting Efficiency:

Upgrade lighting to LED bulbs. Not only are they more energy-efficient, but they also produce less heat than traditional bulbs, contributing to better temperature control within the garage.
By paying attention to these details, you can ensure your garage is not only well-insulated but also energy-efficient, offering you a comfortable space year-round while helping to reduce your overall energy costs.
Cost Considerations and Return on Investment
When planning to insulate your garage ceiling, understanding the cost implications and potential return on investment (ROI) is crucial. The cost of garage insulation can vary widely depending on the insulation material you choose, the size of your garage, and whether you will do the job yourself or hire professionals.
Materials like fiberglass batts and rigid foam boards are generally more affordable and easier for DIY projects, while spray foam insulation tends to be more expensive and may require professional installation.
The ROI of insulating your garage ceiling can be significant, especially if your garage is attached to your house or if you use the space as a workshop, gym, or for other activities that require temperature control.
Proper insulation can lead to substantial energy savings by reducing the need for heating in winter and cooling in summer. This not only makes your garage more comfortable but also decreases your overall energy bills.
Additionally, insulation contributes to the overall value of your home. A well-insulated garage can be an attractive feature for potential buyers should you decide to sell your home in the future. It signals that the house is energy-efficient and comfortable throughout the year.
It’s essential to weigh the upfront costs against the long-term benefits, including energy savings and increased home value, to determine if insulating your garage ceiling is a sound investment for you. Remember, the specific climate of your area and how you use your garage can significantly impact the cost-benefit analysis.
Frequently Asked Questions
Q: How Long Does It Take to Insulate a Garage Ceiling?
A: The time required for insulation will vary depending on the size of your garage and the type of insulation material used. On average, the installation process can take anywhere from a few hours to a full day. Properly preparing the work area and following safety measures may also add to the overall time required.
Q: Can I Insulate My Garage Ceiling Myself?
A: Yes, with proper knowledge, instructions, and precautions, insulating your garage ceiling can be a DIY project. However, it’s always recommended to consult a professional if you’re unsure about the process or have any concerns.
Q: How Much Will Insulating My Garage Ceiling Save Me on Energy Costs?

A: The amount of money saved on energy costs will vary based on factors such as climate, insulation material used, and efficiency of installation. However, insulating your garage ceiling can lead to significant savings on heating and cooling expenses in the long run.
Q: Can I Install Insulation Over Existing Ceiling Materials?
A: It’s not recommended to install insulation over existing materials, as it may lead to moisture build-up, mold growth, and reduced effectiveness of insulation. It’s best to remove any damaged or outdated materials before installing new insulation.
Conclusion
Insulating your garage ceiling is a worthwhile investment that can improve the overall comfort and energy efficiency of your home.
By following these steps on how to insulate a garage ceiling, you can successfully insulate your garage ceiling and reap the numerous benefits it offers. Remember to prioritize safety measures, prepare the work area thoroughly, consider using a vapor barrier, and follow proper installation techniques for optimal results.
With regular maintenance and monitoring, your insulated garage ceiling will continue to provide reliable insulation and energy savings for years to come. So don’t hesitate to start insulating your garage ceiling today and enjoy a more comfortable and cost-effective home environment.