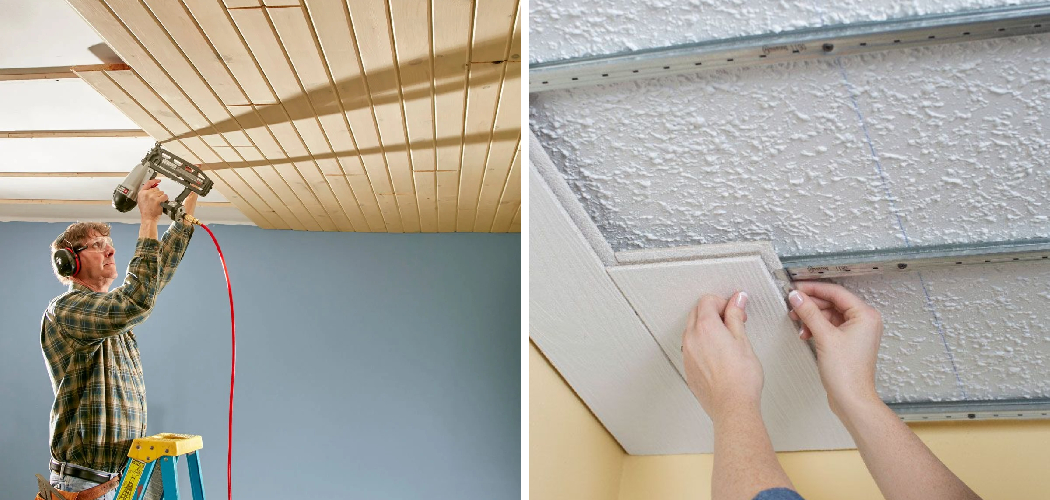
The trend of plank ceilings has been gaining traction due to their ability to add character and dimension to any space.

With the right tools and a bit of patience, this DIY project can be accomplished over a weekend, making it a perfect undertaking for anyone looking to refresh their home’s look without extensive renovations.
In this guide on How to Install Plank Ceiling , we will go through the steps needed to install a plank ceiling in any room of your home.
What is a Plank Ceiling?
A plank ceiling is made up of individual wooden planks that are installed on the ceiling, usually in a perpendicular direction to the joists. The planks can be made from various materials such as wood, MDF, or vinyl and come in different widths, lengths, and finishes.
While traditional ceilings are typically smooth and flat, plank ceilings add texture and warmth to a room, making it look more inviting and cozy.
You can choose to install a plank ceiling on your own or hire a professional, depending on your level of expertise and the complexity of the project. The cost of materials will also vary based on the type of planks you choose, but overall, it is a budget-friendly way to give any room in your home a new look.
Materials Needed
Before starting the installation process, make sure you have all the necessary materials at hand. Here is a list of tools and materials you will need:
Wooden Planks (Measurement Depends on Your Ceiling’s Size):
Choose the type of planks you want for your ceiling. You can opt for natural wood, engineered wood, or vinyl planks. It is recommended that you purchase around 10% extra material to account for mistakes and potential damages.
Mounting Tools:
- Ladder
- Stud Finder
- Measuring Tape
- Pencil
- Level
Installation Materials:
- Nails or Screws
- Hammer or Screwdriver
- Saw (if cutting planks to size)
- Caulk and Caulking Gun
- Sandpaper (to smooth out any rough edges)
9 Step-by-step Guides on How to Install Plank Ceiling
Step 1: Planning

Before heading to your local home improvement store, calculate the square footage of your ceiling to determine how much material you will need. Consider buying an extra 10% to account for cuts and potential mistakes.
Decide whether you want to paint or stain your planks before installation; doing this step beforehand can save you a lot of time and effort. You can also choose to fill in any gaps between the planks with caulk to create a seamless finish. It is also important to locate the joists in your ceiling, as you will need to nail or screw the planks into them for stability.
Step 2: Prep Work
Make sure your ceiling is clean and free of any debris. Remove any light fixtures or ceiling fans, and cover the floor with drop cloths or plastic sheets to protect it from potential damage.
The planks should also be acclimated to the room’s temperature for 48 hours before installation. It is crucial to read and follow the manufacturer’s instructions for your chosen planks, as some may have specific requirements for acclimation.
Step 3: Find the Center Point
Discovering the center point of your ceiling is a critical step to ensure your plank ceiling installation starts correctly and proceeds uniformly across the space. Begin by measuring the length and width of the ceiling. Then, using your measuring tape and pencil, mark the halfway points of each side.
From these marks, draw two chalk lines that intersect at the ceiling’s center, using your level to ensure the lines are perfectly straight. This intersection marks the center point from which you will begin installing the planks, ensuring a balanced and symmetrical appearance upon completion.
Step 4: Measure and Cut Planks
Using your measuring tape, measure the length of your ceiling from one wall to the other. Add an extra inch or two to account for any discrepancies in measurement or potential errors.
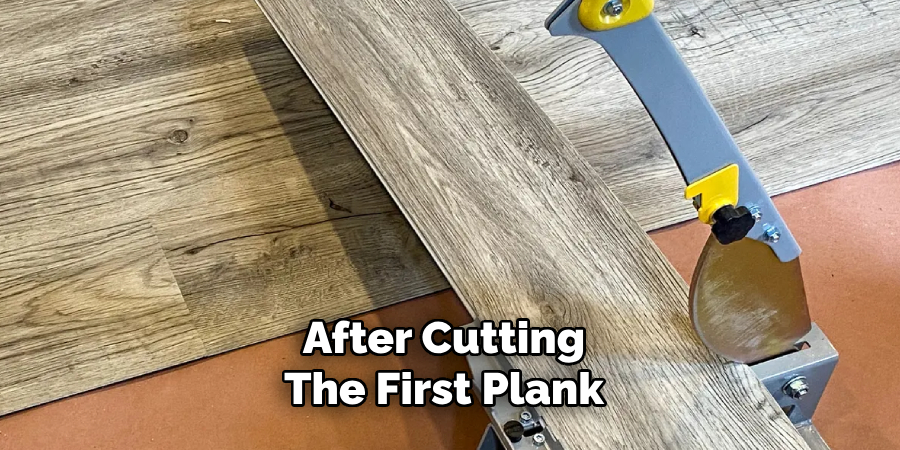
Using a saw, cut the first plank to this length. It is essential that the first plank is perfectly straight and aligned with the center point. If necessary, sand the edges of the plank to ensure a smooth fit.
Step 5: Attach First Plank
After cutting the first plank to the correct length, it’s time to attach it to the ceiling. Position the plank with one edge aligned at the center point you marked earlier. This ensures that your installation will be symmetrical.
Use your stud finder to locate the ceiling joists along the path where the plank will lie. Once you’ve identified the joists, use your pencil to mark their location directly on the plank. Pre-drill small pilot holes through the plank at each mark to prevent the wood from splitting when you insert the nails or screws.
Then, using your hammer or screwdriver, secure the plank to the ceiling by nailing or screwing through the pre-drilled holes into the joists.
Ensure each fastener is slightly countersunk so that it doesn’t protrude above the surface of the plank. Check that the plank is perfectly straight and level before moving on to the next step. This first plank will serve as a guide for the rest of your installation, so taking the time to get it right is crucial.
Step 6: Continue Installing Planks
Following the same method as step 5, continue installing planks in a straight line from the first plank. Use your level to ensure each plank is parallel and aligned with the previous one.
If necessary, use a rubber mallet to gently tap the planks into place for a snug fit. The last plank may need to be cut to fit against the wall, so measure and cut it accordingly. It is also important to stagger the seams between planks to create a more natural and visually appealing look.
Step 7: Around Light Fixtures or Ceiling Fans
When you approach a section of your ceiling that contains a light fixture or ceiling fan, you’ll need to measure and cut the planks precisely to fit around these fixtures. First, turn off the power to prevent any electrical hazards.
Measure the distance from the last plank to the edge of the fixture. Then, measure the diameter of the fixture to calculate the size of the opening you need to cut in the plank.
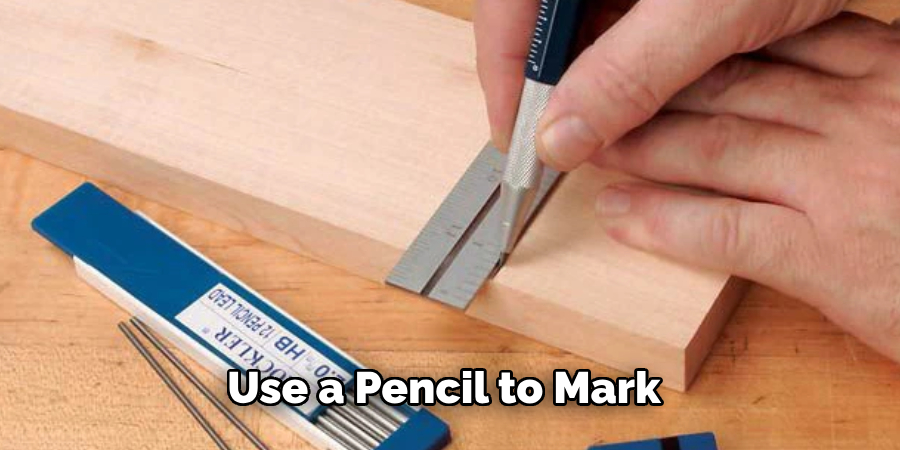
Use a pencil to mark these measurements on the plank. The safest way to cut around the fixture is by drilling a hole large enough for your saw blade to fit through and then cutting along your previously marked lines. Once the plank is cut, fit it around the fixture and secure it in place.
Step 8: Filling Gaps
If you have any gaps between the planks, apply caulk to fill them in. Cut the tip of your caulk tube at a slight angle and insert it into a caulk gun. Slowly squeeze the trigger as you run the bead of caulk along the gap, making sure to fill it completely. Use a damp cloth or your finger to smooth out the caulk and create a seamless finish. It is important to wipe away any excess caulk before it dries.
Step 9: Finishing Touches
Once all the planks are installed, you can add trim or molding along the edges for a more finished look. You can also choose to paint or stain the planks at this point if you haven’t already done so before installation.
It is recommended to wait at least 24 hours for the paint or stain to dry before adding any decorations or fixtures back onto the ceiling. But, once complete, you will have a beautiful and unique plank ceiling that adds character and warmth to your space.
Following these steps and paying attention to details will help ensure a successful plank ceiling installation. Remember to always follow the manufacturer’s instructions, use appropriate safety gear, and take your time for a professional-looking result. Enjoy your newly transformed space with your beautiful new plank ceiling!
Additional Tips

- It is recommended to have a helper for this project, as it can be challenging to hold long planks in place while attaching them to the ceiling.
- Work slowly and carefully to ensure each plank is installed correctly and securely.
- Use a damp cloth to wipe down the planks before installation to remove any dust or debris that may affect adhesion.
- Consider using adhesive in addition to nails or screws for extra stability and to prevent any potential squeaking noises.
- If you are installing planks over an existing ceiling, make sure it is in good condition and free of any moisture issues before proceeding.
- Before painting or staining, consider using a wood conditioner to ensure an even finish.
- If you are unsure about any aspect of this project, consult a professional for assistance. Safety should always be the top priority when undertaking any home improvement task.
By following these additional tips and recommendations on how to install plank ceiling, you can ensure a successful plank ceilings installation that will elevate the look of any room in your home. Happy DIY-ing!
Troubleshooting Common Issues
Even with careful planning and execution, you might encounter some common issues during your plank ceiling installation. Here are solutions to some potential problems:
Warping or Buckling Planks
If you notice your planks warping or buckling after installation, it could be due to moisture in the wood or room. Ensure your planks are adequately acclimated to the room’s humidity before installation, and check for any moisture issues in your space. If the problem persists, replacing the affected planks might be necessary.
Squeaky Planks
Squeaking usually occurs when there’s movement between the planks and the ceiling joists. To resolve this, you can remove the fasteners and resecure the planks, adding adhesive this time for a more stable attachment.
Gaps Between Planks
Temperature and humidity changes can cause wood to expand and contract, leading to gaps. If they are particularly bothersome, you can carefully remove the planks and reinstall them, ensuring they’re tightly fitted. Applying caulk is another solution, but it may affect the ceiling’s aesthetic.
Difficulty Finding Ceiling Joists
If you’re having trouble locating your ceiling joists, a more advanced stud finder may be required. Ensure it’s calibrated correctly and move it slowly across the ceiling for a better reading. Marking all the joists with chalk lines across the entire ceiling can also help keep your installation aligned.
Uneven Ceiling Surface

For an uneven ceiling, use shims to even out the lower spots. Shims can be placed between the joists and planks to achieve a level surface. However, be mindful of the added thickness when cutting planks around fixtures.
By addressing these common issues, you can ensure a smooth and successful plank ceiling installation. Remember, patience and attention to detail will significantly contribute to the quality of the finished project.
Alternative Installation Methods
Beyond the conventional nail or screw and adhesive approach to installing a plank ceiling, there are several alternative methods that can offer unique advantages or accommodate different types of materials.
Clip Systems:
Some plank ceiling systems come with specialized clips that can be attached directly to the ceiling joists. These clips securely hold the planks in place, allowing for an easier and faster installation process. This method is particularly useful for heavy or awkwardly shaped planks.
Interlocking Planks:
Interlocking planks, also known as tongue-and-groove planks, can be a convenient option. These planks fit together snugly without the need for nails, providing a seamless and clean look. This method can also reduce the amount of time and labor involved in the installation process.
Adhesive-Only:
For lighter materials, such as foam or thin wooden planks, using a strong construction adhesive might be sufficient. This method eliminates the need for drilling or nailing, making it ideal for DIYers looking to minimize potential damage to their ceiling or for installation over delicate substrates.
Suspended Ceiling Systems:
For rooms with especially high ceilings, a suspended or drop ceiling might be a practical alternative. This involves installing a grid system below the actual ceiling, onto which ceiling tiles or lightweight planks can be placed.
This method can also provide easy access to wiring and plumbing above the ceiling, making it a popular choice for basements or commercial spaces.
Magnetic Systems:
Although less common, magnetic installation systems offer a novel solution for those seeking a highly adjustable ceiling option.

Metal brackets are attached to the ceiling, and planks with embedded magnets are then positioned as desired. This method allows for easy removal or rearrangement of planks, ideal for temporary installations or spaces that require frequent access to the area above the ceiling.
Each of these alternative installation methods comes with its own set of advantages, challenges, and suitability for specific project needs. When considering which method to use, it’s essential to weigh factors such as the type of planks, the condition and height of your existing ceiling, and your personal preferences regarding installation ease and flexibility.
Frequently Asked Questions
Q: Is It Necessary to Use a Stud Finder for This Project?
A: While not essential, using a stud finder can help ensure a more secure and stable attachment of the planks to the ceiling joists. If you choose not to use a stud finder, make sure you are aware of the location of the joists and attach the planks accordingly. The last thing you want is for your beautiful new ceiling to come crashing down!
Q: Can You Install Plank Ceilings in Any Room?
A: Yes, plank ceilings can be installed in any room within your home. However, it is important to consider moisture levels and potential for exposure to water when choosing which type of planks to use.
For high moisture areas such as bathrooms or kitchens, opt for PVC or vinyl planks that are more resistant to water damage.
Q: How Do I Clean and Maintain My Plank Ceiling?
A: Regular dusting with a dry cloth or using a vacuum with a soft brush attachment is typically sufficient to keep your plank ceiling clean. If there are any spills or stains, gently wipe them away with a mild detergent and warm water.
Avoid using harsh chemicals or abrasive cleaners as they can damage the planks’ finish. Additionally, make sure to periodically check for any signs of damage or wear and tear that may require touch-ups or replacements.
Q: Can I Install a Plank Ceiling Over Popcorn or Textured Ceilings?
A: While it is possible to install planks over textured ceilings, it may be more challenging and time-consuming. It is recommended to remove any existing texture for a smoother and easier installation process. However, if you choose to proceed with installation over the textured ceiling, make sure to thoroughly clean and sand down the texture before proceeding.
Q: How Do I Determine the Amount of Materials Needed for My Project?
A: Measure the length and width of your ceiling to determine the square footage. Then, refer to the manufacturer’s instructions or packaging to see how much coverage each package of planks provides.
Add extra as a buffer for any mistakes or cutting waste. It is always better to have more material than not enough. Additionally, consider purchasing a few extra planks in case any future repairs or replacements are needed.

Conclusion
Installing a plank ceiling is a rewarding DIY project that can significantly transform the appearance of any room, adding warmth, texture, and character. By following the steps outlined in this guide, you can achieve a professional-looking ceiling without the high costs usually associated with home renovations.
Remember to take your time, measure accurately, and not rush the process. With careful planning and execution, your new plank ceiling will become a standout feature in your home, making all the effort worthwhile.
Whether you’re aiming for a modern, rustic, or traditional look, the versatility of plank ceilings ensures that your space will have a unique aesthetic appeal that reflects your personal style. Thanks for reading this article on how to install plank ceiling.