Are you looking to add a touch of elegance and sophistication to your home decor? Look no further than crown molding. Not only is it beautiful, but hanging curtains with crown molding brings a whole new level of style and charm to any room in the house. As a crafty homeowner, you know how important it is to make sure all those finishing touches are perfect.

This is exactly why this guide on how to hang curtains with crown molding will show you everything you need to know about hanging curtains with crown molding! From choosing the right curtain rod and fabric for your project to measuring and installing – we’ve got all the details covered so that you can enjoy stunning results. So grab your tools, and let’s get crafting!
What is Crown Molding?
Crown molding is the decorative trim that lines the walls at ceiling level in a room. It adds an elegant touch to any home and serves as a great way to add extra visual interest. Crown molding also helps to hide imperfections on the ceilings and walls, which can give any room an instant facelift without having to do any major construction.
Choosing the Right Curtain Rod and Fabric
When it comes to hanging curtains with crown molding, you’ll want to make sure that you choose the right curtain rod and fabric for your project. Make sure that your curtain rod is long enough to cover from end-to-end of the crown molding, and the curtains you choose should be lightweight enough to avoid damage to the crown molding.
How to Use Crown Molding
Once you have chosen the right curtain rod and fabric, it’s time to get started with your project.
- First, measure the length of the crown molding in order to get the exact size for your curtains.
- Then, mark where you will need to attach the brackets in order to hang your curtains. You’ll want to make sure the brackets are securely attached to the wall.
- Finally, hang your curtains on the rod and make any necessary adjustments for a perfect fit. And that’s it! You’re now ready to enjoy your lovely new curtains with crown molding.
Adding curtains with crown molding is a great way to give any room in your home an instant facelift. With the right tools and a few simple steps, you’ll be able to enjoy beautiful results in no time!
Required Items
Before you get started hanging curtains with crown molding, make sure you have all the necessary items. You will need the following:
- A tape measure
- Screwdriver
- Screws
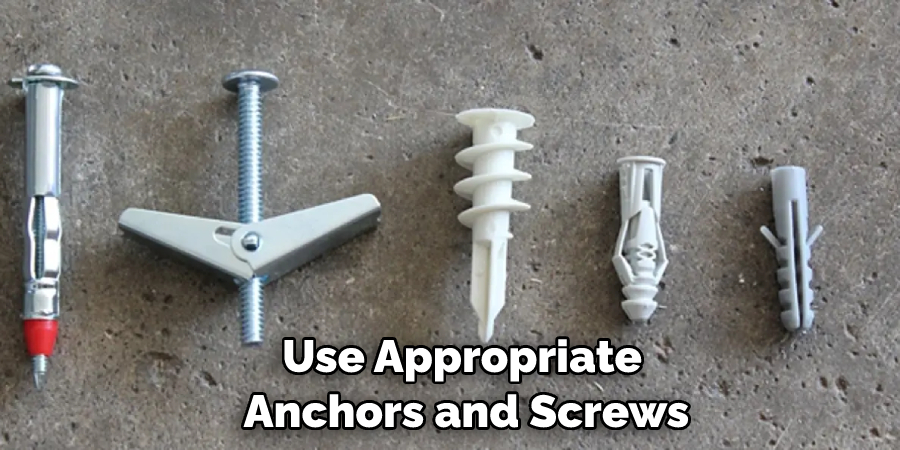
- Anchors (if needed)
- Curtain rod and hooks
10 Ways How to Hang Curtains With Crown Molding
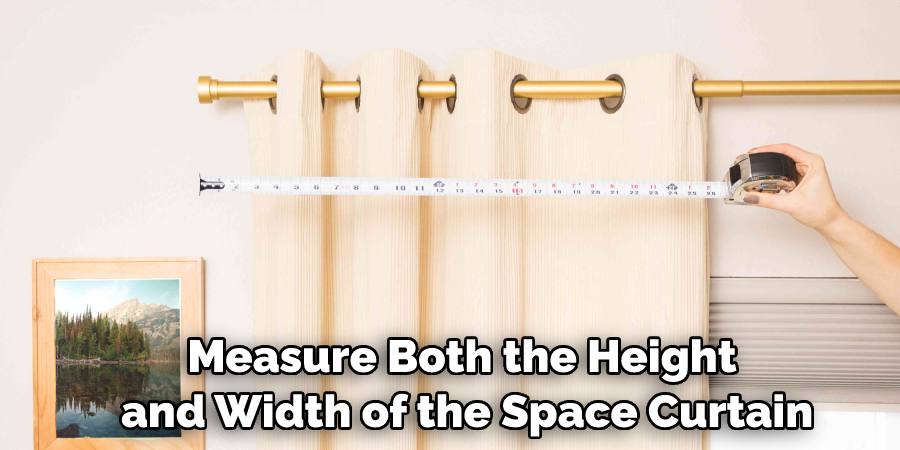
1. Measurement
Start by measuring the area where you want to hang your curtains. Measure both the height and width of the space. The right measurements will ensure that your curtains fit perfectly in the space.
2. Markings
Mark the area where you want to hang the curtains with a pencil or marker. This will help guide you when it’s time to mount the crown molding. Mark the area for the curtain rod, as well. Keep in mind that the curtain rod should be at least 4 inches away from the wall.
3. Drill Holes
Use a drill to make holes in the crown molding and secure it to the wall with screws. Make sure to use anchors if you’re drilling into a plaster or drywall surface. Drilling into the wood may require longer screws.
4. Attach the Curtain Rod and Hooks

Once your crown molding has been secured to the wall, use a drill or screwdriver to attach the curtain rod and hooks into place. Make sure they are securely fastened so that your curtains can hang properly without any gaps.
5. Hang the Curtains
Hang the curtains on the rod and secure them with hooks. Make sure to spread them evenly so that they hang straight and there aren’t any gaps in between them. The curtains should be securely fastened to the rod and hooks.
6. Adjust the Curtain Length
If needed, adjust the length of the curtains by either cutting or folding them at the bottom. Make sure that they’re not too long. The curtains should hang neatly without any excess material pooling at the bottom of each curtain panel.
7. Install Finishing Hardware
Install any finishing hardware that you may need to complete the look of your curtains, such as curtain rings or tiebacks. These will help keep the curtains in place and can add a decorative touch to your room.
8. Check
Once all of the hardware has been installed, check that everything is securely fastened and in place. Make sure that all of the screws are tightened and that there are no gaps between the curtains and the wall.
9. Accessorize
Add accessories to your window, such as a valance or sheers, for an extra layer of texture and color. This will complete the look of your curtains and add an extra touch of style to your room.
10. Enjoy!
Now that you know how to hang curtains with crown molding, admire your handiwork and enjoy the finished result. Your curtains will be a beautiful addition to any room and showcase your eye for design.
By taking the time to hang curtains with crown molding, you can create a stylish addition to any room. Follow these steps and enjoy your new window decor!

7 Safety Precautions to Consider
When hanging curtains with crown molding, it is important to take safety precautions. Here are seven common safety tips that should be followed:
1. Wear the appropriate protective clothing, such as goggles and gloves, when working. Be sure to use a stud finder to check for wiring or other obstacles before drilling. Wearing a dust mask is also advisable when drilling or sawing.
2. Be sure to use the correct tools and hardware for the task at hand. Don’t attempt to hang curtains with nails, screws, or other unsuitable materials that may damage the crown molding or create a safety hazard.
3. Place the curtain rod brackets in a secure location. Avoid hanging them too close to the edge of the crown molding, as it may create an unstable base for the curtain rod and cause it to come loose or shift over time.
4. Recheck all measurements before cutting any holes in the crown molding. Carefully mark each spot with a pencil and double-check the measurements to ensure accuracy. Accurate marking is important for ensuring that the brackets are even and secure.
5. Use the right drill bit and speed for the task at hand. A slower, larger-sized drill bit is advised when working with crown molding to avoid splintering or splitting the material. Make sure you also use a drill bit that is slightly smaller than the size of the screws.
6. Secure the brackets with appropriate hardware. Always use appropriate anchors and screws to ensure that they stay in place without shifting or wobbling over time. This will help keep your curtains secure and stable for years to come.
7. Clean up any debris, sawdust, or small pieces of wood after you are finished. This will help prevent any potential injuries in the future and keep your work area tidy and organized.

Following these safety precautions when hanging curtains with crown molding will help create a safe and secure installation that will last for years to come. Be sure to take the time to properly measure, mark, drill, and secure all parts of the installation for best results.
Frequently Asked Question
How Long Will It Take to Finish the Project?
The amount of time it takes to finish the project will depend on the size of your window and the complexity of your curtain rod, but most projects should take about 1-2 hours to complete. It won’t hurt to take your time and double-check all the measurements and securements.
What Type of Hardware Should I Use?
The type of hardware you should use will depend on the material that your crown molding is made out of. Most crown moldings are either wood or metal, so make sure you are using appropriate anchors, screws, or other hardware to secure the brackets in place.
Conclusion
Adding curtains to crown molding is a beautiful way to add a touch of sophistication and class to any room. Not only does decorating with wallpaper or paint, but it’s also an affordable alternative. It takes some patience and careful preparation, but the result can be truly amazing.
With the step-by-step instructions on how to hang curtains with crown molding provided in this article, you should now have all the tools necessary to take your DIY decorating project to the next level. So don’t wait!
Grab your drill, screwdriver, curtains, and crown molding, and transform your space with classic style. Plus, it’s a great excuse to finally try your hand at that craft item you’ve been eyeing for weeks! Who knows, this could be just the start of something beautiful. So get creative and find out today just how much impact adding curtains to crown molding can have on your home’s décor!