
Nothing quite disrupts the serenity of a home like the persistent pops and creaks of a wooden floor. As time marches on, the natural aging process and environmental changes can lead to the development of annoying sounds that echo through the halls. However, fear not, as there are effective ways to restore the hushed elegance of your wooden flooring. In this guide, we will explore how to fix popping wood floor, from humidity-induced expansions to loose floorboards, and delve into the art of remediation.
From simple DIY solutions to professional interventions, we’ll navigate the diverse strategies available to rectify this common issue. So, if you find yourself tip-toeing around your own home, trying to avoid the creaks beneath your feet, join us on a journey to silence those pesky pops and rediscover the tranquility of a harmonious living space.
Importance of Addressing the Issue Promptly
When you first notice a popping or creaking sound coming from your wood floor, it may be tempting to ignore it and write it off as a minor annoyance. However, this is not a problem that should be ignored or put off for long. Addressing the issue promptly is crucial in preventing further damage and ensuring the longevity of your wood floor.
One of the main reasons for addressing the issue promptly is to prevent further damage. Popping or creaking sounds are often a sign of loose floorboards or subfloor, which can lead to more serious issues such as uneven floors and structural damage. If left untreated, these problems can become increasingly difficult and costly to fix.
In addition to preventing further damage, addressing the issue promptly can also save you money in the long run. By fixing the problem early on, you can avoid more extensive and expensive repairs down the line. This is especially important for homeowners who may eventually want to sell their home. A well-maintained wood floor can greatly increase the value of a home, whereas a damaged or poorly maintained floor can lower its resale value.
10 Methods How to Fix Popping Wood Floor
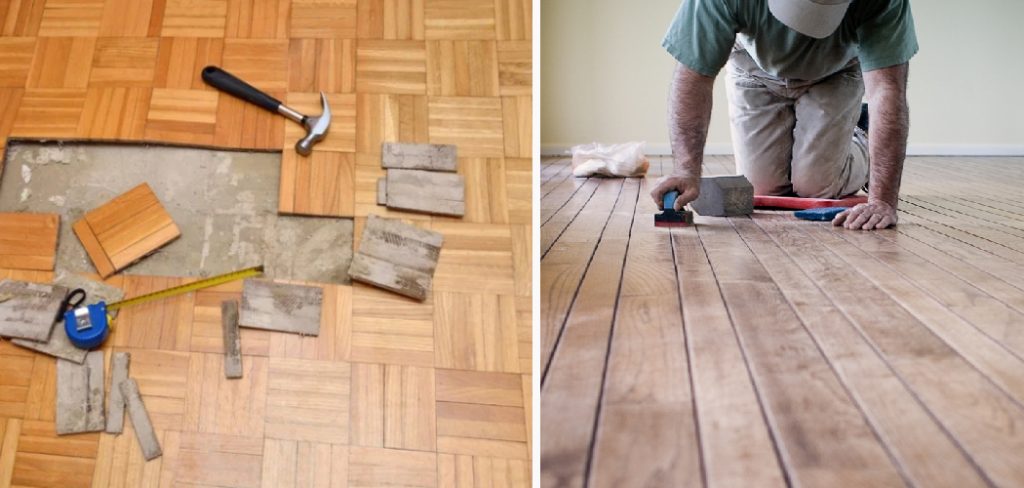
1. Clean the Floor
The first step to fixing a popping wood floor is to clean it thoroughly. Vacuum up any dirt, dust, and debris that may have accumulated on the surface of the floor. Then use a mild detergent and warm water to mop the entire floor, paying special attention to any areas where there are popping sounds. Allow the floor to dry completely before proceeding with any other steps.

2. Check for Loose Nails
The next step is to check for loose nails in the subflooring or joists underneath the wood flooring. If you find any loose nails, use a hammer and nail set to drive them back into place. Be sure to check all areas of the subflooring and joists for loose nails, as this can be a common cause of popping wood floors.
3. Glue Down Loose Boards
If you find any boards that are loose or coming apart from one another, you will need to glue them back together using a strong adhesive such as construction adhesive or epoxy glue. Apply the adhesive liberally and press down firmly on each board until they are firmly attached once again. Allow the adhesive to dry completely before walking on it or continuing with other steps.
4. Replace Damaged Boards
If there are any boards that are cracked or warped beyond repair, they will need to be replaced with new ones in order for your wood flooring to remain stable and secure. Take measurements of each damaged board so that you can purchase new ones of an identical size at your local home improvement store or online retailer.
Be sure to follow all instructions carefully when installing new boards in order for them to fit properly into place without causing further damage or instability in your wood flooring system.
5. Add Support Underneath
If you notice that some areas of your wood flooring feel spongy or bouncy when walked upon, then it may be necessary for you to add additional support underneath these sections in order for them not to give way over time due to excess weight being placed upon them by foot traffic or furniture moving around on top of them regularly throughout their lifespan.. This can be done by adding extra layers of plywood underlayment beneath these sections or by using metal supports such as joist hangers and steel beams which can help provide extra stability and strength where needed most within your wooden floor system as a whole unit.
6. Re-Secure Floorboards
If individual boards within your wooden floor system have become detached from one another due to wear and tear over time, then it may be necessary for you re-secure these boards back into place using screws instead of nails so that they remain securely locked together even after years worth of constant use.. To do this successfully without damaging either board in question, use a drill bit slightly smaller than the diameter of each screw head so that they fit snugly into place without causing too much strain on either side during installation.
7. Use Expansion Gaps
Expansion gaps should also be used between each board within your wooden floor system in order for it not to buckle or warp due to changes in temperature or humidity levels within its environment over time. Expansion gaps should measure at least 1/4 inch wide between each board so that there is enough room left open for movement without compromising overall structural integrity.
8. Seal Gaps Between Floorboards
In addition, expansion gaps between each board within your wooden floor system should also be sealed shut with caulk so that no moisture can get inside, which could lead to mold growth over time if left unchecked. This will help keep moisture levels low inside each gap which will prevent warping buckling from occurring while also protecting against insect infestations such as termites carpenter ants etcetera which could otherwise cause serious damage if left untreated..
9. Use Furniture Protectors
To further protect your wooden floors against possible damage caused by furniture pieces being moved around regularly throughout its lifespan, furniture protectors should also be used beneath legs, chairs, tables, etcetera so that no scratches dents, gouges etc., occur during their normal usage period.
10. Refinish Your Wood Flooring
The last step towards fixing a popping wood floor is refinishing it after all previous steps have been taken care of properly. This includes sanding down the entire surface area lightly followed by staining sealing waxing, buffering, etcetera, depending on the desired look, feel finish overall. Taking these measures will help ensure lasting results that will keep your floors looking and performing at their best for years to come.
Things to Consider When Fixing a Popping Wood Floor
When considering fixing a popping wood floor, there are several factors to keep in mind before starting the repair process. These include the type of flooring, underlying issues, and potential causes of the popping sound. Here are some important things to consider when tackling this common problem:
Type of Flooring
The first thing to consider is the type of wood flooring you have. Different types of wood, such as solid or engineered, may require different repair methods. Additionally, the age and condition of the flooring can also play a role in determining the best approach for fixing popping noises.
Underlying Issues
Popping sounds from a wood floor can be caused by various underlying issues. These can include changes in humidity levels, improper installation, or even structural issues with the subfloor. Before attempting any repairs, it’s important to identify and address these underlying issues to prevent recurring popping noises in the future.
Potential Causes
Identifying the potential causes of popping sounds can also help determine the best course of action for fixing them. Common causes include loose floorboards, gaps between boards, or nails that have come loose. By identifying the root cause, you can target your repair efforts more effectively.
Tools and Materials Needed
Fixing a popping wood floor may require specific tools and materials depending on the type of flooring and underlying issues. Some common tools that may be needed include a hammer, pry bar, drill, and saw. Additionally, some materials that may be necessary include wood putty, screws, and adhesive.

Conclusion
By following these steps, you now know how to fix popping wood floor issues and can successfully tackle them! As with any DIY project, safety is always paramount when dealing with carpentry. If there’s no way to work around a problem safely, it may be best to call in a professional for repairs.
However, if you feel comfortable tackling the job yourself, using these steps should help you achieve success without any further complications. What’s more, avoiding DIY disasters can save you time and money in the long run—so hopefully this blog post proves beneficial to your needs. Get started today and see what kind of difference repairing popping wood floors can make for your home!