
Laminate flooring is an attractive and durable choice for many homeowners. It can be installed quickly and easily, making it a great option for those who want to update their home without spending too much time or money on the project. However, if not installed properly, laminate flooring can look unfinished or be damaged by foot traffic. Knowing to end laminate flooring at doorways is an important part of ensuring your floors look great and last for years.
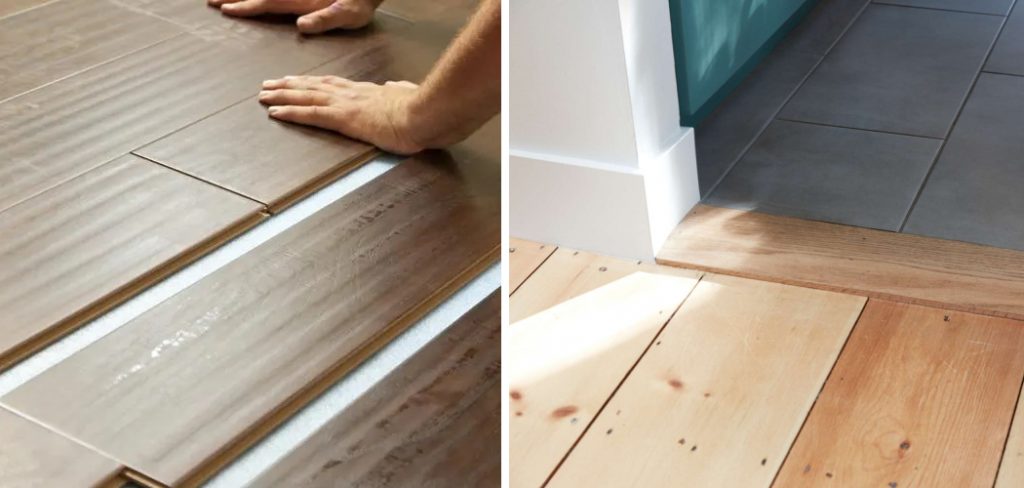
One of the main advantages of ending laminate flooring at doorways is that it gives you a seamless transition from one room to the next. It eliminates any awkward step-down and creates a smoother, more unified look. It also makes cleaning easier since there are no overlaps or edges for collecting dirt and dust. In this blog post, You will learn how to end laminate flooring at doorways.
Step by Step Processes for How to End Laminate Flooring at Doorways
Step 1: Inspect the Doorway
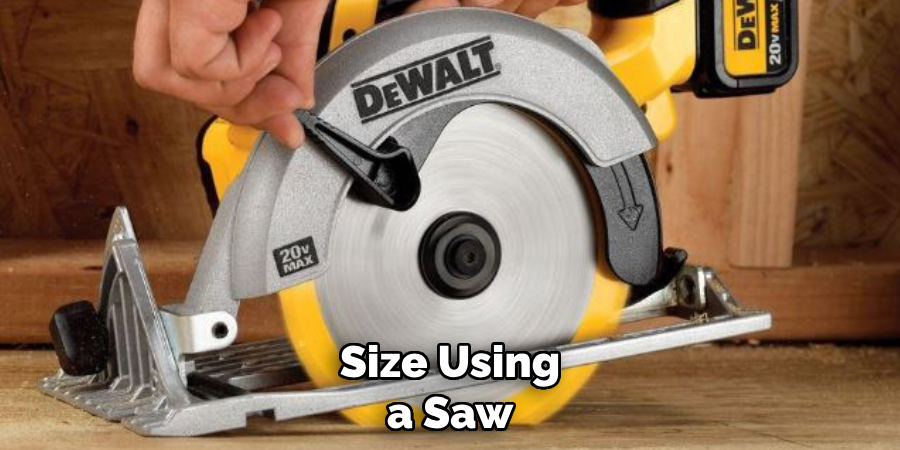
Before you begin, make sure that the doorway is in good condition. This will help ensure that the laminate flooring installation process goes smoothly. Measure the width of the doorway and mark it on the plank. Use a jigsaw to cut along the lines and create two planks that are equal in size.
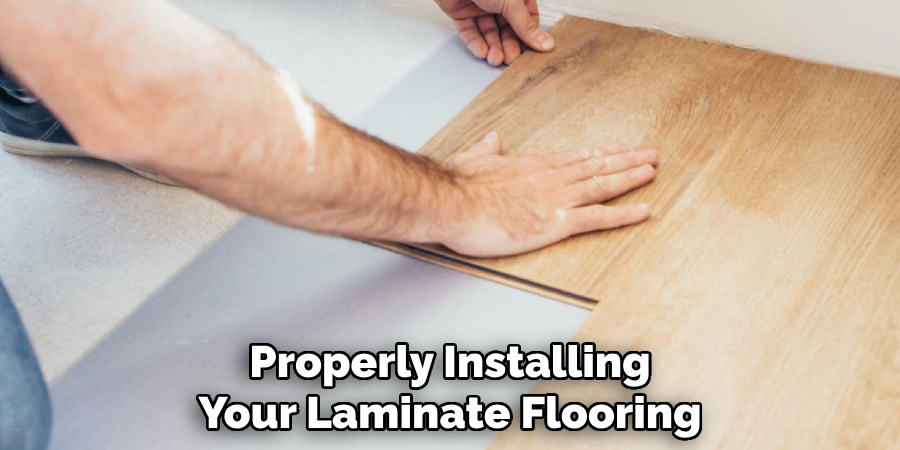
Step 2: Install the Laminate Flooring Planks
Use adhesive to attach the laminate planks to the subfloor. Make sure that the planks are securely installed and level with each other. Measure and mark two lines at each side of the doorway then cut a shank gap in between the lines.
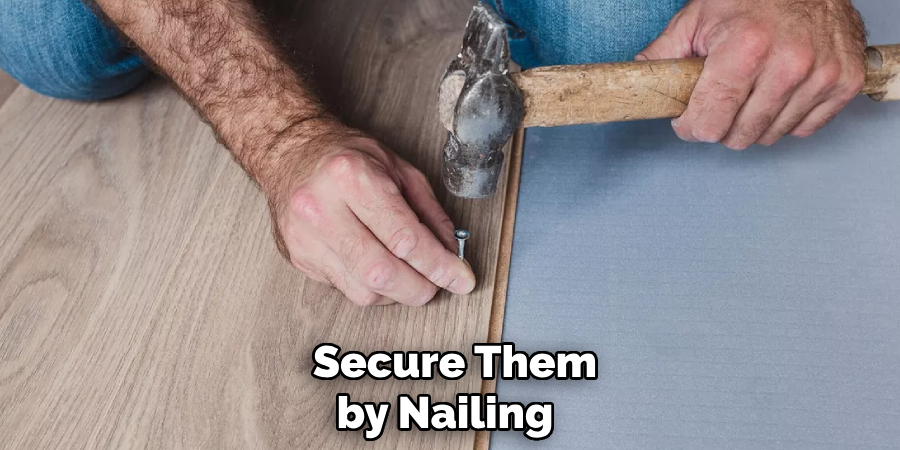
Step 3: Install Transition Molding
Place transition molding around the doorway area and secure it with nails. Use a jigsaw to cut off any excess laminate flooring planks sticking out past the door frame.
Step 4: Install End Caps
Place end caps at each side of the doorway area and secure them with adhesive. Cut door jambs to size and place them around the doorway area. Secure them by nailing or screwing them into the subfloor.
Step 5: Install Quarter Round Molding
Place quarter-round molding around the doorway area and secure it with nails. Use a vacuum and damp cloth to clean up any debris from the installation process.
Following these steps will help ensure you have properly ended laminate flooring at doorways. With a little time and effort, you can have a professional-looking installation that will last years.
Precautions for How to End Laminate Flooring at Doorways
- Before starting, clean the floor and remove any existing debris. Make sure that no dirt or dust is present before installation.
- Wear protective gear such as safety glasses, gloves, and a face mask to avoid splinters and cuts while cutting the laminate pieces.
- Use specialized tools like a jigsaw or miter saw to cut the pieces properly.
- Measure twice, cut once! Take multiple measurements and record them before cutting the laminate.
- Laminate pieces should fit snugly on both sides of the doorway to ensure proper installation.
- Use a sealant or caulk around the edges and seams where two pieces meet for extra protection.
- Finally, use a laminate flooring transition strip to hide any gaps between the two pieces of laminate and create a professional look.
These safety measures help ensure that installing ending laminate flooring at doorways is successful and secure for years.
How Do You Transition From Laminate Flooring to Carpeting Near the Doorway?
If you have laminate flooring in one room and carpeting in an adjacent room, the transition from one to the other near a doorway can be tricky. The best way to make the two types of flooring meet is by using a reducer threshold strip.
This strip is available in various wood, metal, or vinyl materials and comes in various sizes to fit the doorway. First, to install the reducer, measure the gap between the door frame and the laminate flooring. Cut a piece of threshold strip to size using a saw or jigsaw.
Next, apply adhesive to the back side of the threshold strip and adhere it into place at the doorway. Allow ample time for the adhesive to dry before walking on the strip. Reducer threshold strips can also transition from laminate flooring to tile or hard surfaces in doorways. The installation process is the same as described above, but select a threshold strip that complements any decorative tiles near the doorway.
What’s the Best Way to Trim a Door Jam or Molding Around a Doorway When You Have Laminate Flooring?
Using a jamb saw is the best way to trim a door jam or mold around a doorway when you have laminate flooring. This tool allows you to precisely cut the wood to size and angle so that the laminate floor can be installed against the door frame without any gaps or misalignments.
To ensure your cuts are perfect, measure twice and cut once. Additionally, ensure you use the correct blade on your jamb saw for accurate cuts when trimming door jambs or moldings for laminate flooring.
Once your door jam or molding is cut to size and shape, you can install the laminate flooring against it with an expansion gap between the flooring and the door frame. Expansion gaps are necessary for laminate floors to give them room to expand and contract with changes in temperature and humidity levels.
This gap should be between 1/4 – 3/8 of an inch, depending on what type of flooring you have installed. Whether you choose to install your laminate flooring up against a door jam or molding, you must ensure that your cuts are precise and accurate to get a professional-looking installation.
How Do You Make Sure the Edges of Your Laminate Flooring Are Secured Properly at the Doorway?
The most important part of ending laminate flooring at doorways is ensuring the edges are properly secured. This means ensuring they can withstand regular wear and tear, prevent dirt and dust from getting in between them, and look good overall.
To ensure your laminate flooring ends look their best, you should begin by cleaning the area around the doorway to ensure that no dirt or debris can prevent proper adhesion. You’ll also want to ensure you have the right tools, including a jigsaw and a utility knife.

Once you’ve prepped the area, it’s time to cut your laminate flooring to size. To do this, mark the area around the doorway with a pencil. Then, use your jigsaw to cut along the marks you’ve made. Ensure you measure twice and cut once to get an accurate fit. Next, secure your laminate flooring at the doorway using adhesive strips or glue. You should also use a tapping block when hammering the laminate flooring into place to prevent it from chipping or cracking.
Are There Any Special Considerations When Finishing Off the Laminate Flooring Near a Door?
Yes, some special considerations exist when finishing off the laminate flooring near a door. The first consideration is ensuring all the pieces fit together tightly so that no gaps or spaces exist between them.
This will ensure that dirt and debris do not get trapped between the boards and help minimize any noise from foot traffic. Additionally, when cutting the boards to fit around door frames and other openings, always make sure that you leave at least a 1/4” gap between the edge of the boards and the door frame. This extra space will help expand and contract due to temperature or humidity changes.
The last consideration is when installing your transition pieces between two different flooring types, use a quality adhesive to secure them and ensure the pieces fit tightly against each other.
This will ensure a smooth transition from one room to another and create an even finish for your laminate flooring installation. By following these considerations and properly installing your laminate flooring at doorways, you can enjoy a beautiful, hassle-free, and long-lasting flooring solution.
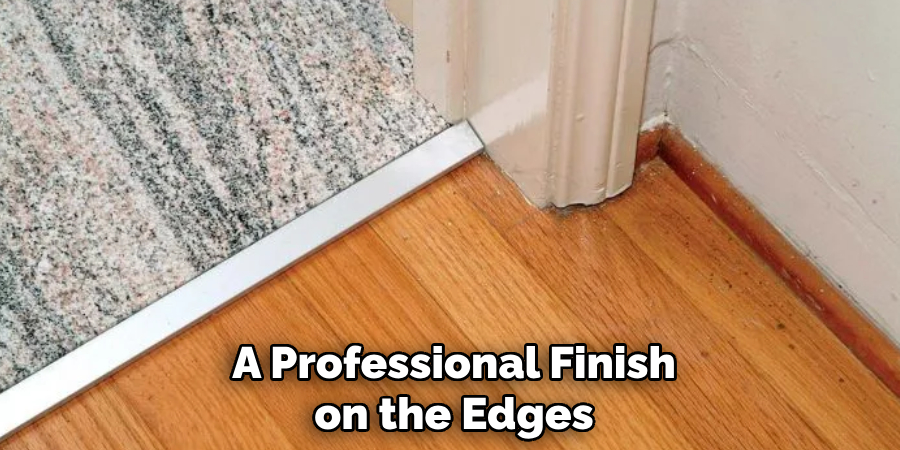
Importance of How to End Laminate Flooring at Doorways
- Enhances the aesthetic appeal of your home – When installed correctly, ending laminate flooring at doorways can give your house a polished and professional look. This can help make visitors or potential buyers look more attractive and inviting.
- Contributes to the overall value of your property – When done properly, ending laminate flooring at doorways can help increase the value of your property. It adds a professional finish that many people appreciate and admire.
- Makes maintenance easier – When you end laminate flooring at doorways, it’s easier to clean and maintain than when the floor is left unfinished nearby doors or other transitions.
- Makes it easier to transition from one room to another – A professional finish on the edges of your laminate floors will make it easier for people to transition smoothly and safely from one room to another.
- Helps prevent dirt, dust, and other particles from accumulating in the corners– When you end laminate flooring at doorways, it can help reduce the amount of dirt and debris in the corners.
- Can help protect against moisture – Ending laminate flooring at doorways can also help prevent water from seeping into your floors, thus helping to preserve their longevity. This is especially important for bathrooms or kitchens with high foot traffic and the potential for water spills.
Understanding the importance of ending laminate flooring at doorways ensures that your floors remain in good condition for years. Following the proper steps and techniques to finish your laminate flooring near doorways, you can enjoy a beautiful and safe transition from one room to another.
Causes of How to End Laminate Flooring at Doorways
- Expansion Gap: Flooring materials tend to expand and contract with temperature changes, so leaving an expansion gap between the flooring and doorways is important. This can be accomplished by using a piece of wood or other material slightly smaller than the width of the doorway. The gap should be less than 1/4 inch wide so the flooring can move freely without damaging the door.
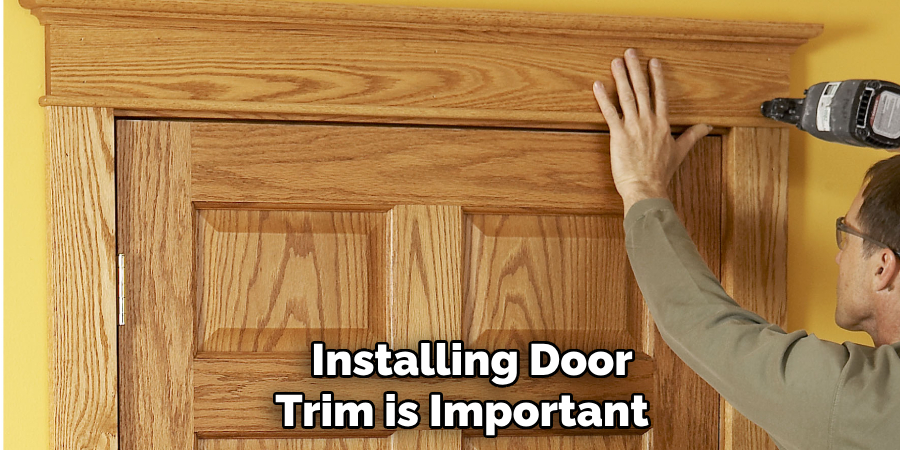
- Door Trim: Installing door trim is important for creating a finished look and preventing the laminate from chipping or cracking along the edges of the doorway. The trim should be made of wood, vinyl, or metal and extend at least 3/4 inch away from the edge of the doorway.
- Quarter Round: Installing a piece of the quarter round along the edge of the doorway helps create a smooth transition between the flooring and trim. The quarter round should be made of wood, vinyl, or metal and extend at least 3/4 inch away from the edge of the doorway.
- Thresholds: Installing a threshold is important for creating an attractive, finished look and preventing water from seeping underneath the door. The threshold should be made out of wood, vinyl, or metal and extend at least 3/4 inch away from the edge of the doorway. It’s also important to check the surface is level before installing the threshold. If not, use shims to even out the surface before securing the threshold.
These are the most important steps for ending laminate flooring at doorways. It’s important to remember that each step is necessary for ensuring a successful installation and protecting your investment.
Conclusion
In conclusion, there are several methods you can use to end laminate flooring at doorways. The most common and popular option is a transition strip, which is easy to install and provides a great-looking finish.
If you don’t want to use a transition strip, then you can opt for other solutions, such as using quarter-round molding or t-molding. No matter which option you choose, all of them can be installed with basic tools and knowledge. I hope this article has been beneficial for learning how to end laminate flooring at doorways. Make Sure the preventive measures are followed chronologically.