
Decorating a wall with high ceilings can initially seem like a daunting task. The vast expanse of vertical space offers a unique challenge but also presents an incredible opportunity to create a striking and memorable visual impact within a room. High ceilings evoke a sense of grandeur and space, allowing for creative decor strategies that can transform any room into a more vibrant, elegant, or cozy space.

Whether you prefer a minimalist approach with carefully selected art pieces or a more elaborate arrangement featuring bold patterns and textures, the key lies in balancing scale, color, and composition. This guide on how to decorate a wall with high ceilings aims to provide you with insightful tips and techniques to effectively decorate your high-ceiling walls, turning them into a captivating focal point that complements the overall aesthetics of your room.
What to Consider Before Decorating?
Before you start decorating your high-ceiling walls, there are a few essential factors to consider. These include the room’s natural lighting, the overall decor style, and the size and shape of the wall itself.
The natural lighting in the room will significantly impact how pieces on your wall are perceived. Bright, well-lit rooms can handle bolder and more colorful decor, while dimly lit spaces may require more subtle and reflective elements.
The overall decor style of the room should also be taken into consideration. If you have a modern and minimalist space, you may want to stick with clean lines and simple, monochromatic pieces. On the other hand, if your room is more traditional or eclectic, you can play with a mix of styles and colors to create a dynamic display.
Additionally, the size and shape of the wall will also influence your decor choices. A tall and narrow wall may require vertical artwork or an arrangement of tall plants to visually balance out the space. On the other hand, a wide and short wall may benefit from a series of smaller pictures or shelves to create a sense of depth.
Decorating Techniques for High-Ceiling Walls
Now that you have considered these factors, it’s time to explore some decorating techniques for high-ceiling walls. Here are a few ideas to inspire you:
Vertical Artwork:
One of the most obvious solutions for a wall with high ceilings is to hang vertical artwork. This can include a large statement piece or an arrangement of smaller pieces that create a cohesive display. To add more interest, consider mixing different sizes and styles of artwork to create a visually dynamic composition.
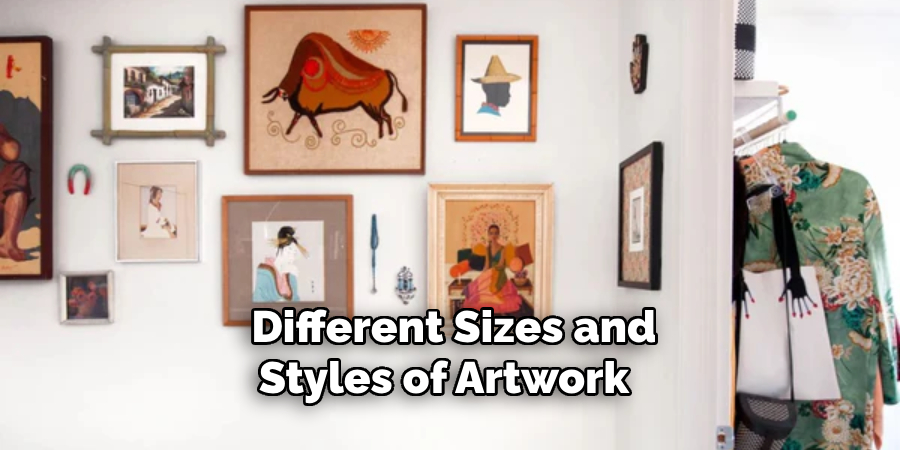
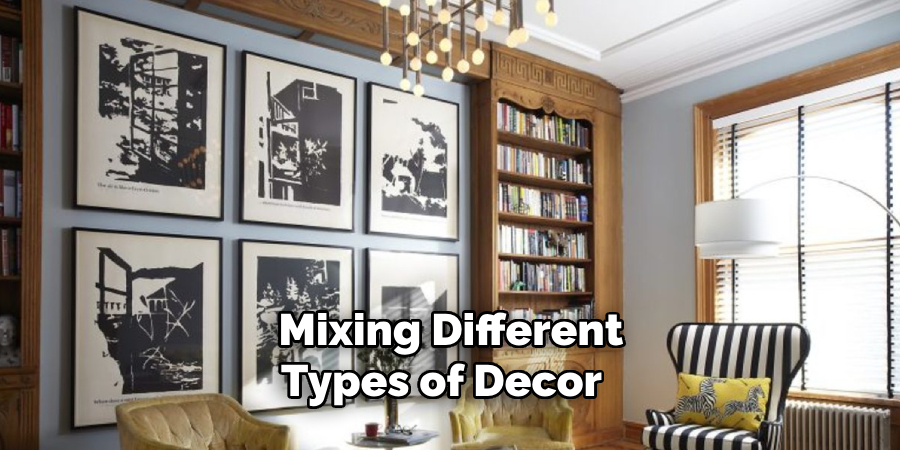
Gallery Wall:
A gallery wall is another popular option for high-ceiling walls. This involves creating a collage of various frames, artwork, photographs, or other decorative elements. The key to making this work is to have a central focal point, such as a large piece of artwork or an eye-catching frame, and then arrange the rest of the pieces around it.
Wallpaper:
Using wallpaper on high-ceiling walls can add texture and depth to the space. You can opt for a bold pattern or a subtle design, depending on your room’s overall aesthetic. Additionally, you may want to consider using wallpaper on just one wall as an accent rather than covering the entire space.
Large Mirrors:
Another popular technique for decorating high-ceiling walls is to use large mirrors. Not only do they add a decorative element, but they also reflect light and create the illusion of more space. Plus, mirrors come in various shapes and styles, making it easy to find one that fits your room’s decor.
Needed Materials
Artwork or Decorative Pieces:
When selecting artwork or decorative pieces for high-ceiling walls, the scale is of the utmost importance. Large-scale pieces can anchor the space and draw the eye upward, enhancing the expansive feel of high ceilings.
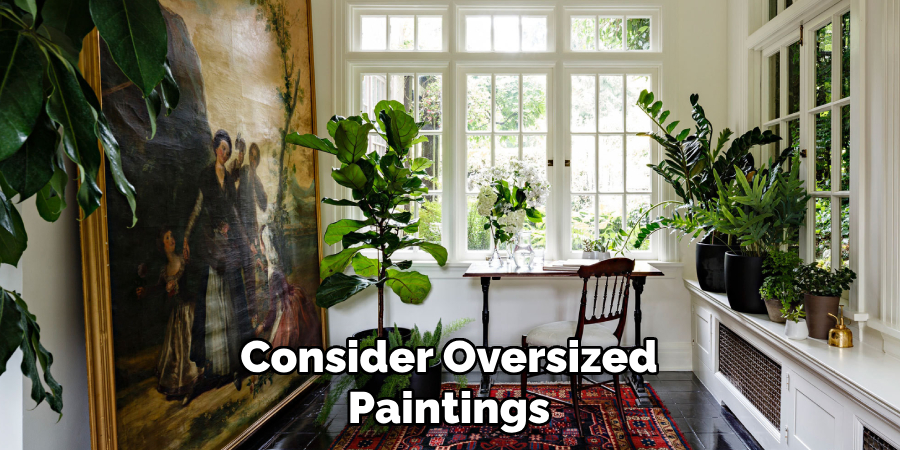
Consider oversized paintings, tapestries, or sculptural elements that can serve as a central focus. Alternatively, arranging a series of smaller pieces in a cohesive manner can also effectively fill the space without overwhelming it.
This approach allows for flexibility and can enable you to showcase a variety of artworks or personal mementos. When curating your collection, aim for a balanced mix of sizes, colors, and textures to maintain visual interest and harmony within the room’s overall design scheme.
Hanging Hardware:
Proper hanging hardware is crucial when decorating high-ceiling walls. The last thing you want is for your artwork or decorative pieces to fall and potentially cause damage. Ensure that you use appropriate hooks, nails, or anchors that can bear the weight of your chosen pieces.
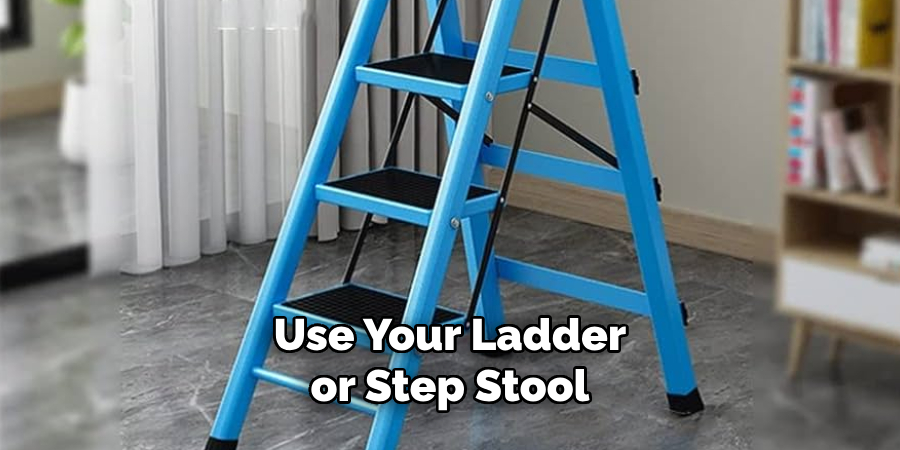
Ladder or Step Stool:
Given the height of the wall, you may need a ladder or step stool to safely reach and hang your pieces. Consider investing in a stable and sturdy ladder that can be adjusted to different heights, making it easier to reach the top of your wall.
9 Simple Step-by-Step Guidelines on How to Decorate a Wall With High Ceilings
Step 1: Measure Your Space
The first step in decorating a wall with high ceilings is to accurately measure your space. This includes the height, width, and depth of the wall you plan to decorate. Knowing the exact dimensions will help you make informed decisions about the size and placement of your artwork or decorative pieces.

Use a tape measure to get the precise measurements and note them down. Remember to consider any architectural features, such as windows or doors, that might influence your decorative scheme. Accurate measurements are key to creating a balanced and visually appealing display that enhances the overall feel of the room.
Step 2: Clean and Prep the Wall
Before introducing any artwork or decorative items to your high-ceiling wall, it’s crucial to ensure the surface is clean and prepared. Start by removing any dust, cobwebs, or marks with a soft cloth or duster. A gentle cleaning solution can be applied to stubborn dirt. Make sure the wall is completely dry before proceeding further.
If there are any holes or imperfections, now is the time to fill them with spackle and sand down any rough areas. This step not only provides a pristine canvas for your decorations but also helps in securing hanging hardware more effectively. Prepping your wall thoroughly will guarantee that your decorations look their best and remain securely in place.
Step 3: Choose Your Focal Point
Decide on your focal point for the wall. This could be a large piece of artwork, a mirror, or a decorative item that will serve as the anchor and visual centerpiece of the display.
The chosen focal point should reflect your personal style and complement the room’s overall decor scheme. Once you have selected your focal point, use it as a guide for the rest of your decorative pieces.
Step 4: Arrange Your Artwork or Decorative Pieces
Once you have your focal point, the next step is arranging your artwork or decorative pieces around it. Begin by laying out your pieces on the floor to experiment with different arrangements. This “mock-up” phase allows you to visualize how the pieces will look together on the wall without committing to holes or adjustments just yet.
Consider the balance and flow of the display, ensuring that the overall composition is cohesive and visually appealing. Space your artwork or decorative items evenly, keeping in mind the scale and proportion in relation to the wall’s size. It’s important to achieve a harmonious balance between the pieces themselves and the surrounding space.
Step 5: Start Hanging from the Center
Begin the hanging process by starting with your central focal point. Positioning this key piece first allows you to ensure it is at the desired height and centrally located on the wall. This central piece acts as an anchor for your entire arrangement, providing a reference point from which to balance the rest of your display.
Use your ladder or step stool to reach the appropriate height, and make certain the piece is level before securing it in place. After installing the focal point, gradually work your way outwards, hanging additional pieces by aligning them in relation to this central item.
This methodical approach ensures a balanced distribution of artworks or decorative elements across the high-ceiling wall, creating a harmonious and aesthetically pleasing ensemble.
Step 6: Measure for Proper Placement
Now that you have a layout plan and your central piece hung, it’s time to ensure each of the remaining pieces is placed correctly. Measure the distances between artworks or decorative items, maintaining uniform spacing to achieve a cohesive look. Use a pencil to lightly mark where each piece will go, ensuring that these marks are level and at the correct height.
For large items, consider the 57-inch-on-center rule, which is a common gallery practice where the center of your artwork is approximately 57 inches from the floor, aligning with the average human eye level. For groupings, maintain a consistent gap of 2 to 5 inches between each piece to create unity without overcrowding.
Step 7: Use Appropriate Hanging Hardware
Selecting the right hanging hardware is crucial for securely displaying your art and decorative pieces, especially on high walls.
The type of hardware will depend on the weight of the item being hung and the wall material (drywall, plaster, or brick, for example). Lightweight pieces may only require a small nail or picture hanging hook, while heavier items might need wall anchors or toggle bolts to ensure they are safely supported.

Always check the maximum weight your chosen hardware can support, and consider using a stud finder to locate studs in the wall for extra support for heavy items. If you’re unsure, it’s better to opt for hardware that can support more weight than you think you’ll need. This step not only ensures the longevity and safety of your decorative display but also protects the integrity of your wall.
Step 8: Hang Your Pieces
With all your measurements taken, focal points decided, and hanging hardware selected, you’re now ready to hang your pieces. Start with the central piece if you haven’t already, and then move on to the surrounding items, using the layout plan as your guide. Carefully hammer or drill the hardware into the pre-marked spots.
Lift each piece into place, ensuring it securely catches on the hardware. For heavier items, it may be helpful to have an assistant who can help you hold the piece while you secure it.
Check the stability of each item once it’s hung, making slight adjustments as necessary to ensure everything is level and securely fastened. Remember to step back periodically to view the arrangement from a distance.
This perspective can help you confirm that the overall composition looks balanced and aligned correctly with your initial vision. Hanging your pieces with patience and precision will result in a beautifully decorated wall that enhances the grandeur of high ceilings.
Step 9: Step Back and Assess
After all pieces are securely hung, take a step back to fully assess and appreciate your work. View the display from various angles and distances to ensure that each piece contributes to the overall harmony and balance of the arrangement.
This moment allows you to see the space as a cohesive whole, ensuring that the distribution of artwork and decorative elements complements not only the high wall but also the room’s layout and furniture placement. It’s not uncommon to notice slight adjustments that may enhance the visual flow or cohesion upon this final review.
If adjustments are needed, approach them with the same careful planning and precision as the initial hanging to maintain the integrity of your wall and the safety of your pieces.
This step not only concludes the physical aspect of hanging art but also marks the moment where your vision comes to fruition, transforming a blank wall into a personal gallery that reflects your style and enhances your living space.
Following these steps on how to decorate a wall with high ceilings ensures that your high-ceiling wall is not just a vast expanse of empty space but an opportunity to showcase your artistic eye and create a visually stunning display.
Remember to have fun with the process and let your creativity shine through. With careful planning and attention to detail, you can turn any intimidating high wall into a captivating work of art. Happy decorating!
Tips for Balancing Scale and Color
When it comes to decorating a wall with high ceilings, the key is to balance scale and color. Here are some tips to keep in mind:
Mix Sizes:
As mentioned before, mixing different sizes of artwork or decorative elements can create a dynamic display and help balance out the vertical space. Consider a combination of large, medium, and small pieces for your arrangement.
Play with Colors:
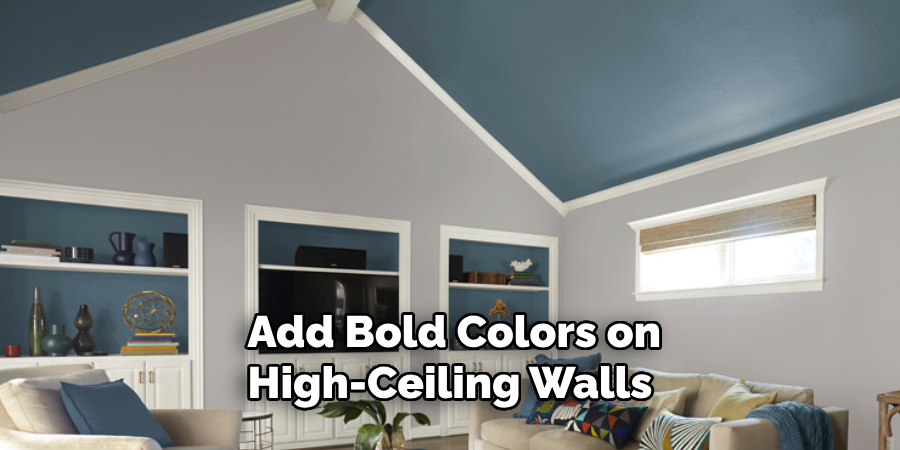
Don’t be afraid to add bold colors on high-ceiling walls. However, be sure to create a sense of cohesion by repeating these colors throughout the room in other decor elements such as pillows, rugs, or curtains.
Use Accent Colors:
Incorporating accent colors can also add visual interest to the space. Consider using a pop of color in your artwork or decorative elements to break up a monochromatic display.
Embrace Negative Space:
High-ceiling walls offer an excellent opportunity to play with negative space. Don’t feel like every inch needs to be filled. Leaving some blank space can provide a visual break and highlight the pieces you do have on display.
Frequently Asked Questions
Q1: Can I Hang Different Types of Decor, Such as Mirrors and Tapestries, Together on a High Wall?
A1: Absolutely! Mixing different types of decor can add texture and dimension to your display. Just be sure to maintain the same principles of balance and spacing discussed in this guide.
Q2: Are There Any Other Factors I Should Consider When Hanging Art on High Walls?
A2: Yes, lighting is an essential aspect to consider when displaying art on high walls. Make sure to position lights in a way that highlights your display and complements the overall aesthetic of the room. Additionally, considering the height of your ceiling, you may want to opt for adjustable lighting or hire a professional to install it.
Q3: Is There a Recommended Distance Between Pieces in an Arrangement on a High Wall?
A3: There is no specific rule for this as it will depend on the size and layout of your pieces. However, as a general guideline, aim for about two to three inches between pieces in an arrangement. This will provide enough space for each piece to stand out while maintaining a cohesive overall look.
Conclusion
Decorating walls with high ceilings can initially seem challenging, but it presents a unique opportunity to enhance the aesthetic appeal and character of your living space.
By considering factors such as the room’s lighting, the overall style, and the dimensions of the wall, you can choose decor strategies that will complement your home beautifully. Whether you opt for towering artworks, a dynamic gallery wall, elegant wallpaper, or striking large mirrors, the key lies in balancing scale, color, and composition to create a harmonious and inviting atmosphere.
Remember, the goal is not just to fill the space but to curate it thoughtfully, allowing each piece to contribute to the room’s overall ambiance and charm. With these tips and techniques on how to decorate a wall with high ceilings, your high-ceiling walls will no longer pose a decorating dilemma but instead offer a canvas for your creativity and style to shine.