
Are you looking for a way to get your printer drum clean and running smoothly? Cleaning your printer drum is an important part of keeping it in good working order and can help prevent costly jams, misprints, or other issues.
Printer drum cleaning is a simple process, but doing it correctly and regularly is important for the best results. Additionally, understanding the purpose and function of your printer drum can help you maintain it better and troubleshoot any problems that may arise.
Here’s a quick guide on how to clean printer drum so that you can continue to print with confidence. Discover the right tools, techniques, and steps for achieving the perfect clean while maintaining the highest possible quality from your machine!
What Will You Need?
Cleaning your printer drum requires a few tools and supplies you may already have. Here’s a quick list of items you’ll need to get the job done right:
- A clean, lint-free cloth
- Isopropyl alcohol or distilled water
- Cotton swabs (optional)
Once you have these items, you’re ready to start the cleaning process.
10 Easy Steps on How to Clean Printer Drum
Step 1. Turn Off Your Printer:
Safety first! Ensure your printer is turned off and unplugged from the power source before you begin cleaning. This helps prevent any electrical shocks and guarantees that you won’t accidentally damage any internal components while cleaning.
Step 2. Open the Printer Cover:
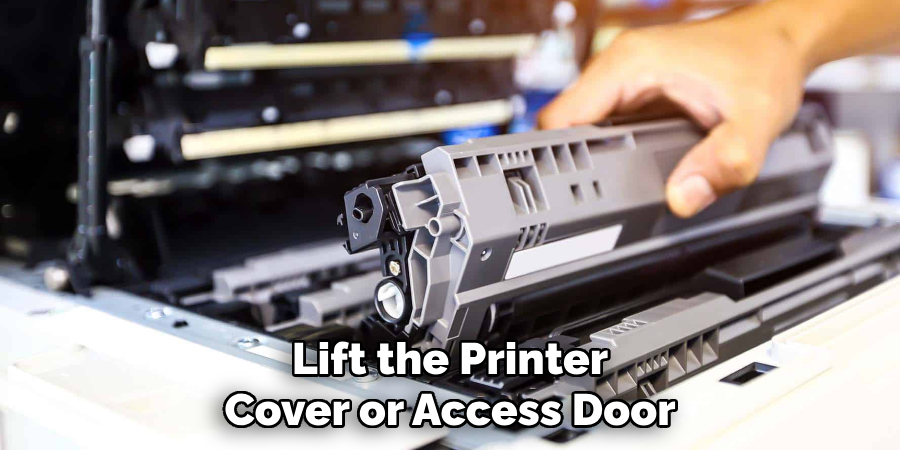
Lift the printer cover or access door. The location of the cover will vary depending on your printer model, but it’s usually at the top or front of the machine. This will allow you to access the printer’s internal components, including the drum. Take care not to touch anything inside yet—there’s a specific process to follow to avoid causing damage.
Step 3. Locate the Printer Drum:
The printer drum is typically located near the toner cartridge. Depending on your printer model, it’s a cylindrical or drum-shaped component that is separate or integrated with the toner cartridge. To find it, look for a usually shiny and metallic part. If you need help to identify it, refer to your printer’s manual or online resources for guidance. Remember, always handle the drum carefully to avoid damaging it.
Step 4. Remove the Drum and Toner Unit:
Carefully remove the drum and toner unit from the printer. Most models allow you to do this by unlatching or sliding out the unit. Avoid touching the drum surface with your hands, as oils can cause damage. Hold the unit by its sides or ends and place it on a clean, flat surface.
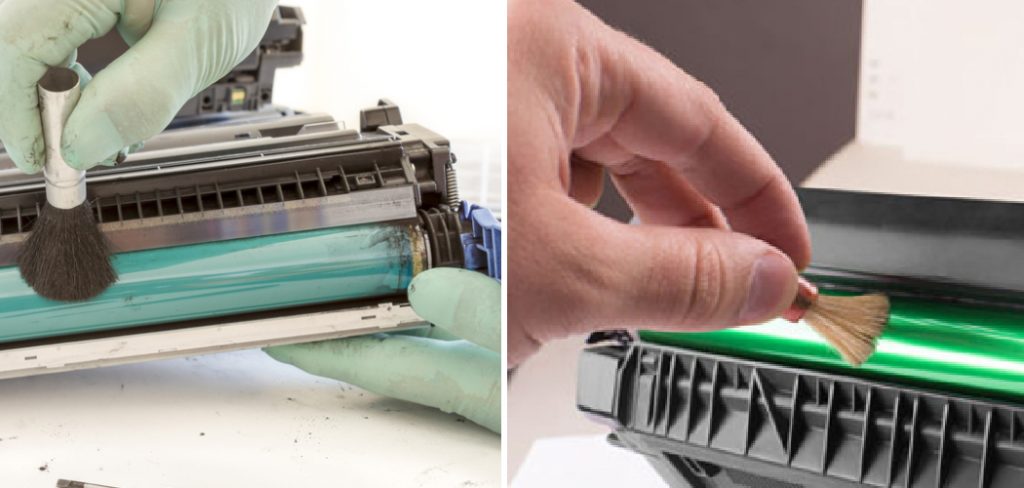
Step 5. Clean the Drum Surface:
Using your clean, lint-free cloth, gently wipe the surface of the drum. If the drum is dirty, lightly dampen the cloth with a small amount of isopropyl alcohol or distilled water. Do not saturate the cloth, as too much liquid could damage the drum. Be extremely careful not to scratch or damage the drum’s surface. You can use a cotton swab if there are small areas that your cloth can’t reach. Remember, the key is to be gentle and thorough.
Step 6. Dry the Drum:
After cleaning, it’s crucial to ensure the drum is dry before reinserting it into the printer. Pat it dry gently with a clean, lint-free cloth, ensuring no moisture remains. Do not use a hairdryer or any heating device to speed up the drying process; this could cause damage. Let it air dry if necessary. Accidental moisture on the drum could cause your printer to malfunction or create poor print quality.
Step 7. Reinsert the Drum and Toner Unit:
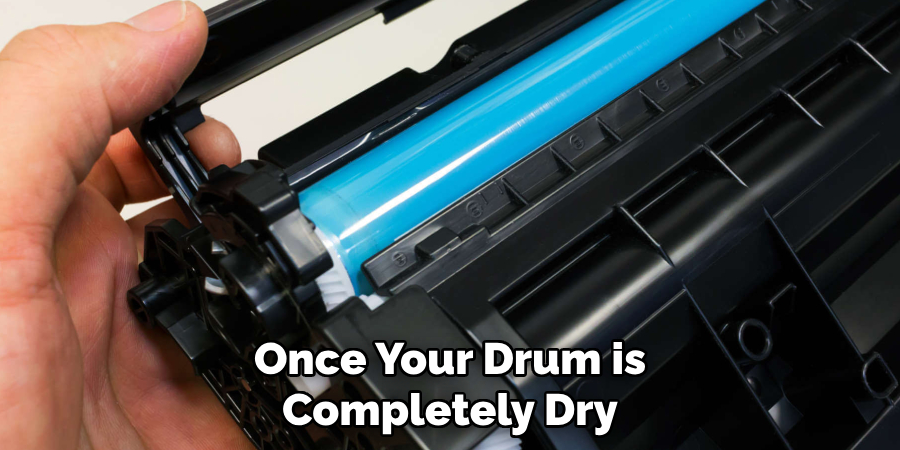
Once your drum is completely dry, it’s time to reinsert the drum and toner unit back into the printer. Carefully slide or latch the unit back into its original place, ensuring it is firmly and correctly positioned. Ensure not to force the unit into place, as this could cause damage. If you need help, refer to your printer’s manual or online resources for guidance.
Step 8. Close the Printer Cover:
After securing the drum and toner unit back in place, it’s time to close the printer cover or access door. Make sure it closes securely and completely; leaving it ajar might affect the performance of your printer or even lead to a printer error. If you need clarification, refer to your printer’s manual for instructions.
Step 9. Reconnect and Turn on the Printer:
After closing the printer cover, reconnect it to the power source and turn it on. It’s important to remember not to rush this step—give your printer a few moments to recognize the reinserted drum and toner unit. A quick self-diagnosis or cleaning process may occur, which is normal and necessary for optimal printing performance.
Step 10. Perform a Test Print:
The final step is to perform a test print. This ensures that the cleaning process is successful and that the printer drum is functioning correctly. If the print quality is satisfactory, you’ve successfully cleaned your printer drum! If not, you may need to repeat the process or consult a professional to ensure no damage was done during cleaning.
By following these ten easy steps, you can keep your printer drum clean and enjoy high-quality prints for years to come.
5 Additional Tips and Tricks
- Avoid Abrasive Materials: Do not use abrasive materials or cleansers when cleaning your printer drum. These can damage the drum’s surface, affecting print quality and potentially shortening the lifespan of the drum.
- Use Compressed Air: Compressed air can effectively remove dust and particles lodged in hard-to-reach places. Be sure to use it gently to avoid damaging any interior components.
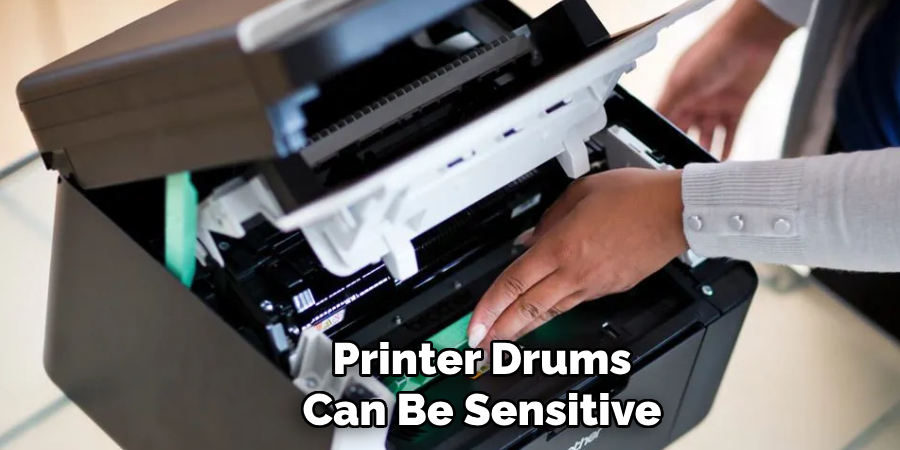
- Be Mindful of Static: Printer drums can be sensitive to static electricity. Always ground yourself by touching something metal before handling the drum to prevent static build-up.
- Handle with Care: The drum is a crucial part of your printer, and mishandling it can cause serious damage. Always pick it up by its sides and avoid touching the green or blue roller surface.
- Regular Maintenance: Regular cleaning helps keep the drum in good condition and can extend its life. Consider setting a reminder to clean your printer drum every 3-6 months, depending on usage.
With these additional tips and tricks, you can ensure your printer drum stays clean and in top working condition.
6 Things You Should Avoid
- Do Not Use Wet Cloths: Using a wet cloth might seem like a good idea to clean the drum, but the moisture can cause damage and lead to poor print quality. Only use dry, lint-free cloths when cleaning.
- Avoid High Temperatures: Never expose your printer drum to high temperatures. This can warp the drum and cause issues with print quality. Always store and clean your printer drum in a cool, dry place.
- Never Force It: If the drum seems stuck or difficult to remove, never force it. This can cause irreparable damage. If you need help, consult your printer’s manual or contact the manufacturer’s support line.
- Avoid Touching the Photosensitive Surface: The drum’s photosensitive surface is delicate. Touching it with your bare hands can lead to smudges or scratches, affecting print quality.
- Don’t Ignore Warning Signs: If your printer starts producing poor quality prints, pay attention to it. This is often a sign that your printer drum needs cleaning or replacing. Regular maintenance helps prevent these problems before they affect your work.
- Consider Professional Cleaning: If you need help cleaning your printer drum or feel uncomfortable doing it yourself, consider hiring a professional. They have the experience and equipment to safely and effectively clean your drum without causing any damage.
With these precautions, you’ll be able to maintain your printer drum’s longevity and ensure consistently high-quality prints.
Does the Drum Affect Print Quality?
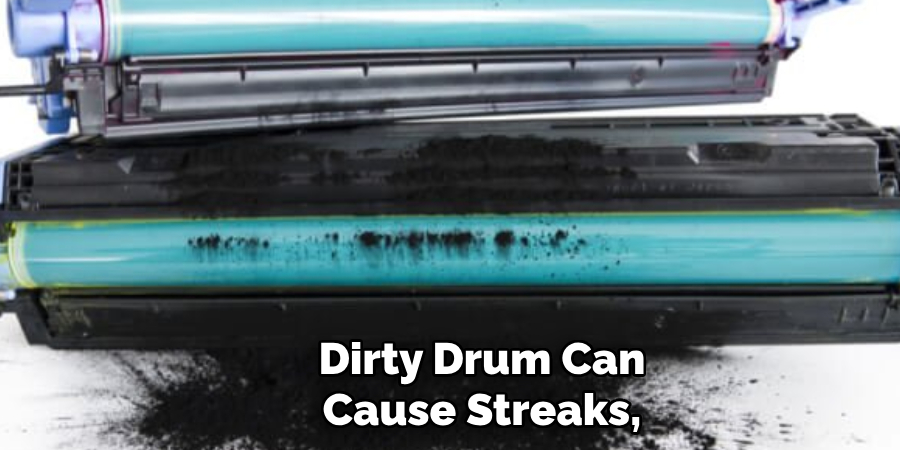
Absolutely! The drum is an integral part of the printing process, and any damage or buildup can significantly affect print quality. A dirty drum can cause streaks, smudges, and other imperfections on your prints, while a damaged drum can result in faded or distorted images.
Additionally, build-up on the drum’s surface can prevent proper toner transfer, leading to incomplete prints or blank spots. Keeping your printer drum clean and in good condition is key to producing professional-quality prints consistently.
Overall, the drum plays a crucial role in producing high-quality prints, and proper maintenance is essential for achieving optimal results.
Conclusion
Finally, with a few simple steps, you can easily clean your printer drum, ensuring that the output of your projects is never compromised.
Furthermore, a thorough cleaning from time to time will enhance the overall performance of your printer. You should use caution when dealing with parts that handle electricity and take extra care while handling toner. As always, read up on best practices before attempting any DIY project so you don’t regret it later!
Hopefully, the article on how to clean printer drum has helped you understand the importance of regular maintenance and provided useful tips to keep your printer drum in top working condition. With these techniques, you can prolong the life of your drum and maintain consistent, professional-quality prints for all your projects. Happy printing!