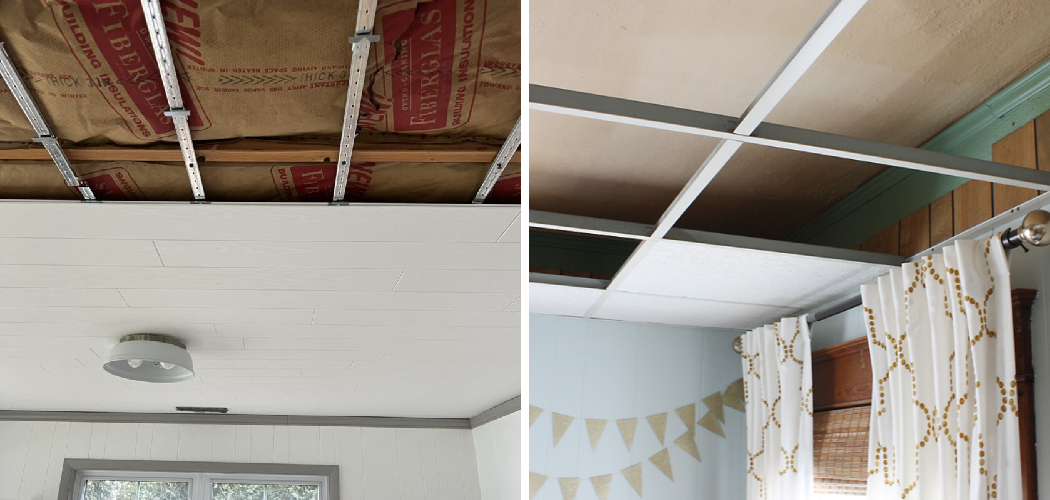
Changing a drop ceiling, also known as a suspended ceiling, can dramatically alter the appearance and feel of a room.

This guide is designed to lead you through the process of replacing old ceiling tiles with new ones, whether you’re looking to refresh an outdated look or need to replace damaged tiles. Drop ceilings are popular for their ease of installation and access to the overhead mechanical and electrical systems they conceal.
By the end of this guide on how to change a drop ceiling, you’ll have all the knowledge needed to give your space a fresh, updated look with minimal effort and expense.
What is a Drop Ceiling?
A drop ceiling is a secondary ceiling suspended below the structural ceiling of a room. It consists of a grid of metal tracks and lightweight tiles that can be easily removed and replaced. This type of ceiling is commonly used in commercial spaces, such as offices and retail stores, but it has become increasingly popular in residential settings as well.
You may also hear drop ceilings referred to as suspended ceilings, T-bar ceilings, or false ceilings. They provide a clean and modern look while also concealing unsightly overhead wires, pipes, and ductwork.
Why Change a Drop Ceiling?
There are several reasons why homeowners or property managers decide to change a drop ceiling. A primary motivation is aesthetic improvement. Over time, ceiling tiles can become discolored, stained, or outdated, affecting the overall look and feel of the room. Updating the tiles can instantly refresh the space, making it appear more modern and tailored to current interior design trends.
Secondly, functionality plays a significant role. A new drop ceiling can improve room acoustics, thermal insulation, and even fire resistance with the right materials. This is particularly beneficial in spaces where noise reduction is crucial, such as in home offices or media rooms.
Additionally, replacing a drop ceiling provides an excellent opportunity to access and upgrade the hidden mechanical, electrical, and plumbing systems. It allows for the easy integration of new technologies, such as smart lighting or advanced ventilation systems, without significant construction work.
Finally, for those concerned about health and safety, modern ceiling tiles made from non-toxic materials are available and designed to resist mold and moisture, creating a healthier indoor environment.
Upgrading a drop ceiling, therefore, not only enhances the aesthetic appeal of a space but can also contribute to its functionality, safety, and comfort.
Tools You Will Need
Before getting started on your drop ceiling project, gather all the necessary tools and materials. Here are some of the basic tools you will need:
Ladder or Scaffolding:

Depending on the size and height of your room, you may need a ladder or scaffolding to reach the ceiling. Make sure it is properly set up and stable before climbing on it.
Measuring Tape:
Accurate measurements are crucial for determining the amount of materials needed. Use a measuring tape to determine the dimensions of your room, including any irregularities or obstructions that may affect tile placement.
Pencil or Chalk Line:
Use these tools to mark guidelines on the ceiling for the placement of the new grid and tiles.
Utility Knife:
A sharp utility knife will be necessary for cutting ceiling tiles to fit around corners, light fixtures, and other obstructions.
Grid Punch:
This tool is used to create holes in the metal tracks of the drop ceiling grid for attaching wires and other components.
Tin Snips:
Tin snips are necessary for cutting metal tracks to the desired length.
Safety Equipment:
When working on any home improvement project, safety should always be a top priority. Make sure to wear protective gear, such as goggles and gloves, when handling tools or materials.
9 Easy Steps on How to Change a Drop Ceiling:
Now that you have all the necessary tools and materials let’s dive into the step-by-step process of changing a drop ceiling.
Step 1: Remove Old Tiles and Grid
The first step is to remove the old ceiling tiles and grid. Start by removing any light fixtures or other obstructions attached to the ceiling. Then, carefully remove each tile from the grid by pushing it up and sliding it out of place.
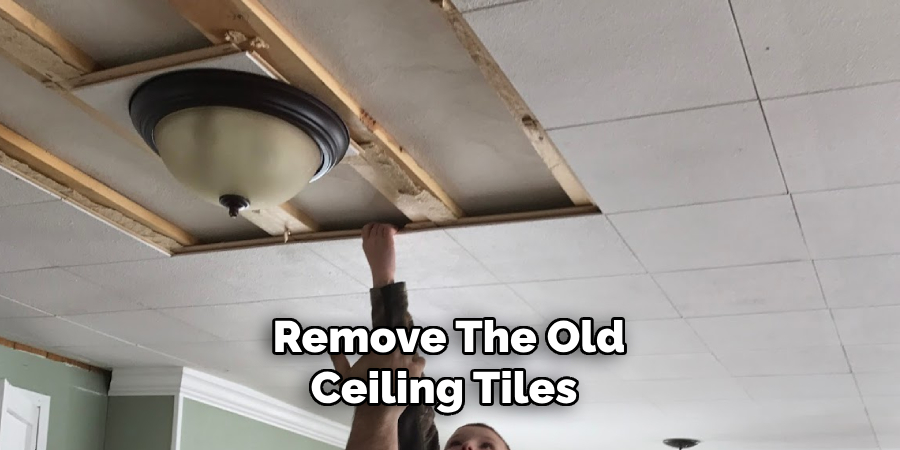
Next, use a pry bar or screwdriver to detach the metal tracks that make up the grid. Be cautious not to damage them, as they can be reused if in good condition.
Step 2: Prepare the Ceiling
Once the old grid and tiles are removed, it’s essential to prepare the ceiling for the new installation. If there is any damage to the ceiling or any protruding nails or screws, make sure to repair and smooth them out before proceeding.
You may also want to consider painting the ceiling before installing the new grid and tiles for a more polished look. But if you do decide to paint, remember to allow enough time for the paint to dry completely before moving on to the next step.
Step 3: Install the New Grid
Using your measuring tape and pencil or chalk line, mark guidelines on the ceiling for the new grid placement. Make sure to follow any building codes or regulations regarding ceiling height and spacing between grid lines.
The new grid can then be installed by attaching the metal tracks to the ceiling with screws or clips. Use a level to ensure that the grid is straight and even.
Step 4: Cut and Install Cross Tees
Next, cut the cross tees to fit between the main runners of the grid. These will help support the weight of the tiles and create a sturdy framework for the ceiling.
You may need to use tin snips to cut the cross tees to the correct length. Once cut, they can be easily snapped into place on the grid.
Step 5: Install Ceiling Tiles
With the grid in place, it’s time to start installing the new ceiling tiles. Begin at one corner of the room and work your way across, making sure the tiles fit snugly into the grid.
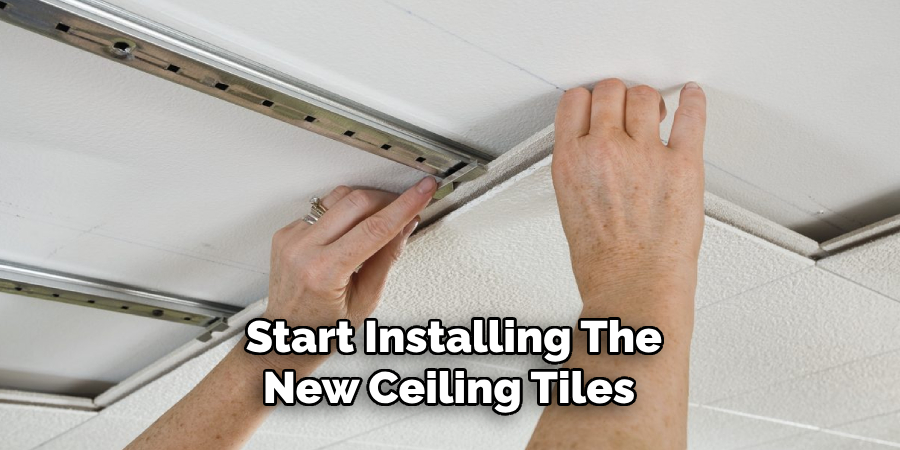
If necessary, use a utility knife to make any cuts for fitting around corners or obstructions. It’s also important to remember to leave room for any light fixtures or vents.
Step 6: Attach Light Fixtures
Once the majority of the tiles are installed, you can now attach any light fixtures or other obstructions. Follow the manufacturer’s instructions for proper installation and make sure to securely attach them to the ceiling grid.
It’s also a good idea to connect any wiring or other components before attaching the fixture to the ceiling. You may need to use a grid punch to create holes in the metal tracks for wires to pass through.
Step 7: Finish the Edges
To give your new drop ceiling a polished look, you can add edge trim around the perimeter of the room. This is especially useful if you have any uneven edges or gaps between the tiles and walls.
Simply cut the edge trim to fit and attach it to the grid using screws or clips. It’s a small but important step to complete the overall look of your new ceiling.
Step 8: Add Finishing Touches
With the main installation complete, it’s time to add any finishing touches to your new drop ceiling. This may include painting the grid or touching up any spots on the tiles.
You can also consider adding decorative elements, such as crown molding or lighting fixtures, to enhance the aesthetic appeal of the space. The possibilities are endless when it comes to personalizing your drop ceiling.
Step 9: Clean Up and Enjoy Your New Ceiling
Once everything is installed and in place, it’s time to clean up any debris and enjoy your newly transformed space. Take a step back and admire your handiwork – you’ve successfully changed a drop ceiling!
Remember to properly dispose of any old materials or recycle them if possible. And don’t forget to take some before and after pictures to showcase your hard work.
Following these steps on how to change a drop ceiling and using the right tools and materials will ensure a successful and professional-looking drop ceiling installation. Now, you can sit back, relax, and enjoy your newly improved space. Happy renovating!
Maintenance and Care Tips:
Proper maintenance and care of your new drop ceiling will ensure its longevity and keep it looking its best. Here are some essential tips to help you maintain your drop ceiling:
Regular Cleaning:

Dust and dirt can accumulate on ceiling tiles and in the grid system. Use a soft brush or vacuum with a brush attachment to gently remove dust from the tiles. For stains or spots, a damp cloth with mild soap can be used, but make sure the tiles are completely dry afterward to prevent damage.
Tile Replacement:
If a ceiling tile becomes damaged or stained beyond repair, it’s easy to replace. Simply push up the damaged tile and tilt it to remove it from the grid. Then, position the new tile and lower it into place.
Grid Maintenance:
Check the condition of the grid system periodically. If you notice any loose components or damage, make necessary repairs or tighten screws to ensure the grid remains secure and level.
Avoid Water Damage:
Water leaks can cause significant damage to ceiling tiles. If you notice any signs of water damage, such as discolored tiles or sagging, locate and fix the source of the leak before replacing the affected tiles.
Inspection for Mould:
In areas with high humidity, inspect the tiles for signs of mold or mildew. If mold is present, remove the affected tile and clean the area thoroughly with a mold-removal cleaner before replacing the tile.
Lighting Fixtures and Vents:
Ensure that any attached lighting fixtures or vents are securely fastened and not causing strain on the ceiling grid. Periodically check and tighten connections as needed.

By following these maintenance and care tips, your drop ceiling will remain an attractive and functional feature in your space for years to come.
Safety Considerations
When undertaking a project to change a drop ceiling, prioritizing safety is paramount. Here are some key safety considerations to keep in mind:
Ladder Safety:
Always use a stable, appropriately sized ladder to reach the ceiling. Ensure the ladder is on a firm, level surface, and follow the 4-to-1 rule for ladder placement (for every four feet of height, move the base one foot away from the wall).
Electrical Safety:
Before starting the installation process, turn off the power to any electrical circuits in the area. This is crucial when installing light fixtures or working near electrical wiring. Use a circuit tester to ensure that the power is indeed off.
Protective Gear:
Wear appropriate safety gear, including safety goggles to protect your eyes from debris, gloves to safeguard your hands, and a dust mask, especially when cutting tiles or working with insulation.
Heavy Lifting:
Be cautious when lifting heavy materials. Use proper lifting techniques, keeping your back straight and lifting with your legs, not your back. If necessary, enlist help for heavier objects to avoid strain or injury.
Falling Objects:
Be aware of the risk of falling objects. Securely fasten all components of the ceiling grid and tiles. When working with others, communicate clearly to avoid accidental injury from dropped tools or materials.
Tool Safety:
Use all tools according to the manufacturer’s instructions. Ensure that tools are in good working condition, and keep them safely stored when not in use to prevent accidents.
Chemical Safety:
If using adhesives, sealants, or cleaners, work in a well-ventilated area. Follow all manufacturer guidelines for use and disposal to avoid harmful exposure or environmental damage.
Adhering to these safety considerations not only helps in preventing accidents but also ensures that the project is completed efficiently and effectively. Always plan ahead and be prepared for any situation that might arise during the installation process.
Frequently Asked Questions
Q: Can I Change a Drop Ceiling Myself?
A: While it is possible to change a drop ceiling on your own, it can be a challenging and time-consuming task. It is recommended to have at least one other person to assist with the installation process, particularly when working with larger tiles or objects. You should also have prior experience and knowledge of using the necessary tools and materials.
Q: How Long Does it Take to Change a Drop Ceiling?
A: The time it takes to change a drop ceiling will vary depending on the size and complexity of the space, as well as your level of experience. On average, it can take anywhere from 2-4 days to complete the project. You should also factor in additional time for any necessary repairs or modifications to the existing structure.
Q: Do I Need Special Tools or Skills to Change a Drop Ceiling?

A: While some basic tools are required for changing a drop ceiling, such as a measuring tape, level, and utility knife, no special skills are necessary. However, it is essential to have proper safety gear and follow all manufacturer instructions for tools and materials.
Q: Can I Installrecessed Lighting on a Drop Ceiling?
A: Yes, recessed lighting can be installed in a drop ceiling. However, it is important to ensure that the grid system can support the weight of the lights and that the wiring is installed correctly for safety purposes. The assistance of a licensed electrician may be necessary for this type of installation.
Q: How Often Should I Replace My Drop Ceiling Tiles?
A: It is recommended to replace drop ceiling tiles every 5-10 years, depending on the condition and frequency of use. Regular maintenance and cleaning can help extend the lifespan of the tiles. You may also choose to replace tiles if they become damaged or discolored.
Q: Can I Use Different Types of Tiles for My Drop Ceiling?

A: Yes, there are various types of drop ceiling tiles available, including acoustic, decorative, and moisture-resistant options. It is essential to choose tiles that are compatible with your grid system and meet your functional and aesthetic needs.
Conclusion
Successfully changing a drop ceiling can dramatically transform any space, giving it a fresh and updated look. The process, while might seem daunting at first, can be accomplished with careful planning, the right tools, and a bit of patience.
From preparing the ceiling and installing a new grid to cutting the tiles and adding finishing touches, each step you take adds value and beauty to your room.
Remember, safety should always come first, ensuring not only a successful project completion but also your well-being throughout the renovation.
Whether it’s a home improvement project or a larger-scale renovation, the satisfaction of looking up at your new ceiling, knowing you did it yourself, is unmatched. We hope this guide on how to change a drop ceiling has provided you with the confidence and knowledge to tackle your drop ceiling project head-on. Happy renovating!