
Do you need to cap a basement floor drain in your home? This task can seem daunting – where do you start and what tools do you need? Don’t worry. We have the answers in this blog post! We’ll explain how to properly cap a basement floor drain with clear instructions and helpful images. Having the right steps followed for this important job is essential; it will save time, money and headaches by avoiding potential problems due to improper installation.
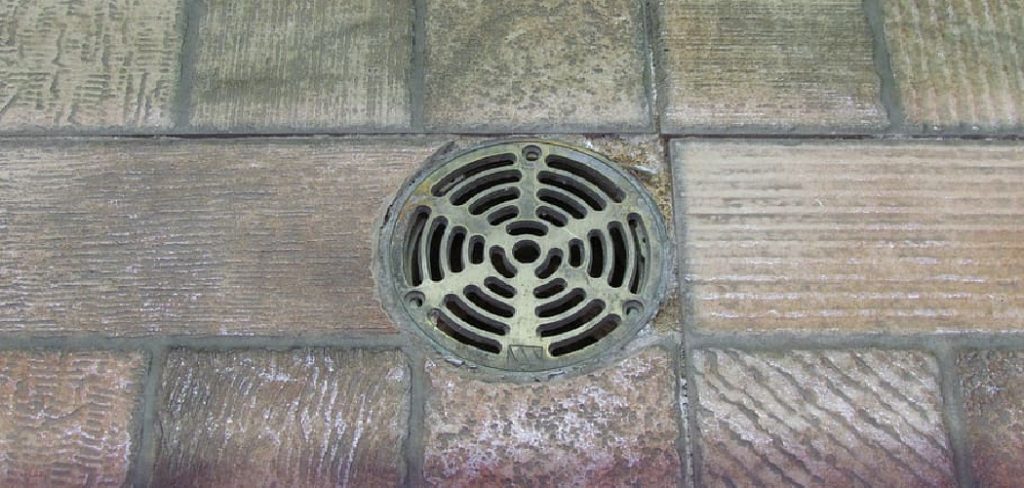
Whether you’re renovating your basement or simply replacing a damaged floor drain, capping it off is an important task that should be done correctly. Let’s dive into the steps to cap a basement floor drain.
Read on for all of the information you need about how to cap a basement floor drain!
What Will You Need?
Before you get started, make sure you have the following tools and materials on hand:
- Safety gloves
- Screwdriver or drill
- Pipe cutter or hacksaw
- Cap or plug suitable for your drain size and type
10 Easy Steps on How to Cap a Basement Floor Drain
Step 1: Prepare the Area
First, it’s important to make sure the area around the floor drain is clear. Remove any debris or objects that may obstruct your work. If the drain has water in it, use a small bucket or towels to remove it.
Step 2: Choose the Right Cap
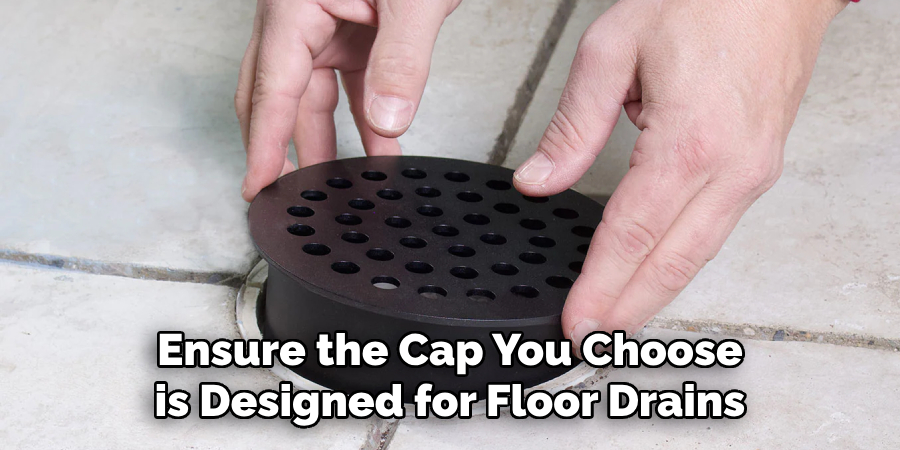
Now, you must choose the right drain cap or plug. The size and type of your drain will determine what kind of cap you need. This could be a twist-in, push-in, or screw-in cap. You can find these at your local hardware store or online. Ensure the cap you choose is designed for floor drains and fits your particular drain snugly to prevent leaks.
Step 3: Remove the Old Drain Cover
Using your screwdriver or drill, carefully unscrew any fasteners holding the old drain cover in place. Lift the cover off and set it aside. Be sure to handle this part of the procedure carefully, as the drain cover may be rusted and brittle. If it’s difficult to remove, you may need some lubricant or WD-40 to ease the process.
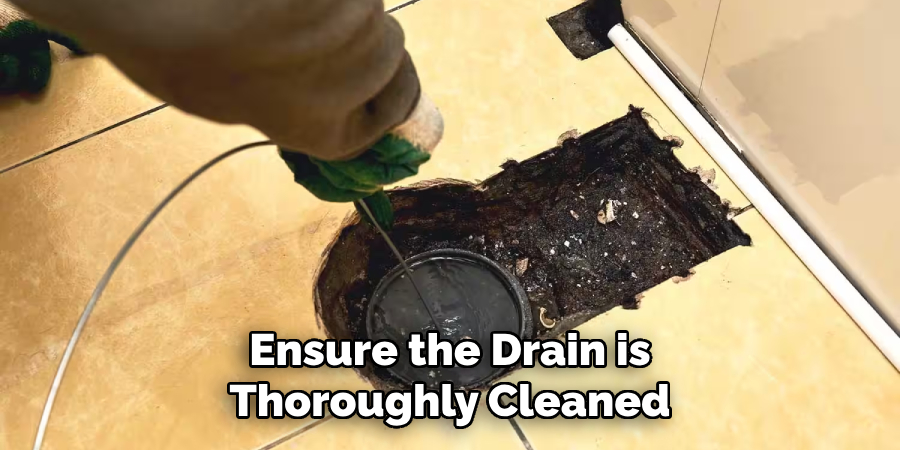
Step 4: Clean the Drain Opening
Before installing the cap, cleaning the drain opening thoroughly is important. This will ensure a tight seal and prevent any future leaks. Use an old toothbrush or a small wire brush to remove dirt or grime. After scrubbing, rinse the area with warm water and allow it to dry completely.
Step 5: Fit the Cap
It’s time to fit the cap once the drain is clean and dry. The installation process will differ depending on the type of cap you’ve chosen. For a twist-in cap, simply insert it into the opening and twist until it’s tight. For a push-in cap, align it with the opening and push until it’s secure. If you’re using a screw-in cap, you’ll need to screw it into place using your screwdriver or drill.
Step 6: Check for Leaks
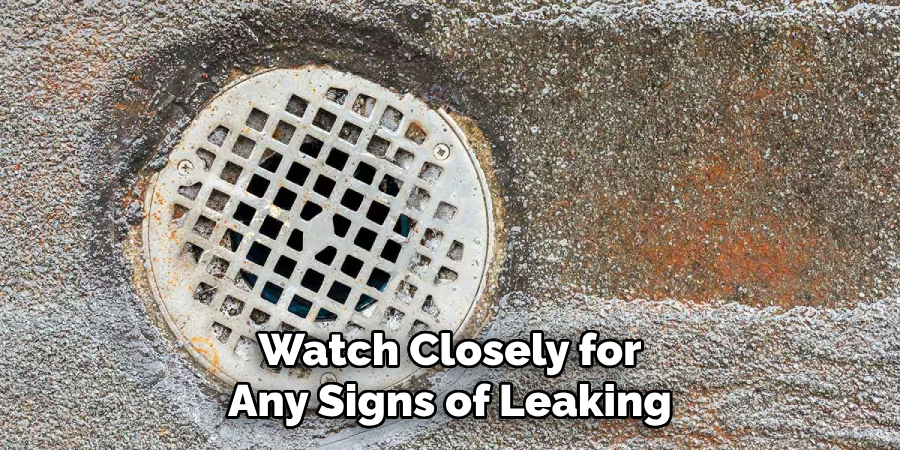
Now that your cap is securely in place, it’s time to check for potential leaks. Pour some water around the drain cap and watch closely for any signs of leaking. If you notice any water seeping out from underneath the cap, it’s a sign that the cap is not fitted properly or is not the correct size. If this happens, you must adjust the cap or consider getting a different size.
Step 7: Secure the Cap
To further secure the cap and ensure a watertight seal, consider applying a waterproof sealant around the edges of the cap. This will help to prevent any future leaks and keep your basement dry. Allow the sealant to dry according to the manufacturer’s instructions before proceeding to the next step.
Step 8: Test the Drain
After completely dries the sealant, it’s time to test your new cap. Pour a generous amount of water over the cap and watch to see if any leaks occur. If the water drains away without any leakage, then your cap is properly sealed.
Step 9: Clean the Area
Now that your basement floor drain is successfully capped, it’s time to clean up. Wipe down the area surrounding the drain to remove any dirt or debris that may have fallen during the process. This is also the perfect time to dispose of the old drain cover properly, as it is no longer needed.
Step 10: Regular Maintenance
Now that the capping process is complete, regular inspection and maintenance of your capped drain is key to ensure a long-lasting, trouble-free seal. Check the drain periodically for any signs of leaks, and reapply the waterproof sealant as needed. Remember, maintaining your capped drain can prevent potential flooding and save you from costly water damage in the future.
By following these simple steps, you can easily cap a basement floor drain and ensure a watertight seal. It’s an important task that will help keep your basement dry and prevent potential problems.
5 Additional Tips and Tricks
- Ensure the Drain is Clean: Before you begin capping a basement floor drain, ensure the drain is thoroughly cleaned to avoid trapping any dirt or debris.
- Measure the Drain Opening: The drain opening size may vary, so it’s important to measure it accurately before purchasing a cap. This way, you can ensure the cap will fit securely and effectively.
- Secure the Cap Firmly: Once the right size of the cap is chosen, it should be secured firmly to prevent any leakage. This is particularly important in case of any sudden water overflow.
- Regular Inspection & Maintenance: Even after capping the drain, regular inspection is necessary to check for any leaks or damages in the cap. This ensures the drain remains effectively sealed over time.
- Seek Professional Help if Needed: If you need clarification on any step in the process or if the drain seems unusually complex, feel free to seek professional help. It’s better to invest in professional services than to risk causing damage to your drain or basement.
With these additional tips and tricks, you can effectively cap your basement floor drain and prevent any potential flooding or unpleasant odors.
5 Things You Should Avoid
- Avoid Using Incorrect Tools: Using the wrong tools can damage the drain and the cap. Ensure you have the correct tools for the task before you begin.
- Do Not Neglect Safety Precautions: Always prioritize safety when dealing with basement floor drains whether wearing protective gloves or ensuring the area is well-ventilated.
- Avoid Using a Cap of the Wrong Size: A cap that is too large or too small will not effectively seal the drain, leading to potential leaks and other issues. Always measure the drain opening accurately to get the correct size.
- Avoid Skipping Regular Maintenance: Regular maintenance is key to keeping your drain and cap in good condition. Pay attention to this crucial step.
- Don’t Ignore Persistent Problems: If problems persist despite your efforts to cap the drain, it may be a sign of a larger issue. Don’t ignore these signs; instead, consult a professional to avoid further damage.
Avoiding these common mistakes will ensure a successful and long-lasting cap for your basement floor drain. Remember always to take the necessary precautions and follow proper procedures to keep your basement dry and functional.
How Do You Stop Water Coming Up Your Floor Drain?
If water is unexpectedly coming up through your floor drain, it could be a sign of a clogged or damaged pipe. You may need to unclog the drain using a plunger or call a professional for help.
Regular maintenance and cleaning are key to preventing water from coming up your floor drain in the future. This includes ensuring the drain cover is securely in place and regularly checking for any signs of clogging or damage. Additionally, avoid pouring grease, oil, or other substances down the drain, as these can build up and cause blockages.
In some cases, installing a backwater valve may also help prevent water from entering your floor drain. This device allows water to flow out but prevents it from returning, acting as a barrier against potential floods. Consult a professional to determine if a backwater valve is necessary for your basement floor drain.
By following these tips and being proactive in maintaining your basement floor drain, you can effectively prevent water from coming up through the drain and protect your home from potential damage.
Conclusion
In conclusion, providing the proper waterproofing and protection to cap a basement floor drain is an important part of household maintenance. Capping a basement floor drain is necessary to ensure that harmful water and bacteria don’t enter your home, leading to possible flooding or illnesses. If done correctly, you can rest easy knowing that the integrity of your basement floor drain and your home is well protected.
All you need are the right materials and some elbow grease, and you should have little trouble successfully capping off your basement drain. It’s always best to contact a professional for additional advice or assistance if in doubt.
Hopefully, the article on how to cap a basement floor drain has provided you with all the necessary information and tips to successfully cap your drain, as well as avoid common mistakes. Happy capping!