Do you want to avoid cluttered countertops and limited storage space in your kitchen? Floating shelves are a great solution to add extra storage and display space without taking up much room.
Floating shelves are a sleek and modern addition to any kitchen, offering style and functionality. Unlike traditional shelving that requires visible brackets, floating shelves are mounted to conceal their support, creating a clean and minimalist look. Not only do they provide a practical storage solution, but they also allow for decorative displays, enhancing the overall aesthetic of your kitchen space.

This guide will walk you through the essential steps on how to build floating shelves in kitchen. Whether you’re a seasoned DIY enthusiast or a beginner, creating your own floating shelves can be a rewarding project that adds a personal touch to your kitchen.
What Will You Need?
Before building, gather all the necessary materials and tools to ensure a smooth process. Here’s a list of items you’ll need:
- Wood boards (preferably hardwood such as oak or maple)
- Wall anchors
- Drill
- Level
- Screws
- Measuring tape
- Stud finder
- Sandpaper
- Wood stain or paint (optional)
Make sure to choose high-quality wood that is strong enough to support the weight of your desired items. You can also add a personal touch by selecting different wood finishes or painting them in colors that complement your kitchen décor.
10 Easy Steps on How to Build Floating Shelves in Kitchen
Step 1: Measure and Mark the Wall
First, use the measuring tape to carefully measure where you want to install the floating shelves. Determine the length and the height of the shelves, keeping in mind any appliances or cabinets that might influence their placement. Consider your kitchen’s overall layout and balance to decide on the best location for your shelves. Once you have your measurements, use a pencil to lightly mark the spots on the wall where the supports will be installed.

These marks will guide you during installation, so ensure they are level and equally spaced. Using a level, draw a straight, horizontal line to guide positioning the bracket. This will help you maintain accuracy as you align the shelf support structures. Make sure your markings account for the thickness of the shelf so the final placement delivers the intended aesthetic look.
Step 2: Locate Wall Studs
Using the stud finder, carefully locate the studs behind the wall where you plan to mount the shelves. Studs provide the necessary support for your floating shelves, ensuring they can safely hold the weight of items. Pass the stud finder along the wall where you marked your measurements, listening for beeps or watching for lights that signify the presence of a stud. Mark the location of each stud with a pencil, making sure to do this for every spot that aligns with your intended shelf placement. Aligning your shelf brackets with wall studs will provide the strongest support for your floating shelves.
Step 3: Install the Brackets
Once you have marked the location of the wall studs, it’s time to install the brackets that will support your floating shelves. Begin by aligning the brackets with the pencil marks that indicate the position of the studs. Hold the bracket against the wall, ensuring it is vertically straight with a level. Pre-drill holes into the wall through the bracket’s screw holes, then fasten the bracket securely using the appropriate screws. Make sure each bracket is tightly attached to the wall, as they will bear the load of your shelves and any items you place on them.
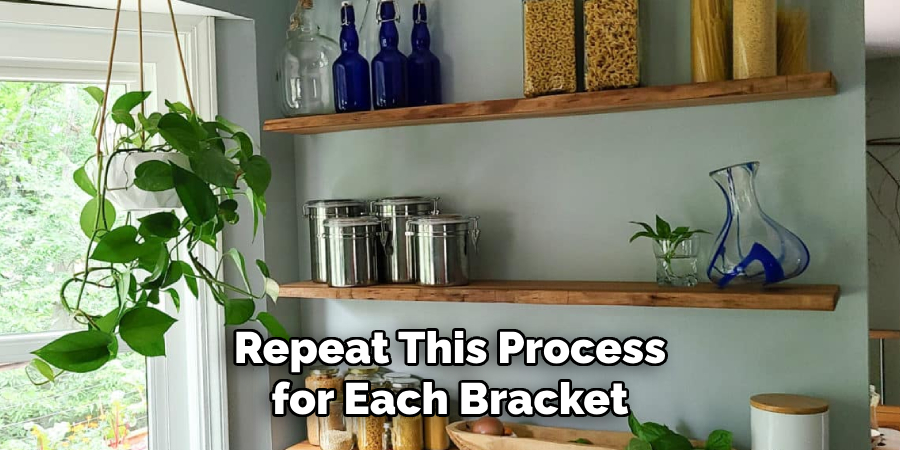
Repeat this process for each bracket, double-checking their alignment before proceeding to ensure your shelves will be level. Installing the brackets properly is crucial for the stability and safety of your floating shelves.
Step 4: Prepare the Wood Boards
With the brackets securely in place, it’s time to prepare the wood boards that will serve as your floating shelves. Start by cutting the boards to the desired length using a saw, ensuring that the length fits the space you measured earlier. Once the boards are cut to size, use sandpaper to smooth out any rough edges or surfaces, which will help prevent splinters and improve their finish. If you have chosen to stain or paint the wood, now is the time to apply your chosen finish.
Follow the manufacturer’s instructions regarding drying times and application methods to achieve the best results. Allow the boards to dry completely before proceeding to the next step. Preparing the wood boards carefully will contribute to a polished and professional look for your floating shelves.
Step 5: Mount the Shelves
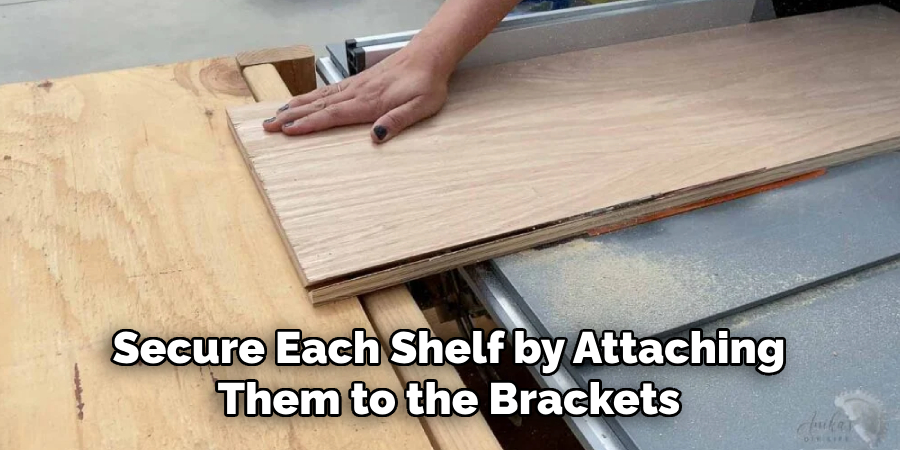
With the wooden boards prepared and dried, you can now mount them onto the brackets installed on the wall. Carefully align the boards with the brackets, ensuring each board is centered and level before proceeding. Gently slide each board onto the bracket pegs and double-check the alignment with the level to confirm they remain horizontally straight. Secure each shelf by attaching them to the brackets, using wood screws if necessary to keep them steady and reduce movement. Properly mounting the shelves will guarantee their stability and enhance the aesthetic appeal of your kitchen.
Step 6: Load Your Shelves
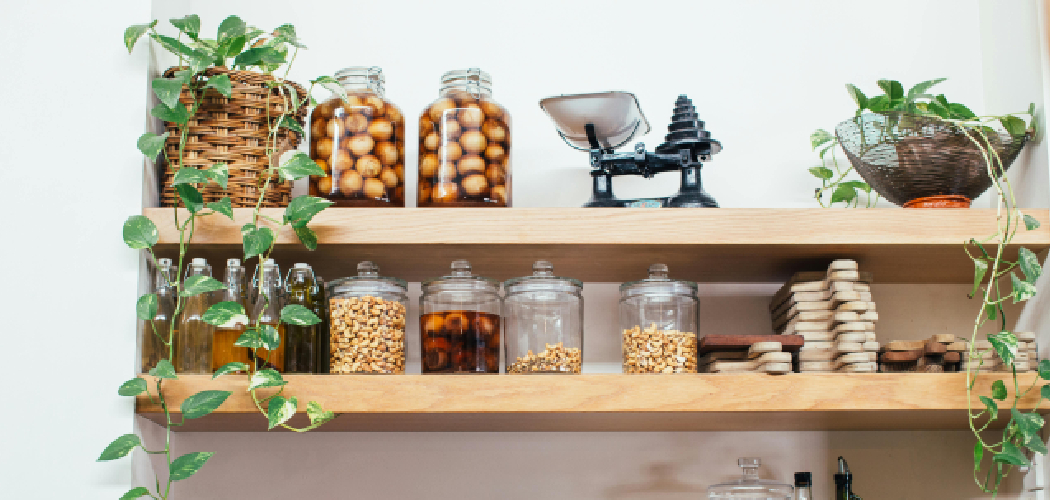
After successfully mounting your floating shelves, it’s time to start loading them with the items you wish to display or store. Begin by placing lighter decorative items, such as small plants, cookbooks, or decorative jars, towards the ends to prevent imbalanced weight distribution. Centrally position heavier items like pots, pans, or appliance components directly over or near the wall brackets for the sturdiest support. As you organize, keep an eye on the overall aesthetic to maintain an uncluttered and pleasing look. Periodically check that the shelves maintain their level and that no items are causing them to tilt or sag.
Distributing weight evenly across your floating shelves will not only ensure they function correctly but will also add to the stylish organization of your kitchen.
Step 7: Adjust and Secure
Once you have loaded your shelves with various items, it’s essential to give them a final check to ensure everything is safe and secure. Begin by gently pushing down on the shelves in different areas with your hand to feel if they remain firmly in place. Watch for any signs of instability, such as wobbling or sagging. Tighten any screws or adjust the alignment of the shelves as needed to correct these issues. Use additional brackets or supports to enhance stability, particularly for heavier load-bearing shelves. This final adjustment step is crucial for both the safety of your kitchen items and the longevity of the floating shelves.
Step 8: Personalize the Display
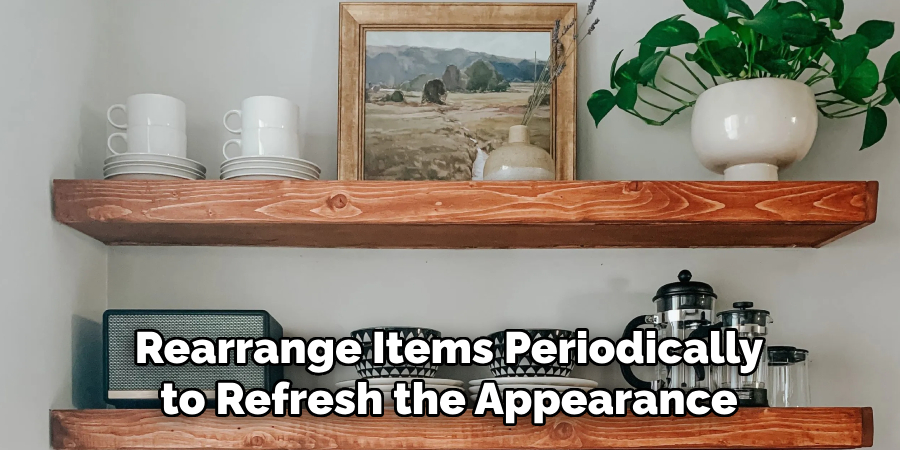
Now that your floating shelves are securely installed and loaded, it’s time to personalize the display to reflect your style and taste. Start by considering your kitchen’s color scheme and decorative theme and select items that complement this aesthetic. Use a mix of functional and decorative pieces, such as colorful dishware, framed photos, and artisanal vases, to add visual interest—experiment with the arrangement, varying the height and spacing of items to create a dynamic look.
Consider using plants or fresh herbs to introduce a natural element and brighten the space. Rearrange items periodically to refresh the appearance of your kitchen and keep the display engaging. Personalizing your floating shelves allows you to express your personality while maximizing both style and utility in your kitchen.
Step 9: Maintenance and Care
Regular maintenance and care are essential to ensure your floating shelves continue to look great and function well. Dust the shelves frequently using a soft, lint-free cloth to keep them looking clean and to prevent buildup that could dull their appearance. Be mindful of any spills or stains; clean these immediately with a gentle, damp cloth followed by a dry cloth to prevent moisture damage. Periodically reassess the weight distribution of the items on your shelves, adjusting them if necessary to avoid placing too much stress on any area.
Check the brackets and screws for tightness, and resecure them if needed to maintain stability. By incorporating these simple maintenance routines, you will prolong the life and beauty of your floating shelves, ensuring they remain a valuable and attractive feature in your kitchen.
Step 10: Enjoy Your New Setup
With all the installation, organization, and personalization complete, it’s time to enjoy your beautifully arranged floating shelves. Take a moment to appreciate the enhanced functionality and aesthetic appeal these shelves bring to your kitchen. Relish how they effectively utilize your wall space while adding a touch of contemporary style. Remember, your kitchen shelves tell a story about who you are, reflecting your practical needs and personal tastes. Share your innovative setup with friends and family, and enjoy the compliments on your eye for design.
By following these ten simple steps, you can seamlessly install and personalize your floating shelves, transforming your kitchen into a functional and fashionable space.
Conclusion
How to build floating shelves in kitchen can dramatically enhance both its style and functionality, providing a sleek, modern look while optimizing wall space for storage and display.
By following the outlined steps, you ensure a systematic approach that begins with careful planning and material acquisition, progresses through precise installation and load distribution, and ends with personal touches that express your individuality.
Whether you’re showcasing cherished items or efficiently storing kitchen essentials, floating shelves offer a versatile and appealing solution that enhances your culinary space’s overall aesthetic and usability.