Building a linen closet can significantly enhance the functionality and organization of your home. A dedicated linen closet provides a specific space for storing towels, bedding, and other linens, which helps in keeping them neat, accessible, and well-organized. This means no more searching for a specific item through random closets or drawers.

Moreover, a linen closet is a fantastic space-saving solution, allowing you to maximize your storage without cluttering your living areas. This article will guide you through the essential steps on how to build a linen closet, covering everything from selecting the right materials to the actual construction process. By the end of this guide; you will be equipped with all the knowledge needed to create your own efficient and organized linen closet.
Planning Your Linen Closet
Assessing Your Space
Before you begin building your linen closet, assessing the space where it will be constructed is crucial. Start by measuring the area to determine the exact dimensions available for your new closet. Accurate measurements are essential to ensure that your design will fit perfectly within the designated spot. Next, consider the best location for your linen closet. Common choices include hallways, bathrooms, or laundry rooms. The ideal location should be easily accessible from bedrooms and bathrooms, where linens are most frequently used.
Designing the Layout
Once you have assessed your space, move on to designing the layout of your linen closet. Begin by deciding on the overall dimensions of the closet, keeping in mind the available space and storage needs. Think about the shelving configuration that will most effectively suit your needs. Adjustable shelves can provide greater flexibility for different types of linens.
Additionally, consider incorporating special features such as drawers, baskets, or pull-out shelves to enhance organization and accessibility. Built-in drawers can be useful for storing smaller items like hand towels and washcloths, while baskets can be handy for larger, bulkier items. Carefully planning the layout and features of your linen closet will ensure that it meets all your storage needs efficiently.
Materials and Tools Needed
Materials
To build your linen closet, you will need the following materials:
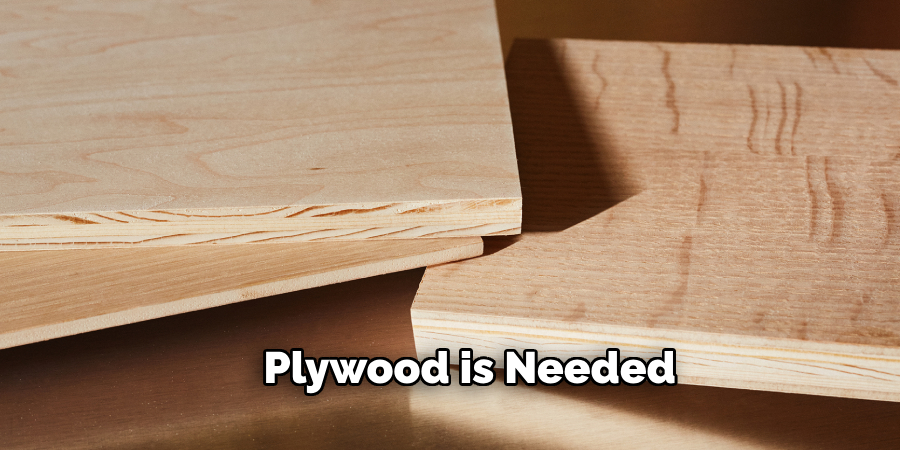
- Plywood or solid wood for shelves
- 2×4 lumber for framing
- Drywall or backer board for the walls
- Screws and nails
- Hinges for the door(s)
- Paint or wood stain
- Primer (if painting)
- Wood glue
- Handles or knobs for the door(s)
- Shelf brackets (if needed)
When choosing materials, consider eco-friendly options such as sustainably sourced wood or low-VOC paints and stains. Budget-friendly alternatives like pre-fabricated shelves can also be a great choice while still providing good quality and durability.
Tools
The essential tools you will need include:
- Saw (circular saw or hand saw)
- Drill and drill bits
- Measuring tape
- Level
- Screwdrivers
- Hammer
- Stud finder
- Sandpaper or a sander
- Paintbrushes or rollers
Optional tools that can make the job easier are a power sander for quicker sanding, a nail gun for faster assembly, and a multi-tool for precision cuts and adjustments. Having these tools can significantly streamline the construction process and enhance the final result.
How to Build a Linen Closet: Installing Shelves and Dividers
1. Measuring and Cutting Shelves
Accurate measurements are crucial before you start installing shelves in your linen closet. Begin by measuring the width and depth of the closet’s interior frame where the shelves will be placed. Use a measuring tape to get precise dimensions. Mark these measurements on the plywood or solid wood you have chosen for the shelves. A circular saw or hand saw can be used to cut the wood to the measured size. When cutting the shelves, ensure that your measurements account for any supports or brackets that will be used to hold the shelves in place.
When selecting shelf materials, consider durability and weight capacity. Plywood is a popular choice due to its strength and ease of handling, but solid wood can offer a more aesthetic finish and greater durability. If you opt for pre-fabricated shelves, make sure they match the dimensions of your space for a seamless fit.
2. Installing Shelves
Once your shelves are cut to the correct size, it’s time to install them into the frame of your linen closet. There are several methods for securing shelves, such as using brackets or cleats.

If you opt for shelf brackets, start by marking the desired height for each shelf on the closet walls. Use a level to ensure the brackets will be perfectly horizontal. Attach the brackets to the wall studs using screws to guarantee a secure hold. Place the shelf on the brackets and screw it in place for added stability.
For a more streamlined look, consider installing cleats. Cleats are wooden strips attached to the closet walls at the height where the shelves will sit. Mark the cleat positions on the wall and use a stud finder to locate the wall studs. Attach the cleats to the studs, ensuring they are level. Once the cleats are secured, simply rest the shelves on top of them, and attach the shelves to the cleats with screws or wood glue for additional support.
3. Adding Dividers
Dividers can significantly enhance the organization within your linen closet by creating smaller compartments for different types of linens. To install dividers, start by measuring the height and depth of each shelf where a divider will be placed. Mark these measurements on your wood or plywood and cut the dividers to size using a saw.
When installing the dividers, ensure they are aligned and stable. Mark the positions of the dividers on your shelves. Apply wood glue to the bottom and sides of each divider and place them along the marked lines. For added stability, you can reinforce the dividers with small screws or nails. If you prefer a removable option, consider installing adjustable tracks or slots on the shelves, allowing the dividers to be repositioned as needed. Properly installed dividers will help keep your linens well-organized and easy to access.
Adding Doors and Hardware
Selecting Doors

When choosing doors for your linen closet, there are several styles to consider, each with its own set of benefits. Sliding doors are ideal for spaces where you need to save on floor space, as they do not swing outwards. They work smoothly on a track system and are perfect for narrow hallways. Hinged doors are a classic choice and provide easy access to the entire closet; however, they require more clearance to open fully.
Bifold doors offer a compromise between the two, folding in on themselves and taking up less space when opened than hinged doors. When selecting the right door for your space, consider the available room for opening the door, the aesthetic match with your room’s decor, and the ease of use.
Installing Doors
To install your chosen doors, begin by assembling any necessary frames or tracks. Install the top and bottom tracks for sliding doors according to the manufacturer’s instructions, ensuring they are level and properly aligned. For hinged doors, attach hinges to the door first and then mark corresponding locations on the closet frame. Position the door and secure the hinges, checking for even spacing. Attach the pivots and brackets to both the door and frame for bifold doors, ensuring everything is aligned before hanging the doors.

Position the doors carefully, adjusting for a level fit. Use a spirit level to ensure the door hangs straight and true. Adjust any hardware as needed, checking that the doors open and close smoothly without sticking or scraping.
Adding Hardware
Selecting proper hardware enhances both the functionality and appearance of your linen closet. Choose handles, knobs, and hinges that complement your room’s decor and match the type of doors you’ve installed. When installing handles and knobs, use a template or measuring guide to position the hardware consistently across all doors. Drill pilot holes before inserting screws to avoid splitting the wood.
For hinges, ensure they can support the weight of the door adequately. Align the hinges perfectly with the hinge plates on the door and frame—small misalignments can cause the door to hang improperly. Secure the hinges with screws, tightening them firmly but not overly so, to avoid stripping the screws or damaging the wood. Properly aligned hardware ensures your linen closet project’s seamless and professional finish.
Finishing Touches
Sanding and Painting
To achieve a polished and professional look in your linen closet, begin by sanding the wood surfaces. Use medium-grit sandpaper (120-150 grit) to smooth out any rough areas, then follow up with fine-grit sandpaper (220 grit) for a silky finish. Be sure to sand along the wood grain to avoid scratches. After sanding, wipe down all surfaces with a damp cloth to remove any dust particles.
Choose a finish that complements your room’s decor when it comes to painting or staining. If painting, apply a primer first to ensure the paint adheres well. Once the primer is dry, use a high-quality paintbrush or roller to apply the paint, using even strokes to avoid streaks. For staining, apply a wood conditioner to prevent botching, then use a brush or cloth to apply the stain, wiping off any excess. Allow the paint or stain to dry thoroughly between coats, and finish with a clear sealant for added durability.
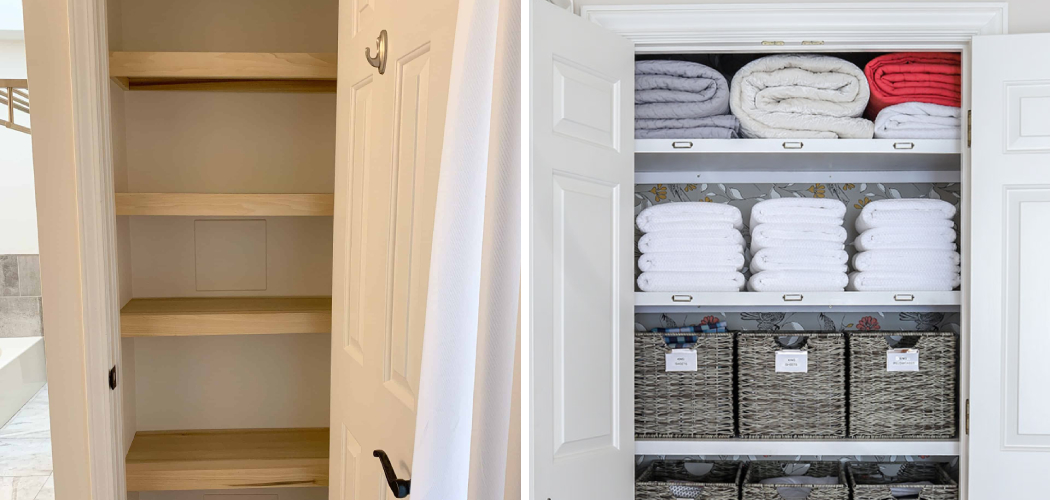
Adding Organizational Accessories
Enhance the functionality of your linen closet with organizational accessories such as baskets, bins, and shelves. Choose storage containers that fit neatly on your shelves and match your aesthetic. Woven baskets add a rustic charm, while clear plastic bins allow you to see their contents easily.
Maximize space by using stackable bins and tiered shelf organizers. Label each container to keep items easily accessible. Installing hooks or small rods inside the closet door can create additional storage for items like cleaning supplies or small linens. Consider using pull-out drawers or wire baskets for smaller items, ensuring that everything has its place. Proper organization not only keeps your linen closet tidy but also makes it a breeze to find exactly what you need.

Conclusion
Building a linen closet involves several key steps that culminate in a highly functional and personalized storage space. Starting with planning and measuring, you can create efficient compartments using well-placed dividers. Selecting and installing the right type of doors—sliding, hinged, or bifold—ensures easy access while preserving space. Adding hardware such as handles, knobs, and hinges enhances both functionality and appearance. Lastly, finishing touches like sanding, painting, and installing organizational accessories complete the project with a polished look.
The benefits of a custom-built linen closet include optimized storage tailored to your specific needs and a cohesive look that matches your room’s decor. This project allows you to keep your linens well-organized and easily accessible, reducing clutter and stress. By following these steps on how to build a linen closet, you can take pride in a job well done and enjoy the long-lasting benefits of a neatly organized space.