
Floating vanities are a modern innovation in bathroom design, rapidly gaining popularity due to their sleek and contemporary appearance. These vanities are mounted on the wall without any legs or visible support, creating an illusion of more space and offering easy access for cleaning underneath. The benefits of floating vanities extend beyond aesthetics; they provide practical advantages such as saving floor space, making small bathrooms appear larger, and offering customizable height for ergonomic use.

When considering how to install floating vanity, the process involves several key steps: careful preparation and planning, secure mounting, and meticulous finishing touches. Properly installing a floating vanity not only enhances the functionality of your bathroom but also elevates its style. Understanding and following each step ensures that your floating vanity is both secure and visually stunning.
Preparation and Planning
Before diving into the installation process, meticulous preparation and planning are crucial for a successful outcome. Start by measuring the wall space where the floating vanity will be mounted. Use a measuring tape to determine the width, height, and depth available on your wall, ensuring that the vanity will fit comfortably within these dimensions. Accurate measurements are essential to avoid potential installation issues and to ensure a seamless appearance.
Next, locate the studs in the wall, which are critical for providing the necessary support for your floating vanity. A stud finder will help you identify the exact positions of the studs behind the drywall. Mark the stud locations clearly with a pencil, as these will serve as your anchor points for the mounting brackets. Ensuring that the vanity is securely attached to the studs is vital for its stability and longevity.
Finally, consider the plumbing aspects of your installation. Verify that the existing plumbing pipes and connections align appropriately with the vanity’s design. Modify the placement of the pipes if necessary to ensure they fit within the designated spaces of the vanity. Proper planning of your plumbing connections will facilitate a smoother installation process and prevent potential water damage or leaks down the road.
How to Install Floating Vanity: Installation Steps
1.Positioning
Start the installation process by positioning your vanity. Use a level and a pencil to mark the desired position on the wall. Ensuring the vanity is level is critical for both aesthetics and functionality. Measure and mark the height at which you want the vanity to sit, ensuring it is centered within the intended space. These marks serve as a visual guide, making sure the vanity will be aligned perfectly once mounted.
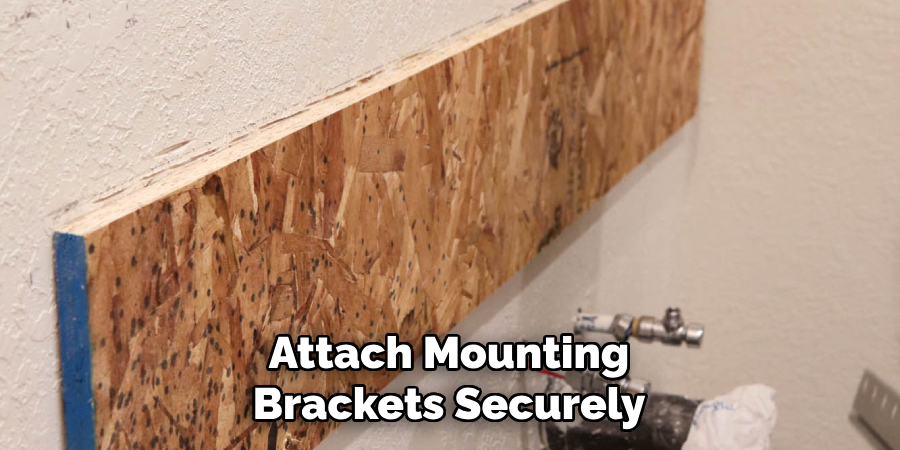
2.Stud Attachment
With the vanity’s position marked, locate the pencil marks you previously made to indicate the stud locations. Using a drill, create pilot holes into the studs at these marked locations. These holes make it easier to insert screws and prevent the wood from splitting. Once the pilot holes are drilled, attach the mounting brackets securely using screws. These brackets will bear the weight of the vanity, so make sure they are firmly and securely attached to the studs.
3.Plumbing Connections
Next, you will need to address the plumbing connections. Install the P-trap and water supply lines according to the manufacturer’s instructions. This step involves connecting the pipes and ensuring they align correctly with the vanity’s design. Secure each connection tightly to avoid any leaks. Ensure the water supply lines and the drainpipe are accessible and properly aligned with the vanity’s designated cutouts or compartments. This setup will facilitate a seamless integration with your plumbing system.
4.Vanity Mounting
Now that the brackets and plumbing are in place, it’s time to mount the vanity. With help, lift the vanity into place and carefully slide it onto the mounting brackets. Make sure the vanity is level and positioned according to your earlier pencil marks. The vanity should sit snugly on the brackets without wobbling. This ensures that the weight is distributed evenly and the installation is stable.
5.Securing
After the vanity is positioned on the brackets, further secure it using screws. Drive screws through the vanity into the mounting brackets, checking periodically to ensure the vanity remains level and centered. Testing for stability is crucial during this step; the vanity should not shift or move once secured. This extra layer of fastening ensures that the vanity is not only stable but also safe for daily use.
6.Finishing Touches
For a polished and finished look, apply silicone caulk around the edges of the vanity. This step not only seals against moisture, protecting both the vanity and the wall but also gives a clean, professional appearance. Use a caulking gun to apply a smooth bead of caulk, then smooth it with a caulking tool or your finger for a seamless finish. This final touch enhances the vanity’s durability and helps prevent water damage.
7.Testing
Finally, turn on the water supply to test for any potential leaks or issues with the plumbing connections. Check each joint and connection meticulously, ensuring there are no drips or signs of moisture. Fix any leaks immediately by tightening connections or adding the plumber’s tape as needed. Once confirmed, your floating vanity installation is complete, bringing both functionality and modern design into your bathroom space.
Safety Considerations
When installing a floating vanity, safety should always be a priority to ensure both a secure and functional installation.
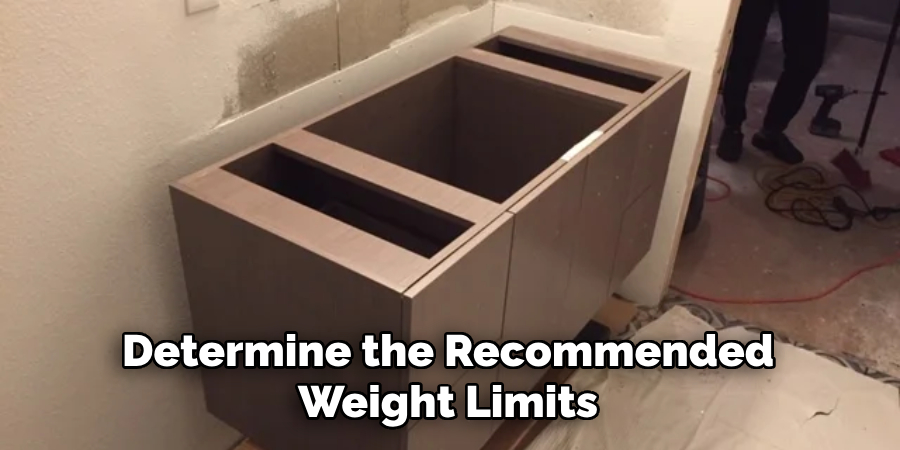
Weight Capacity
It is essential to verify that the mounting brackets and screws you plan to use can support the weight of the vanity. Consult the manufacturer’s specifications to determine the recommended weight limits and choose appropriate hardware accordingly. Overloading the brackets can lead to the vanity detaching from the wall, posing a safety hazard.
Secure Attachment
Before finalizing the installation, double-check the stability of the vanity and mounting brackets. Ensure that all screws are tightly secured and that the vanity is level and centered. An unstable vanity can not only cause damage to your wall but also create a risk of injury.
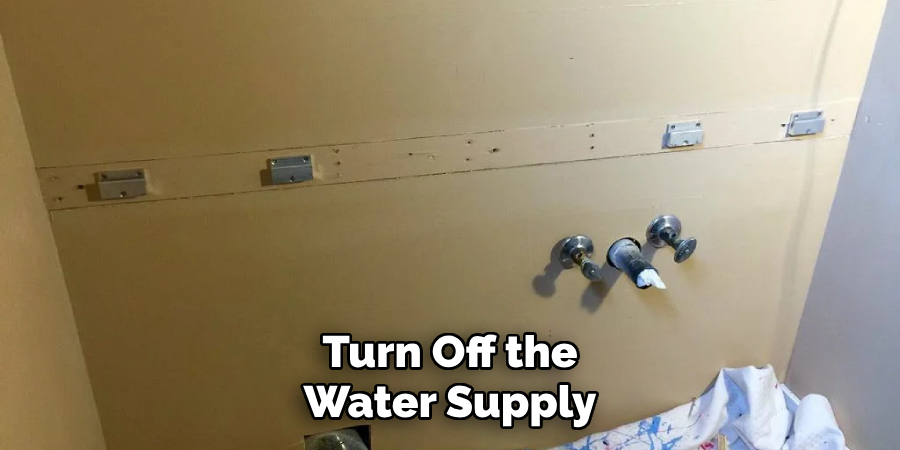
Plumbing Safety
When working with plumbing connections, turn off the water supply to prevent accidental leaks or water damage. Follow proper procedures when installing and connecting the P-trap and water supply lines. Ensuring each connection is tight and secure will help prevent leaks and potential water damage, safeguarding both the vanity and your home.
Final Inspection and Adjustment
Leveling
Use a level to ensure the vanity is straight and aligned with the wall. Place the level on top of the vanity and adjust it until the bubble is centered. If the vanity is not level, you may need to slightly adjust the screws or brackets to achieve the correct position. Ensuring the vanity is perfectly level is essential for both aesthetics and proper functionality.
Plumbing Check
Test the water supply by turning on the faucets and checking for any leaks or issues with the plumbing connections. Pay close attention to each joint and connection, ensuring there are no drips or signs of moisture. If you detect any leaks, tighten the connections or apply the plumber’s tape as necessary. Confirming that your plumbing is leak-free will prevent future water damage and ensure the vanity operates correctly.
Clean-Up
Remove any debris or excess caulk left over from the installation process. Use a damp cloth to wipe down the vanity and surrounding area, ensuring everything is clean and tidy. Proper clean-up not only enhances the appearance of your bathroom but also ensures the longevity and functionality of your new floating vanity.

(Frequently Asked Question) FAQs
Q: How Long Does It Typically Take to Install a Floating Vanity?
A: The installation time for a floating vanity can vary depending on the complexity of the setup and your level of experience. On average, it can take anywhere from 4 to 6 hours. This includes time for preparing the wall, mounting the brackets, connecting the plumbing, and securing the vanity itself.
Q: What Tools Are Needed to Install a Floating Vanity?
A: To install a floating vanity, you’ll need several tools including a stud finder, drill, level, pencil, measuring tape, screwdrivers, caulking gun, adjustable wrench, and safety gear like gloves and goggles. Having these tools on hand will help ensure a smooth installation process.
Q: Can I Install a Floating Vanity on My Own, or Do I Need Professional Help?
A: While installing a floating vanity can be a DIY project for those with some level of handyman experience, it can also be challenging. If you’re not comfortable with tasks like drilling into studs, handling plumbing connections, or ensuring the vanity is level and secure, it’s advisable to seek professional assistance to ensure a safe and proper installation.
Q: What Should I Do if I Encounter a Leak After Installing the Vanity?
A: If you find a leak after installing the vanity, first turn off the water supply to prevent any further damage. Then, inspect the plumbing connections to identify the source of the leak. Tighten any loose connections and apply the plumber’s tape if needed. If the leak persists, it may be best to consult a professional plumber to resolve the issue securely.
Conclusion
Installing a floating vanity involves several critical steps, each contributing to the final polished result. Begin with thorough preparation, including marking stud locations and drilling pilot holes to facilitate easy mounting. Secure the mounting brackets, ensuring they are robust enough to support the vanity’s weight. Once the brackets are in place, address the plumbing connections to ensure a leak-free setup. Carefully lift and mount the vanity, verifying its level and stability throughout the process. Apply finishing touches like silicone caulk for a professional look and final stability checks.
Proper installation is crucial for the vanity’s functionality and aesthetics. A correctly installed floating vanity enhances your bathroom’s modern design and ensures durability and safety for everyday use.
Keep the vanity clean for long-term maintenance and routinely inspect the plumbing connections for any signs of leaks. By following these meticulous steps on “how to install floating vanity,” you’ll achieve a beautiful, functional addition to your bathroom.