Faux ceiling beams are an exceptional way to add both character and charm to any space, transforming plain ceilings into stunning architectural features.
These decorative elements have the power to evoke various styles, from rustic farmhouses to elegant classics, making them a versatile choice for enhancing interior design. Real wood beams can be expensive and challenging to install, but faux beams offer an accessible, cost-effective alternative that delivers the same aesthetic appeal.
By learning how to make fake beams for ceiling, homeowners can personalize their living spaces while saving money and gaining the satisfaction of a completed DIY project.
The DIY process of creating and installing faux beams is gratifying and relatively straightforward, even for those without extensive carpentry skills. The process involves planning and designing, choosing appropriate materials, and utilizing tools for cutting and assembling the beams.
By opting for DIY, homeowners can tailor the beams to their specific tastes and needs, ensuring a perfect fit with the existing decor. Additionally, crafting and installing faux beams can be a fun and engaging project that enhances one’s home and hones one’s DIY skills.
Ultimately, learning how to make fake beams for ceiling empowers individuals to take control of their interior design, resulting in uniquely beautiful spaces that reflect personal style.
Planning and Designing
The first crucial step in creating faux beams is determining the desired style and aesthetic. This decision will set the tone for the entire project and influence the choice of materials, colors, and finishes.
The options are virtually limitless from rustic, reclaimed wood beams that evoke a cozy, farmhouse vibe to sleek, modern beams that add a touch of contemporary flair. Consider the room’s decor and architectural elements to ensure the faux beams complement the overall design.
Once the style is established, accurate measurements of the ceiling dimensions are essential. Begin by measuring the length and width of the ceiling to determine how many beams will be needed and their placement.
Consistency is key, so ensure that the beams are evenly spaced and symmetrically aligned to create a balanced look. Marking the positions on the ceiling with painter’s tape can help visualize the layout and make any necessary adjustments before proceeding with construction.
Sketching the layout or using design software can be incredibly beneficial for further refining the design. These tools allow homeowners to experiment with different configurations and styles, ensuring a cohesive final look. By investing time in thorough planning and designing, the resulting faux beams will enhance the room aesthetically and fit seamlessly into the existing architectural framework.
Choosing Materials
Selecting materials is a pivotal step when creating faux ceiling beams, impacting durability, cost, and ease of installation. Several options are available, each with its own set of advantages, including foam, wood, and PVC.

Foam beams, often made from high-density polyurethane, are popular due to their lightweight nature, making them particularly easy to handle and install.
These beams can be made to mimic real wood with incredible accuracy, offering a cost-effective alternative without sacrificing aesthetic appeal. They are resistant to moisture and pests, adding to their durability in various environments.
While more traditional, wood brings authenticity and a rich texture to faux beams. It’s a robust material supporting additional features such as integrated lighting.
However, wood can be heavy and may require additional support and more complex installation procedures. It also needs regular maintenance to prevent issues like warping or pest infestations.
PVC beams strike a balance between durability and ease of installation. PVC is lightweight, resistant to moisture and insects, and can be finished to replicate the look of real wood.
This material is particularly suited for environments with high humidity, such as kitchens and bathrooms, where wood might not perform optimally.
When choosing materials, it is essential to consider existing decor and architectural elements to ensure a harmonious integration. Whether the goal is to seamlessly blend with current furnishings or create a striking contrast, selecting the right material will bring the design vision to life with both functionality and elegance.
Gathering Tools and Supplies
To successfully create and install faux ceiling beams, assembling the right tools and supplies is vital. Essential tools include a saw for cutting the beams to the desired length and shape, a measuring tape for accurate measurements, and a level to ensure proper alignment during installation.
A drill will be needed for making pilot holes and securing screws, while a caulking gun can be useful for applying adhesive.
Additional supplies such as construction adhesives, screws, and anchor bolts will secure the beams to the ceiling. If you plan to customize the beams, having paint or stain on hand will allow you to match or complement your existing decor.
Safety equipment is crucial for protecting yourself during the process. This includes safety goggles to protect your eyes from debris, ear protection to shield your hearing from loud tool noises, and gloves to safeguard your hands while handling materials and tools. Taking these precautions ensures a safe and efficient installation.
How to Make Fake Beams for Ceiling: Constructing the Beams
Cutting the Materials to the Desired Length and Dimensions
The process of constructing faux ceiling beams starts with cutting the selected materials to the proper length and dimensions.
Begin by measuring the span where each beam will be installed, considering any intersections with walls or other architectural elements. Use a saw appropriate for the material, such as a table saw for wood or a utility knife for foam, to make precise cuts.
Accuracy is crucial during this step to ensure seamless joints and an aesthetically pleasing final result. Remember to cut end pieces at an angle where beams will join, creating a mitered edge for a clean, professional look.
Creating Faux Wood Grain or Texture
Creating faux wood grain or texture is an essential step in replicating the look of real wood, especially when working with foam or PVC. Utilize carving tools or a graining tool to etch wood-like patterns onto the surface.
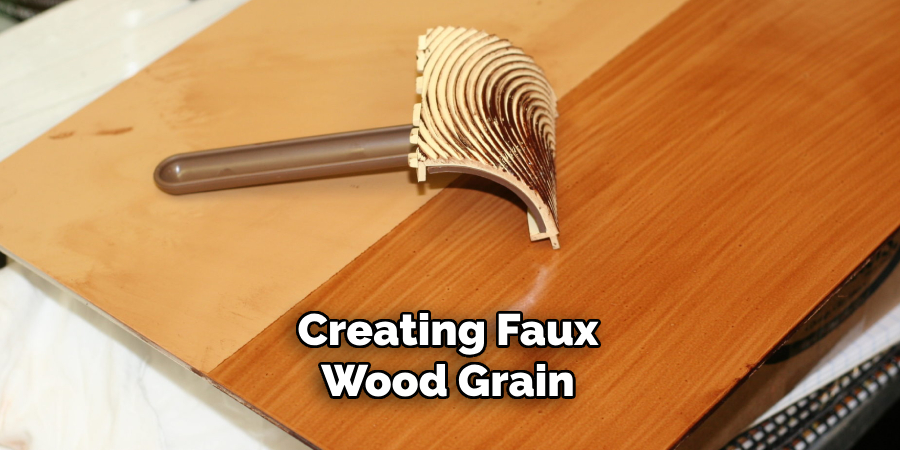
Consider employing advanced techniques such as dry brushing or staining with a contrasting color for a more detailed finish to bring out the grain. These techniques help mimic the natural irregularities and grooves found in authentic wood, adding depth and realism to the faux beams.
Assembling Multiple Pieces to Form Beams
In cases where the desired beam dimensions exceed the size of available materials, it may be necessary to assemble multiple pieces. This involves securely joining pieces using screws, wood glue, or construction adhesive.
Reinforce joints with brackets or dowels to ensure structural integrity. For larger beams or those intended to support additional elements, consider constructing a hollow box beam by joining three or more long pieces, forming a sturdy yet lightweight structure that can be easily mounted.
Sanding and Smoothing the Surface for a Polished Finish
The final step in constructing faux beams is sanding and smoothing the surface to achieve a polished finish. Use sandpaper of varying grits, starting with a coarser grit to remove any rough edges or excess material and progressing to a finer grit for a smooth texture.
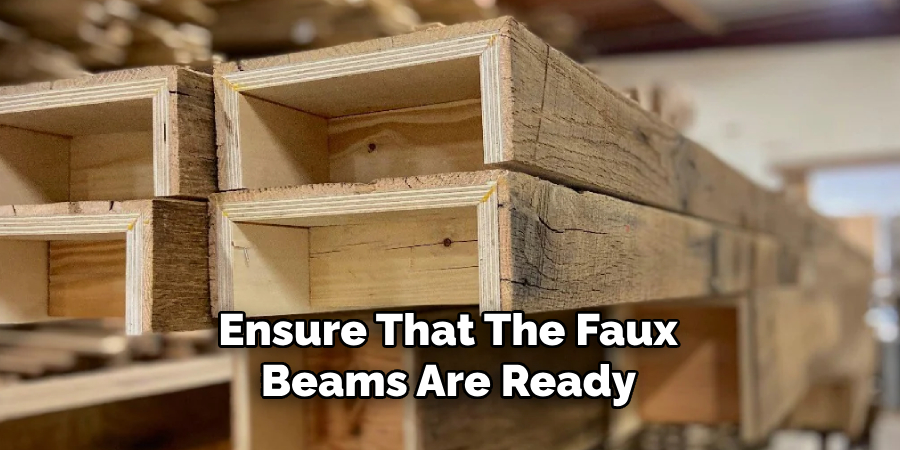
Ensure all carved grains and joins are sanded evenly for a cohesive appearance. After sanding, wipe the beams with a damp cloth to remove dust and debris. This preparation will ensure that the faux beams are ready for staining, painting, or sealing, resulting in a high-quality finish that enhances the overall elegance of your interior space.
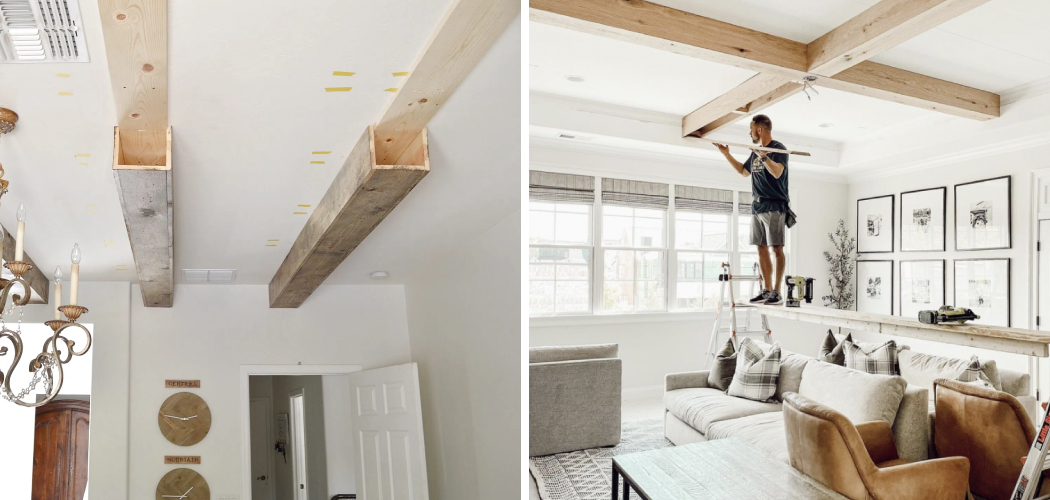
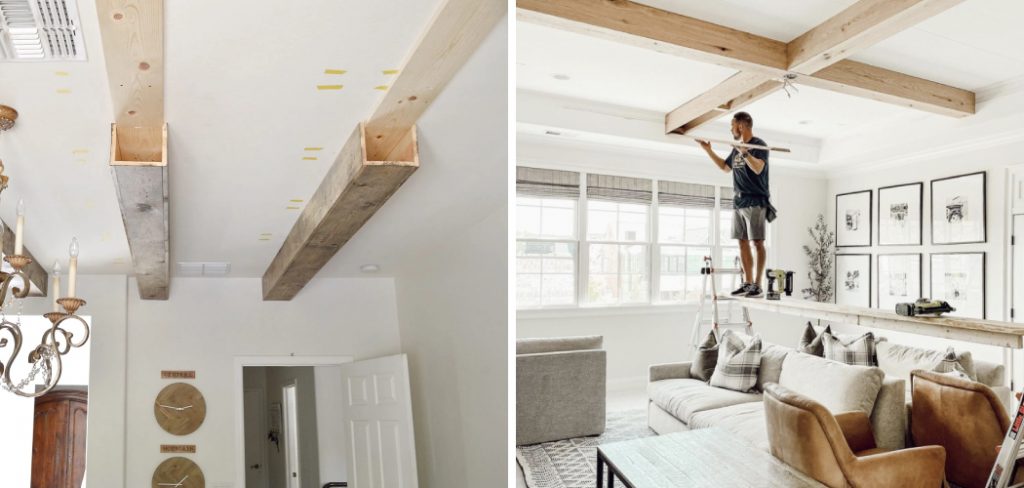
How to Make Fake Beams for Ceiling: Installing the Beams
Marking the Ceiling for Beam Placement and Ensuring Symmetry
Begin by marking the ceiling where each beam will be installed. Measure and mark the positions of the beams, ensuring they are evenly spaced and aligned symmetrically across the room.
Use a chalk line or laser level to create straight lines for precise placement. This step is crucial for maintaining a balanced and harmonious appearance in the final installation.
Attaching Beams Using Adhesive, Screws, or Brackets
Once the positions are marked, you can begin attaching the beams. Use a combination of construction adhesive and screws to ensure a secure bond. Apply adhesive to the back of each beam and press it firmly against the ceiling along the marked lines.
For additional support, insert screws through the beams into ceiling joists or use brackets for reinforcement. Make sure each beam is secured properly before moving on to the next.
Ensuring Proper Alignment and Levelness During Installation
During the installation, continuously check the alignment and levelness of each beam using a spirit level.

Adjust as necessary to maintain a straight and even appearance. This step helps prevent any noticeable dips or unevenness that could detract from the overall look of the beams. Taking the time to ensure proper alignment will result in a professional and polished finish.
Concealing Seams or Joints for a Seamless Appearance
After the beams are securely attached, address any visible seams or joints to achieve a seamless appearance. Use caulk or wood filler to fill gaps between joints and cover screw heads.
Once the filler is dry, sand it smooth to match the surface of the beams. Consider applying a matching paint or stain to the filled areas for an even more refined look. This attention to detail will enhance the overall aesthetic, making the faux beams indistinguishable from real wood.
Enhancing Realism
Adding Decorative Elements such as Faux Metal Brackets or Straps
To elevate the authenticity of your faux beams, consider incorporating decorative elements like faux metal brackets or straps. These additions can be strategically placed at the ends or intersections of beams, lending the appearance of traditional joinery and enhancing the rustic charm of your installation.
Faux metal brackets can be created using lightweight materials like foam or plastic and painted to mimic the look of aged iron or steel.
Staining or Painting the Beams to Match Existing Woodwork or Decor
Staining or painting the beams is essential for integrating them seamlessly into your existing decor. Select a stain or paint that matches the color and finish of your room’s woodwork or furniture.

Applying multiple coats and allowing adequate drying time between each will ensure a rich, consistent color. Additionally, blending techniques such as dry brushing or color washing can add depth and dimension to the finish.
Aging or Distressing Techniques for a Weathered or Rustic Look
For a more vintage or rustic aesthetic, employ aging or distressing techniques. Gently sanding edges, adding nicks and dents, or using a wire brush to create surface texture can simulate years of wear and exposure. These techniques give the beams a weathered, lived-in appearance that adds character and authenticity.
Applying Sealant or Protective Coatings for Durability
Finally, applying a sealant or protective coating is crucial for maintaining the longevity and appearance of your faux beams. Choose a clear sealant or finish that complements your stain or paint. This step protects the beams from dust and damage and enhances their visual appeal, keeping them looking fresh and new for years to come.
Customization Options
Incorporating Lighting Elements within or around the Faux Beams
Adding lighting elements to your faux beams can transform them into a focal point and enhance the overall ambiance of the space. You can incorporate recessed lighting, LED strips, or pendant lights within or around the beams.
Recessed lighting involves installing light fixtures into the beams themselves, providing a subtle, integrated glow. LED strips can be attached along the edges or behind beams to create a dramatic backlighting effect, highlighting the texture and craftsmanship of your beams.
Consider adding hanging pendant lights or chandeliers suspended from the beams for a more traditional look. These lighting options improve the aesthetic appeal and offer practical illumination for your room.
Creating Faux Beam Mantels or Shelves for Additional Functionality
Faux beams can be repurposed to create mantels or shelves, adding both charm and functionality to your home.
A faux beam mantel can be installed above a fireplace to provide a rustic or elegant finishing touch, perfect for displaying decorative items or family photos. Similarly, faux beams can be mounted as floating shelves on walls, offering stylish storage solutions for books, plants, or other decor.

When designing these custom elements, consider the structural integrity and weight-bearing capacity, ensuring they are securely anchored to the wall or supporting structures. This combination of form and function enhances the visual appeal and maximizes the space’s utility.
Experimenting with Different Beam Shapes, Sizes, and Finishes
Customization allows you to experiment with various shapes, sizes, and finishes, tailoring the faux beams to match your unique style and preferences.
Beams can be designed in different cross-sectional shapes, such as rectangular, square, or even round, to suit the architectural features of your home. Sizes can vary based on the proportions of your room, with larger beams making a bold statement and smaller beams providing a more subtle accent.
For finishes, consider options like rustic, weathered wood for a farmhouse look or sleek, polished wood for a contemporary feel.
Applying different stains, paints, or aging techniques allows you to achieve the perfect color and texture, ensuring the faux beams complement your existing decor. This customization empowers you to create a truly personalized and cohesive interior design.
By integrating lighting, multifunctional mantels or shelves, and experimenting with various shapes, sizes, and finishes, you can tailor faux beams to suit your individual taste and enhance the overall aesthetic of your space.
Maintenance and Longevity
Tips for Cleaning and Maintaining Faux Beams to Preserve Their Appearance
Maintaining the pristine look of faux beams requires regular cleaning and simple maintenance. Dust the beams gently using a microfiber cloth or a soft duster to remove accumulated dust and debris.
A damp cloth with mild soap can be used for more thorough cleaning, followed by wiping with a dry cloth to prevent moisture damage. Avoid using harsh chemicals or abrasive tools that could harm the finish.
Addressing Any Damage or Wear Over Time with Repairs or Touch-ups
Over time, faux beams might experience minor wear or damage, such as scratches, chips, or discoloration. Address these issues promptly to preserve their appearance. Wood filler or touch-up markers can be used to repair small imperfections for scratches or chips.
In cases of discoloration, carefully matching the original stain or paint and reapplying as needed will help maintain a consistent look. A professional should assess and repair larger structural damages to ensure lasting integrity.
Regular Inspections to Ensure Structural Integrity and Stability
Periodically inspecting your faux beams is crucial to catch any potential problems early. Check for signs of sagging, loose fittings, or other structural issues that could compromise the installation’s stability.
Ensuring that brackets, straps, and other supportive elements remain secure will prevent further damage. Regular maintenance and vigilant inspections will keep your faux beams looking beautiful and structurally sound for years to come.
Conclusion
In conclusion, faux ceiling beams present a world of creative possibilities and practical benefits for homeowners looking to enhance their interior spaces.
Their lightweight construction makes them easy to install, while various customization options—such as staining, painting, and adding decorative elements—allow you to achieve a look that perfectly matches your aesthetic vision.
Faux beams can seamlessly integrate into various decor styles, from rustic and vintage to contemporary and modern, providing both visual appeal and functional enhancements like lighting and storage solutions.
By exploring how to make fake beams for ceiling projects, you can infuse your home with unique character and charm, often at a fraction of the cost of real wood beams. Embracing different techniques for aging, distressing, and finishing will ensure that your faux beams look authentic and high-quality.
Above all, embarking on a DIY project like this empowers you to personalize your living space, adding elements that showcase your style and creativity.
We encourage you to take the plunge and start your own faux beam project with confidence. With the right tools, materials, and a bit of imagination, you can transform any room into a stunning masterpiece. Enjoy the process and take pride in the results, knowing you’ve created a beautiful and distinctive feature in your home.