
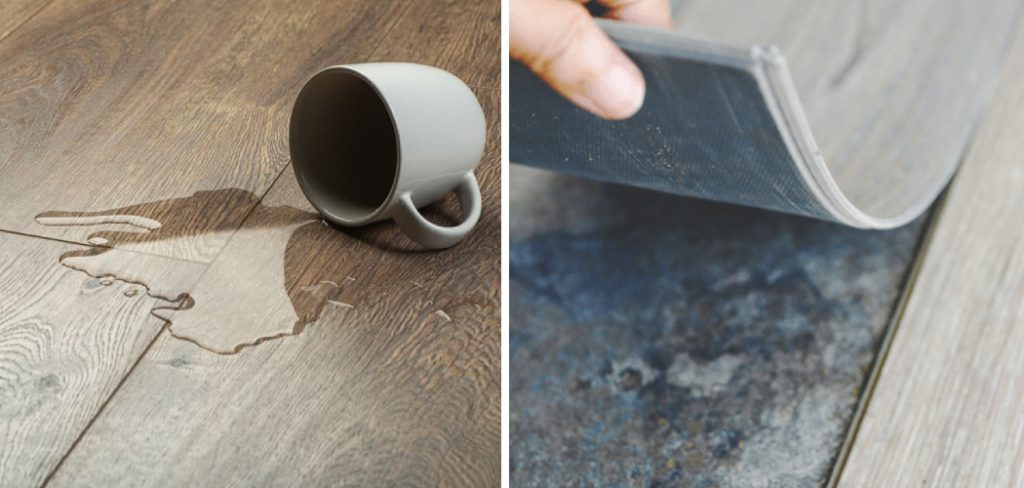
Have you ever walked into your bathroom or kitchen and seen a huge puddle of water on the vinyl flooring? You may be thinking to yourself, “Where did this water come from and now how do I get it out before my landlord notices?” If so, then you have come to the right place.
In this comprehensive blog post on how to get water out from under vinyl flooring, we will explain exactly what causes excess moisture under vinyl flooring and provide step-by-step instructions on how to get rid of it.
So, whether you are dealing with an unexpected puddle or an ongoing problem with excessive moisture accumulation in your home, keep reading for expert tips that can help solve the issue once and for all!
Why is There Water Under the Vinyl Flooring?
First, it’s important to understand why there might be water under your vinyl flooring. This is typically caused by a combination of factors, such as:
- Poor Ventilation in the Room, Leads to High Levels of Humidity and Condensation
- Leaky Pipes or Other Plumbing Issues, Leading to Water Seeping Up Into the Flooring
- Poorly Sealed Seams Between Sheets of Vinyl Flooring, Allow Moisture to Get in
- A Lack of Vapor Barriers Under the Flooring, Allows Moisture From the Ground to Seep Up
- A Flooded Toilet or Other Water Disaster That Is Not Cleaned Up Quickly Enough.
If any of these issues are causing water to accumulate under your vinyl flooring, it’s important to take action as soon as possible in order to prevent major damage and mold growth.
Needed Materials
Given below are the materials that you need to get water out from under vinyl flooring:
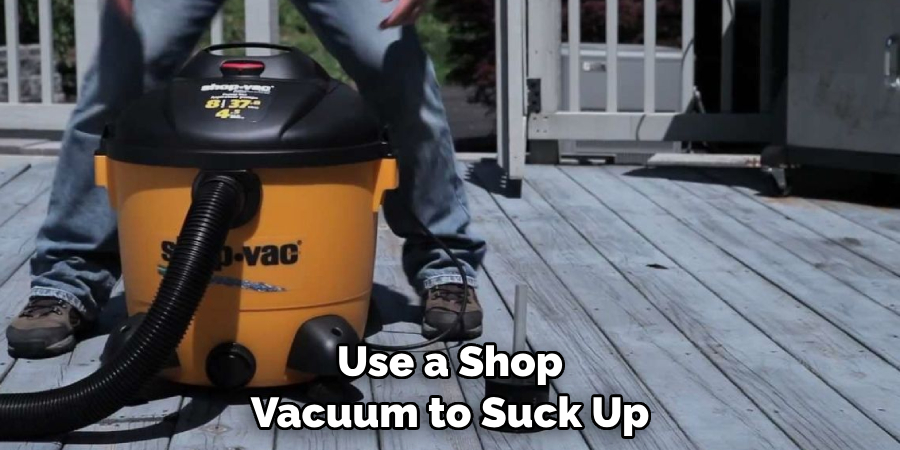
- Shop Vacuum
- Vinyl Floor Cleaner
- Towels or Absorbent Cloths
- Fans for Improved Air Circulation
- Towel Rack or Fan Heater to Speed Up Drying Time.
By having these materials on hand, you should be able to successfully get rid of any excess water that has accumulated under your vinyl flooring.
10 Step-by-step Instructions on How to Get Water Out From Under Vinyl Flooring
Step 1: Vaccum up the Water
The first step of the process is to use a shop vacuum to suck up as much water as possible. Make sure you get into all the nooks and crannies of your vinyl flooring, including along any seams or around baseboards. It may take a few passes with the vacuum to get all of the water out. But once you have done this, then you are ready to move on to the next step.
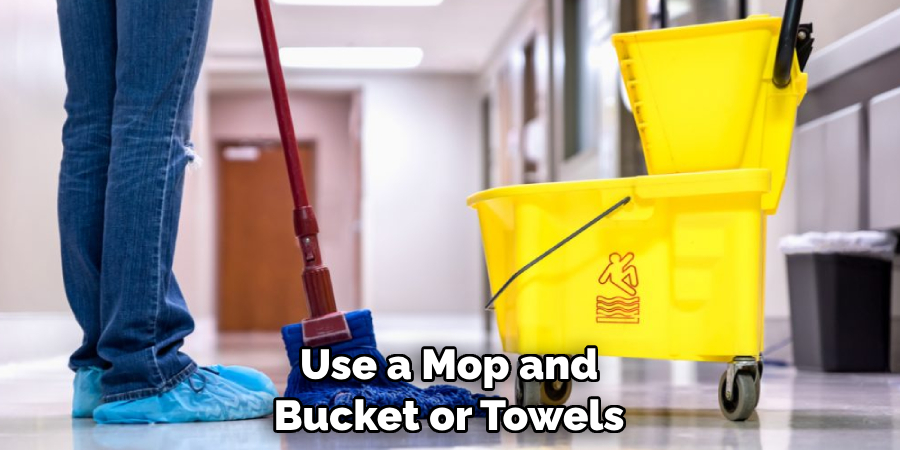
Step 2: Clean Up any Remaining Water
Once you’ve removed as much water as you can with the shop vacuum, it’s time to tackle any remaining puddles or pools of water. Use a mop and bucket or towels and absorbent cloths to soak up any moisture that is still present on the vinyl flooring.
You may need to do this several times until all of the water is gone. It’s also important to pay special attention to any seams or corners that may have been missed by the vacuum.
Step 3: Clean Up Spills & Stains
Once all of the water is removed, you should use a vinyl floor cleaner to clean up any remaining spills or stains. Be sure to follow the instructions on the cleaner carefully in order to avoid damaging your floors. Otherwise, you may end up with a bigger mess to deal with!
It’s also important to use a gentle cleaner that is specifically designed for vinyl flooring in order to ensure that it won’t cause any damage. You can find these types of cleaners at most home improvement stores.
Step 4: Improve Air Circulation
In order to speed up drying time and reduce the chances of mold or mildew forming, it’s important to improve air circulation in the room. Turn on fans or open windows and doors if the weather permits. But make sure you do not turn on any heating systems that could cause the vinyl flooring to warp or buckle due to excessive heat.
This could result in even more damage to your floors. It’s also a good idea to place a towel rack or fan heater in the room and turn it on low. This will help provide even more air circulation and disperse any lingering moisture faster.
Step 5: Use a Towel Rack or Fan Heater
If you want to move even faster, consider setting up a towel rack or fan heater to help dry the area more quickly. Just be sure not to use too much heat, as this can damage your floors. It’s best to use a low setting and only leave the heat on for short periods of time.
This will help speed up the process without causing any unnecessary damage. But be sure to monitor the area carefully and keep an eye on the temperature, as this will ensure that your vinyl flooring does not get too hot.
Step 6: Inspect the Underlayment
Once you’ve dried up any standing water, it’s important to inspect the underlayment of your vinyl flooring for any signs of moisture or mildew. If you find any wet spots, it may be necessary to replace the underlayment in order to prevent further damage. You can find replacement underlayment materials at most home improvement stores.
It’s also important to check the seams between sheets of vinyl flooring for signs of moisture or mildew, as this could indicate a problem with the sealant. If necessary, you may need to reseal these seams in order to prevent further water damage.
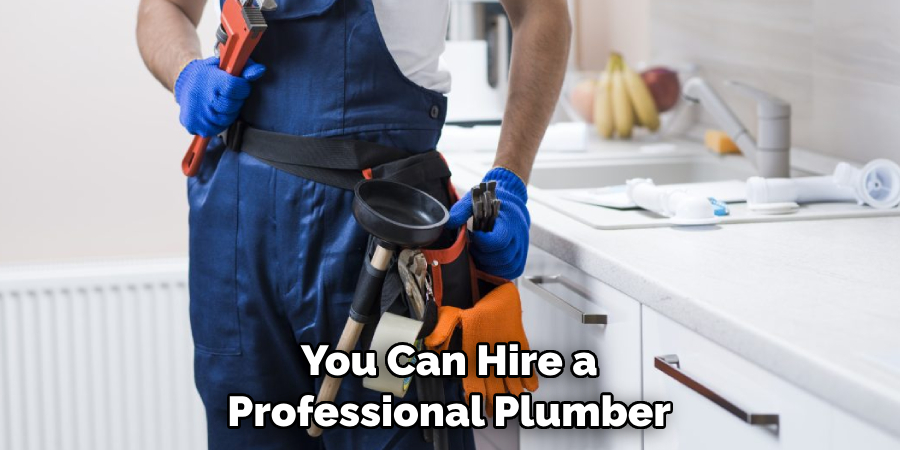
Step 7: Fix Any Leaks or Other Plumbing Issues
It’s also important to inspect your pipes and plumbing for any signs of leaks or other issues that could be causing water to seep into your flooring. If there are any issues, it’s best to get them fixed as soon as possible in order to prevent any further water damage.
You can hire a professional plumber to take care of any necessary repairs. It’s also a good idea to check the seals around doors and windows for any signs of water damage due to poor ventilation. If necessary, you can use weatherstripping or caulking to seal these areas and help prevent further water damage.
Step 8: Seal Any Seams or Gaps
In addition to fixing any plumbing issues, you should also inspect your vinyl flooring for any seams or gaps that may be allowing moisture to get in. If you find any, use a sealant to close them up and prevent further water damage. It’s important to use a sealant that is specifically designed for vinyl flooring in order to avoid any potential damage. You can find sealants at most home improvement stores.
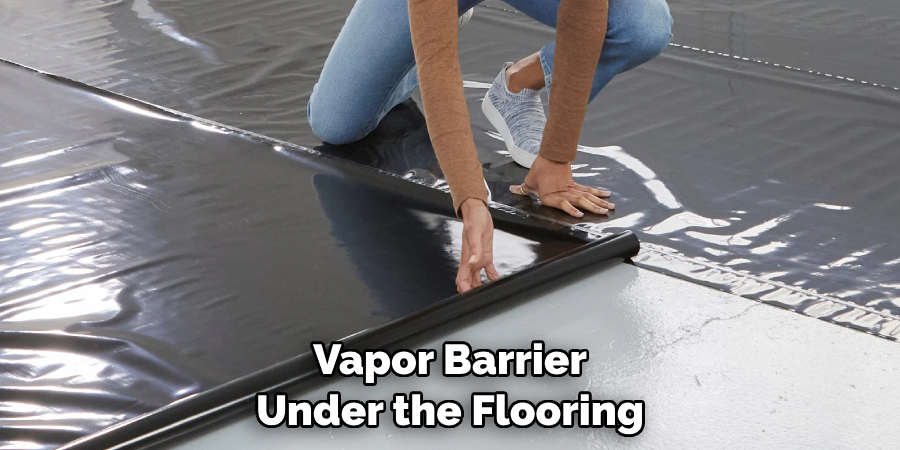
Step 9: Add a Vapor Barrier
If you’re dealing with an ongoing moisture problem, it may be necessary to add a vapor barrier under the flooring in order to prevent moisture from seeping up from the ground. This is especially important in basement or crawlspace areas where there are often high levels of humidity. It’s best to hire a professional who can apply the vapor barrier correctly in order to ensure that it is effective.
Step 10: Monitor the Situation
Once you’ve completed all of the steps above, it’s important to keep an eye on the situation and make sure that your efforts are paying off. If you notice any signs of moisture or mildew returning, take action as soon as possible in order to prevent further damage.
It’s also a good idea to periodically check the underlayment and seams of your vinyl flooring in order to make sure nothing has changed. By doing this, you can be sure that all of your hard work was a success!
By following the steps on how to get water out from under vinyl flooring above, you should be able to successfully get rid of any excess water that has accumulated under your vinyl flooring and prevent damage or mold growth in the future. However, keep in mind that if it’s a recurring problem, it may be necessary to take additional measures such as replacing the underlayment or adding a vapor barrier.
Conclusion
In conclusion, getting water out from under vinyl flooring is a task that requires effort and patience. Start by ensuring the entire affected area is dry, then use a forced air blower to get rid of the excess moisture. If the fan didn’t do it, you can try injecting an absorbent material like calcium chloride underneath. And finally – be sure to check up on areas where water has pooled and watch for any more potential issues or damage.
All in all on how to get water out from under vinyl flooring, taking preventative measures is your best defense against any water problem that might occur in the future.
By regularly checking for leaks around doors and windows – as well as inspecting plumbing pipes routinely – you can stay ahead of any potential issues, saving you money and headaches both down the road. So don’t forget to take those extra steps when it comes to keeping water away from your vinyl flooring!