Do you need help with your cane chair? Don’t worry, you’re not alone.
Cane chairs, known for their classic appeal and intricate designs, are a beautiful addition to any home decor. However, these chairs can begin to show signs of wear and tear over time and with regular use. The cane weave may sag, break, or become discolored, diminishing the chair’s aesthetic and functional value. Fortunately, repairing a cane chair is a feasible task that can restore its original elegance and usability with a few tools and some patience.

This guide will walk you through the process of how to repair cane chair, ensuring your cherished chair is rejuvenated to its former glory. Whether you’re a seasoned DIY enthusiast or a beginner looking to try your hand at furniture repair, these instructions are designed to help you achieve satisfying results.
What Will You Need?
Before you begin repairing your cane chair, gathering all the necessary tools and materials is essential. Here are some items you may need:
- Replacement cane webbing
- Cane spline
- Scissors or utility knife
- Ruler or measuring tape
- Needle-nose pliers
- Chisel or flathead screwdriver
- Hammer
- Glue (preferably wood glue)
- Sandpaper
- Stain or paint (if desired)
It’s important to note that the exact tools and materials required may vary depending on the extent of damage and type of repair needed.
10 Easy Steps on How to Repair Cane Chair
Step 1: Remove the Old Cane Webbing
Begin the repair process by removing the old, damaged cane webbing. Use a chisel or flathead screwdriver to pry out the spline, which holds the cane webbing around the chair seat or back in the groove. Be cautious not to damage the wood during this process. Once the spline is removed, gently remove the old cane material from the groove. Use needle-nose pliers to extract any remaining pieces of cane and clean the groove thoroughly to ensure the new webbing has a smooth surface to sit on.

Step 2: Measure and Cut the New Cane Webbing
After cleaning the groove, it’s time to prepare the replacement cane webbing. Unroll the new webbing and lay it flat. Use a ruler or measuring tape to measure the dimensions of the seat or back where the new webbing will be placed. Remember to add a bit of extra length on all sides to ensure it fits snugly into the groove. With these measurements in hand, use scissors or a utility knife to cut the webbing to size. Be precise with your cuts to avoid any unnecessary waste of material.
Step 3: Soak the Cane Webbing
Before you can install the new cane webbing, it’s crucial to soften it by soaking it in water. Fill a large basin or sink with warm water and immerse the cut webbing completely. Let it soak for about 30 to 60 minutes, depending on the thickness of the cane material. This process will make the cane webbing more pliable and easier to handle during installation. It also enhances the tension and flexibility of the material, ensuring a snug fit when it’s finally secured in place.
Be sure to check the manufacturer’s instructions, as some cane materials may require specific soaking times. Once the webbing is sufficiently soaked, remove it from the water and gently blot dry with a towel, being careful not to fold or crease the material. With your cane webbing prepped, you’re now ready to move on to the next stage of your chair repair process.
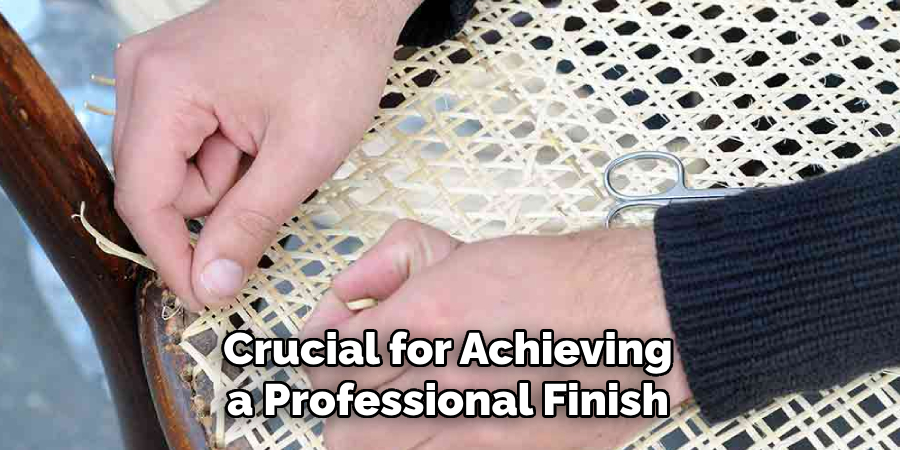
Step 4: Position the Cane Webbing
Now that the cane webbing is soaked and pliable, it’s time to position it on the chair. Lay the cane webbing over the seat or back of the chair, ensuring it covers the entire groove with some excess hanging over the edges. Carefully align the weave to follow the pattern of the original design, if applicable. Take extra care to ensure the webbing is centered and sits evenly in the groove for a balanced appearance. This step is crucial for achieving a professional finish, so take the time to make any necessary adjustments before securing the webbing in place.
Step 5: Secure the Cane Webbing with Spline
With the cane webbing correctly positioned, it’s time to secure it using a cane spline. Begin by pressing the webbing down into the groove around the chair’s seat or back, ensuring it is taut. Next, measure and cut a spline length to fit the groove, trimming it slightly longer than needed to allow for a snug fit. To help the spline fit more easily into the groove, you may also soak the spline briefly in warm water.
Once ready, place the spline over the webbing in the groove, starting at one end. Gradually tap the spline into place using a small hammer, mallet, and a wood block to avoid damaging the cane. Work around the perimeter, ensuring the webbing remains taut and aligned. Trim away any excess spline with scissors or a utility knife, and ensure the edges are neat and tidy, completing the installation of your new cane webbing.
Step 6: Allow the Cane Webbing to Dry
After securing the cane webbing with the spline, it is essential to allow the material to dry completely. This drying process is crucial because, as the cane webbing dries, it will naturally shrink and tighten, providing a firm, sturdy seat or chair back. Place the chair in a dry, well-ventilated area and avoid sitting on it or applying any pressure during this time. Depending on the humidity and temperature of your environment, the drying process may take anywhere from 24 to 48 hours. Patience is vital at this stage, as adequate drying ensures the longevity and overall quality of the repair. Once completely dry, you can move on to the finishing touches for a polished look and lasting performance.
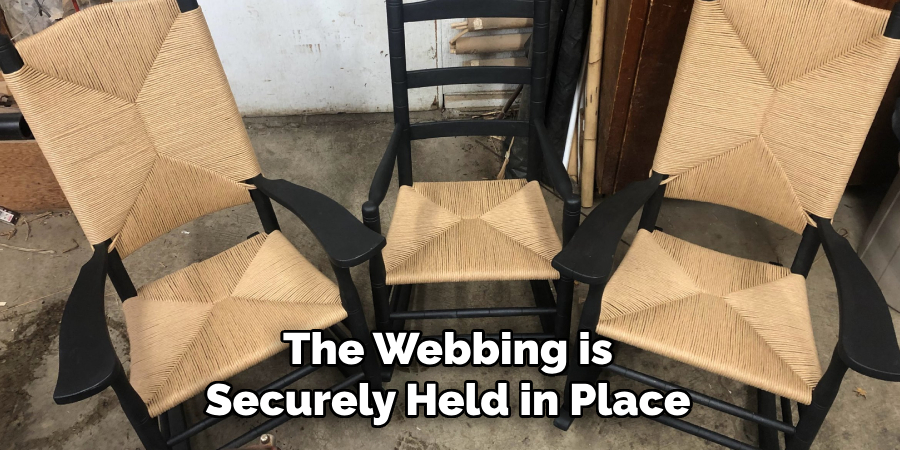
Step 7: Trim Excess Cane Webbing
Once the cane webbing has dried and tightened, you must trim any excess material. Use a utility knife or a pair of sharp scissors to carefully cut away the overhanging webbing around the perimeter of the spline. Avoid cutting too closely to the spline, as this may cause the webbing to come loose. It’s essential to make neat, precise cuts to ensure a clean and professional finish. After trimming, inspect the edge of the groove and spline to confirm that the webbing is securely held in place. Now, the chair is ready for any finishing touches you may wish to add.
Step 8: Apply Finish to the Cane Webbing
To enhance and protect the appearance of the newly installed cane webbing, apply a suitable finish. Select a finish that matches the existing finish on the rest of the chair, such as varnish, wood stain, or wood oil. Before applying the finish, ensure the cane webbing and surrounding wood are clean and dust-free. Using a small brush or cloth, carefully apply a thin, even coat of the chosen finish to the cane webbing and any exposed wood areas.
Allow the first coat to dry completely according to the manufacturer’s instructions, then apply additional coats if necessary for added durability and sheen. This finishing touch not only improves the aesthetic appeal of the chair but also provides additional protection against wear and environmental factors.
Step 9: Final Touches and Inspection
With the finish applied and dried, the chair is nearly complete, but a final inspection is essential to ensure the quality and durability of your work. Start by checking the overall appearance of the cane webbing and its alignment. Verify that the finish has been applied evenly, and look for any areas that may need additional touch-ups. Ensure the spline and webbing are securely in place with no loose edges or uneven cuts. If any issues are detected, make adjustments, such as reapplying finish or trimming excess material.
Finally, gently test the stability of the repaired chair by applying light pressure to confirm that it can bear weight safely. Once satisfied with the results, the chair is ready for regular use, and you can enjoy the refreshed and elegant look brought by your efforts in repairing and refinishing the cane webbing.
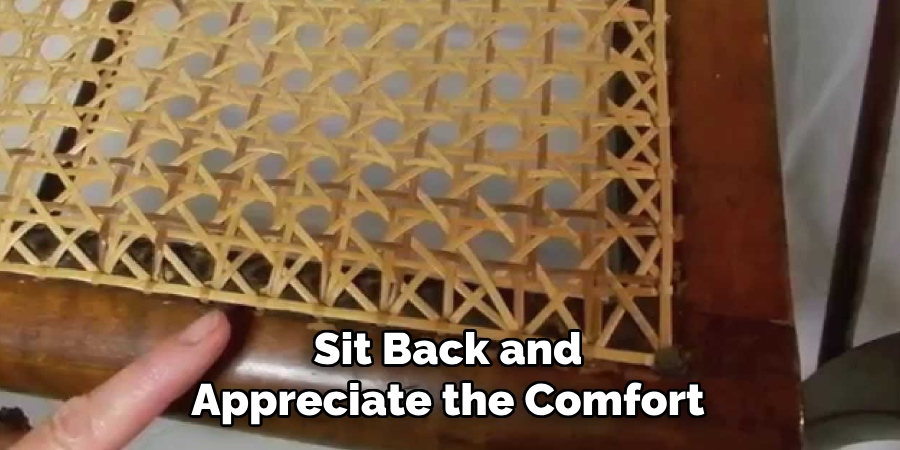
Step 10: Enjoy Your Restored Chair
After completing the final inspection and ensuring the stability of the repaired chair, it’s time to enjoy the fruits of your labor. Place the chair in your desired location, whether it’s a cozy nook in your living room or a sunny spot on the porch.
Take a moment to admire the skillful work and attention to detail that has brought new life to the piece. Sit back and appreciate the comfort and beauty of your restored chair, knowing that your careful craftsmanship has rejuvenated its appearance and extended its lifespan. Whether you choose to showcase it as a functional part of your home or as an elegant decorative item, your refreshed chair is ready to provide both comfort and visual appeal for years to come.
With these simple steps, you can successfully repair and refinish a cane webbing chair, saving money and prolonging the life of a beloved piece of furniture.
Conclusion
How to repair cane chair may initially seem daunting, but by following a structured process, it becomes a manageable and rewarding task.
This guide provides step-by-step instructions, ensuring that even those new to furniture repair can achieve excellent results. From removing old webbing and securing new cane webbing with splines to applying a protective finish, each step is crucial in restoring the chair’s function and aesthetic appeal. The process not only enhances your skills in craftsmanship but also gives you a sense of accomplishment as you breathe new life into a cherished piece of furniture.
Investing time and care into this restoration project contributes to a sustainable approach that values maintenance and prolongs the useful life of well-loved items in your home.