A veneer is a thin layer of wood or other material that is often glued to the surface of furniture to provide a desirable finish at a lower cost than using solid wood. Commonly found in both antique and modern furniture, veneer allows manufacturers to create beautiful pieces with intricate designs while conserving precious hardwoods. However, there are instances where removing veneer becomes necessary. Reasons for removing veneer include visible damage such as peeling, chipping, or bubbling, deterioration over time, or simply the desire for a different aesthetic finish.

It is crucial to employ proper techniques when learning how to remove a veneer to avoid harming the underlying wood. Careful handling and patience are paramount during this process, ensuring the base wood remains intact and ready for any subsequent refinishing. By following established methods, one can successfully take on veneer removal projects and breathe new life into timeworn furniture.
Assessing the Veneer and Furniture
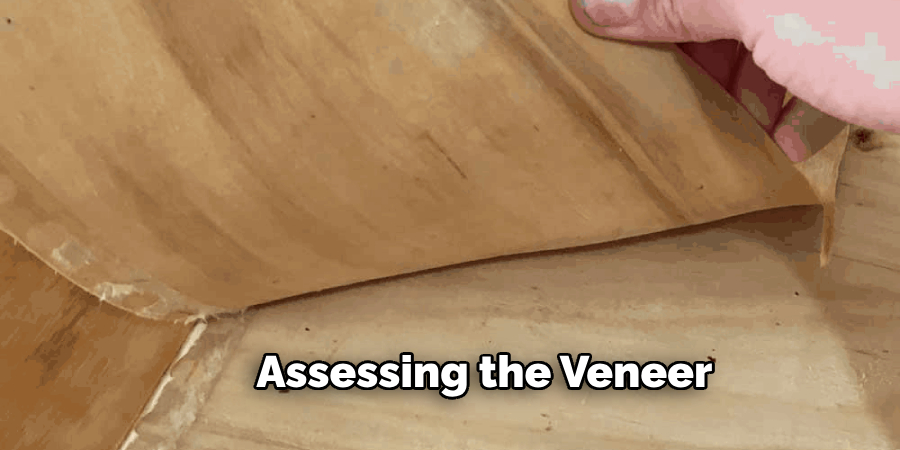
Before beginning the process of veneer removal, it is essential to thoroughly inspect the veneer’s condition and the furniture’s overall structure. Start by examining the veneer closely for any signs of damage. Look for areas where the veneer is peeling, chipping, or bubbling, as these are indicators of deterioration or weak adhesion. Carefully check the edges and corners where the veneer might be lifting away from the underlying wood, which can provide clues about the overall adhesion strength.
Next, evaluate the veneer’s adhesion to the furniture’s surface. Lightly tap or press on different sections to see if there are any hollow sounds or movements, suggesting poor adhesion. Understanding the extent of these issues will help you determine the necessary approach and tools for removal.
In addition to inspecting the veneer, it is crucial to assess the structure of the furniture itself. Determine the type of wood used beneath the veneer, as this will guide you in selecting the appropriate refinishing techniques. Check for any structural issues, such as cracks, splits, or wobbly joints that might need repair. Assessing the overall condition and stability of the furniture will ensure that you can preserve its integrity throughout the veneer removal process and subsequent refinishing.
Preparing the Work Area and Tools
Proper preparation of the work area and gathering the necessary tools are crucial steps to ensure a smooth and safe veneer removal process. First, set up a well-ventilated workspace. Adequate ventilation is essential, especially when working with heat guns, irons, or paint strippers, as these can produce fumes. Ensure the area has plenty of natural or artificial light to see the project clearly. Protect the floor and surrounding surfaces by laying down drop cloths or newspaper to catch any debris, adhesive residue, or spilled chemicals.
Next, gather all the necessary tools and supplies. A heat gun or clothes iron will be pivotal for applying heat to loosen the veneer. Choose a heat gun with adjustable temperature settings for better control, or set the clothes iron to a low heat setting to avoid scorching the wood. You will also need a putty knife or scraper to pry up the veneer as it loosens. Opt for tools with flexible, sturdy blades to balance effective lifting and minimize damage to the surface beneath.
After veneer removal, sandpaper in medium and fine grits will be required to smooth the wood. The medium grit will remove any remaining adhesive and imperfections, while the fine grit will help achieve a smooth finish that is ready for refinishing. If you encounter stubborn adhesive, a paint stripper might be necessary to soften it further; ensure it is a wood-safe option to prevent damage. Lastly, prioritize safety by using safety goggles and gloves to protect your eyes and hands from heat, debris, and chemical exposure. Being well-prepared with a tidy work area and the right tools set the stage for a successful veneer removal project.

How to Remove a Veneer: Heating and Loosening the Veneer
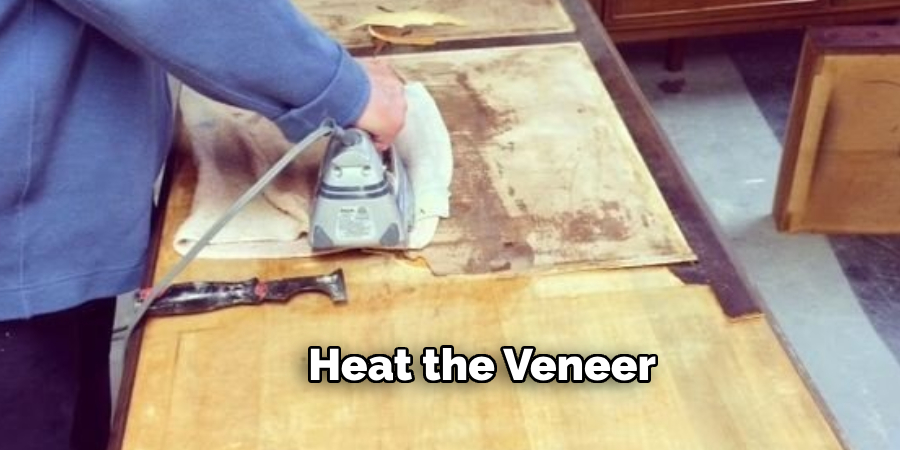
Applying heat to the veneer is a key step in facilitating its removal. Start by selecting a heat gun or a clothes iron set to a low heat setting. A heat gun with adjustable temperature settings offers greater control, but a clothes iron can also be effective when used cautiously. Hold the heat source a few inches away from the veneer’s surface to avoid scorching or damaging the underlying wood. The goal is to apply enough heat to soften the adhesive that binds the veneer to the furniture, allowing for easier removal.
It is crucial to work in small sections rather than trying to heat the entire surface at once. Move the heat source steadily back and forth over the section you are working on. Be patient and consistent, as applying too much heat too quickly can damage the wood beneath the veneer. Keep a close eye on the veneer as you heat it, looking for signs of loosening such as bubbling or lifting edges, which indicate that the adhesive is starting to soften.
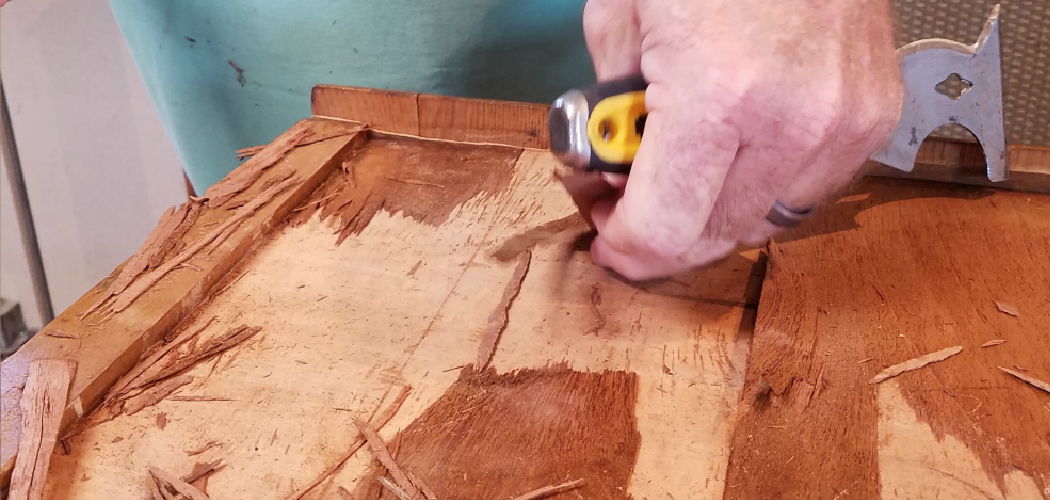
Once you observe signs of loosening, it’s time to insert a putty knife or scraper. Choose a tool with a flexible yet sturdy blade to help lift the veneer without damaging the wood underneath. Gently slide the putty knife or scraper under the loosened edge of the veneer and begin to pry it up. Work carefully and slowly, applying minimal force to avoid splintering the underlying wood. As you continue to heat and lift sections of the veneer, the process should become progressively easier.
Remember to work patiently and methodically. Heating and loosening veneer requires time and care to ensure a successful outcome. By applying heat evenly across small sections and using the right tools, the veneer can be removed efficiently while preserving the integrity of the furniture.
How to Remove a Veneer: Removing the Veneer
1.Peeling off the Veneer
To begin peeling off the veneer, continue applying heat as needed to soften the adhesive. Hold the heat gun or clothes iron a few inches away from the surface, maintaining a steady back-and-forth motion. As the adhesive softens, use the putty knife or scraper to carefully lift and peel away the veneer. Work in small sections to manage the process effectively, and be patient to avoid splintering or tearing the underlying wood. Gently slide the tool under the loosened edge, applying minimal force to lift the veneer without damaging the wood beneath.
2.Dealing with Stubborn Areas
Occasionally, you may encounter areas where the veneer is more stubborn and resistant to removal. For these spots, additional heat is applied to soften the adhesive further. If the adhesive remains persistent, a wood-safe paint stripper can be used to soften it further. Apply the paint stripper according to the manufacturer’s instructions, and allow it to sit for the recommended amount of time. Using gentle pressure and a steady hand, insert the putty knife or scraper under the veneer, gradually prying it up. Take extra care in these difficult areas to avoid causing damage to the furniture.
3.Cleaning and Smoothing the Surface
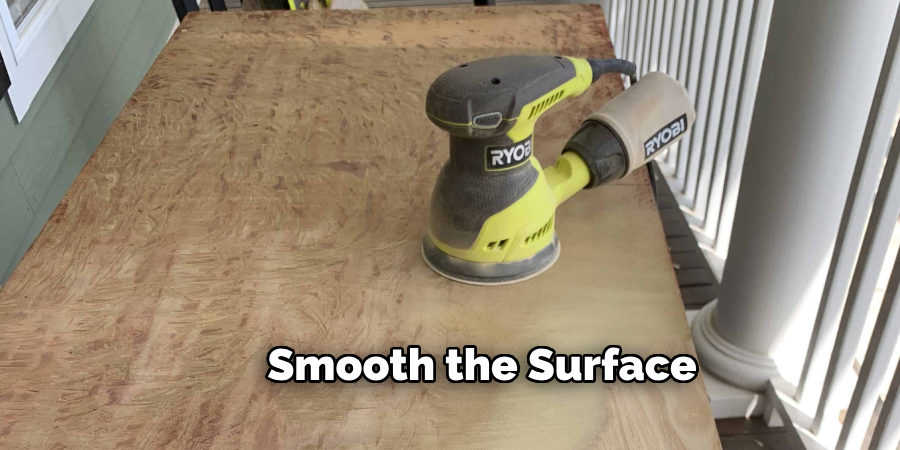
After successfully removing the veneer, focus on cleaning and smoothing the exposed wood surface. Remove any remaining adhesive residue using sandpaper or a scraper. Start with medium-grit sandpaper to tackle more significant adhesive remnants and imperfections. Once the majority of the adhesive is removed, switch to fine-grit sandpaper to achieve a smooth and even finish. Sand the surface thoroughly to eliminate any remaining residue and imperfections, preparing the wood for the next stages of refinishing. You ensure a flawless foundation for the subsequent refinishing processes by meticulously cleaning and smoothing the surface.
Finishing and Refinishing
Inspecting the Exposed Wood
Begin by closely inspecting the exposed wood for any holes, gouges, or imperfections. Use a high-quality wood filler to address these areas, filling them carefully and allowing adequate time for the filler to dry according to the manufacturer’s instructions. Once the filler has set, sand the entire surface to smooth out any repairs and prepare the wood for refinishing. Start with medium-grit sandpaper to create an even surface, then switch to fine-grit sandpaper for a smooth, refined finish.
Choosing a New Finish
Next, decide on the desired look for your refinished furniture. Select a stain that enhances the wood’s grain and character if you prefer a natural wood appearance. For a more modern and updated look, consider painting the furniture with a color that complements your décor. Both options can provide a fresh and appealing transformation.
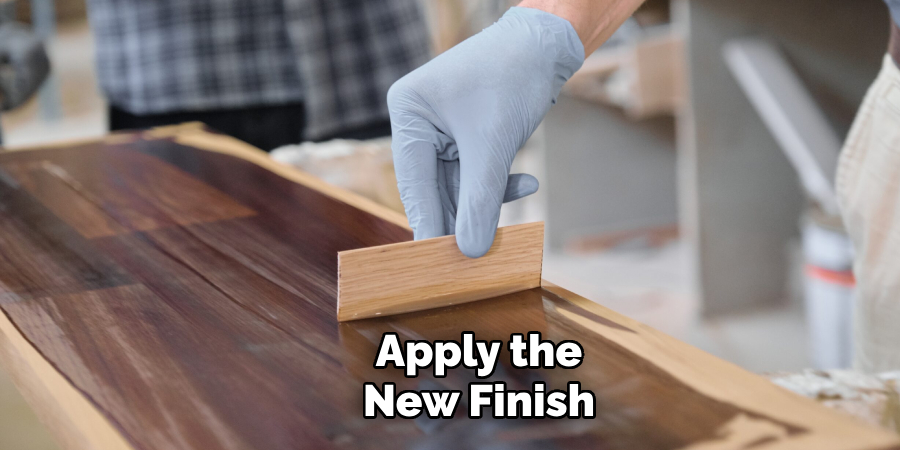
Applying the New Finish
When you have chosen your finish, follow the manufacturer’s instructions for application and drying times. Apply the finish evenly across the surface, covering all areas thoroughly. For increased durability and protection, consider applying multiple coats, allowing each coat to dry completely before adding the next. Proper application techniques and patience during drying will ensure a professional and long-lasting finish for your furniture.
Cleaning Up and Maintenance
Cleaning the Work Area
After completing the refinishing process, thoroughly clean your work area. Begin by removing any debris or leftover adhesive from the surface, ensuring the area is clear of all remnants. Use a damp cloth to wipe down the furniture and surrounding surfaces, removing dust and residue that accumulated during sanding and refinishing.
Regular Maintenance
Implement a regular maintenance routine to preserve the beauty and longevity of your newly refinished furniture. Dust the furniture regularly to keep it clean and free from debris, using a soft cloth to prevent scratches. Additionally, avoid exposing the wood to moisture or extreme temperatures, as these conditions can cause damage or warping. By following these maintenance guidelines, you can ensure that your refinished furniture remains in excellent condition for years to come.
Conclusion
In summary, this guide on how to remove a veneer from furniture covers several essential steps: assessing the veneer, preparing the necessary tools, heating and loosening the adhesive, carefully removing the veneer, finishing and refinishing the exposed wood, and finally, cleaning up and maintaining your work area. Patience, caution, and proper techniques are critical to avoid damaging the underlying wood during the process. Remember to work methodically and use appropriate tools like putty knives and heat guns to achieve the best results.
By confidently tackling veneer removal projects and following these steps, you can successfully refinish your furniture, giving it a fresh and appealing new look. If at any point you feel uncertain or overwhelmed, don’t hesitate to seek professional assistance to ensure the integrity and beauty of your furniture are preserved.