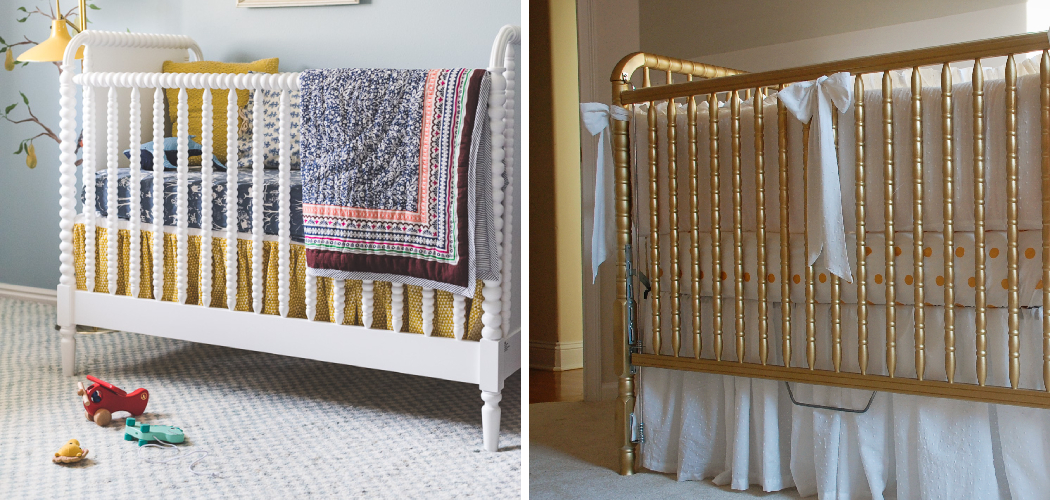
A crib skirt is a beautiful and functional addition to any nursery, serving both a decorative and practical purpose. This fabric accessory adorns the lower part of the crib, hiding the storage space underneath while adding a coordinated touch to the room’s decor. By learning how to sew a crib skirt, you can create a custom piece that perfectly matches your nursery’s theme and dimensions.

Customization allows for greater control over the fabric choice, color, and design, ensuring that every detail aligns with your vision. The process of making a crib skirt includes several basic steps: gathering essential materials, measuring and cutting fabric, preparing and hemming the panels, assembling the skirt, and adding any finishing touches or custom embellishments. This project not only enhances the aesthetic appeal of the nursery but also offers a satisfying and rewarding way to prepare for your new arrival.
Gathering Materials and Tools
You’ll need to gather the right materials and tools to successfully sew a custom crib skirt. Here’s a checklist to help you get started:
- Fabric (amount depends on crib size and desired skirt length)
- Matching thread
- Velcro or fabric tape (optional for attachment)
- Sewing machine
- Scissors or rotary cutter
- Measuring tape or ruler
- Pins or fabric clips
- Iron and ironing board
Choosing the right fabric is crucial for the longevity and appearance of your crib skirt. Opt for a durable, washable fabric that can withstand frequent laundering, as maintaining a clean nursery environment is essential for your baby’s health. The fabric should also complement the overall nursery decor, adding a coordinated and polished touch to the room.
Cotton or cotton blends are popular choices due to their durability, ease of care, and wide range of patterns and colors. Ensure that the fabric you select is free from harmful chemicals and safe for a baby’s sensitive skin. By taking the time to carefully select your materials, you can create a beautiful and practical crib skirt that enhances the look and functionality of your nursery.
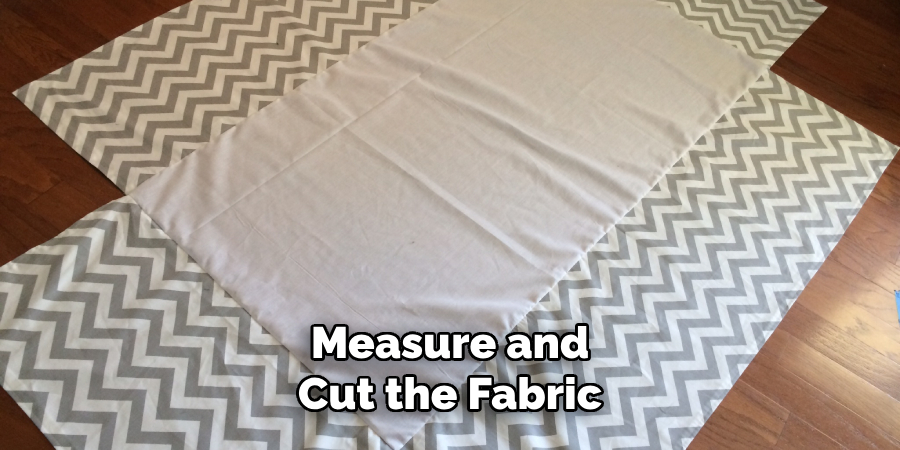
Measuring and Cutting the Fabric
Step-By-Step Instructions for Measuring the Crib:
- Measuring the Length and Width of the Crib Frame:
- Begin by measuring the length of the crib frame from one end to the other. Record this measurement.
- Next, measure the width of the crib frame from one side to the other and note this measurement as well.
- Deciding on the Desired Length of the Crib Skirt:
- Determine how far down you want the crib skirt to extend. This can be from the mattress to the floor or just below the crib frame. It’s a personal choice that should complement the overall look and functionality of the nursery.
- Record the chosen length for future reference.
Calculating Fabric Dimensions:
- Cutting Three Fabric Panels for the Sides and One for the Front:
- You will need three separate panels for the sides and one larger panel for the front.
- To calculate the dimensions of each panel, add the desired skirt length to each side’s length and width measurements.
- Adding Seam Allowances:
- Seam allowances are typically 1/2 inch on all sides of the fabric panels. This extra fabric allows for neat and secure seams.
- Add the seam allowance to the measurements of each panel before cutting.
Tips for Accurate Measuring and Cutting to Ensure a Perfect Fit:
- Use a measuring tape or a ruler for precise measurements. Double-check your measurements before cutting to avoid errors.
- Mark the fabric lightly with a fabric pencil or chalk to create straight cutting lines.
- Use sharp scissors or a rotary cutter for clean, even edges.
- Lay the fabric flat on a clean, hard surface to avoid any creases or puckering while cutting.
By following these instructions carefully, you can ensure that your crib skirt fits perfectly and looks professionally made.
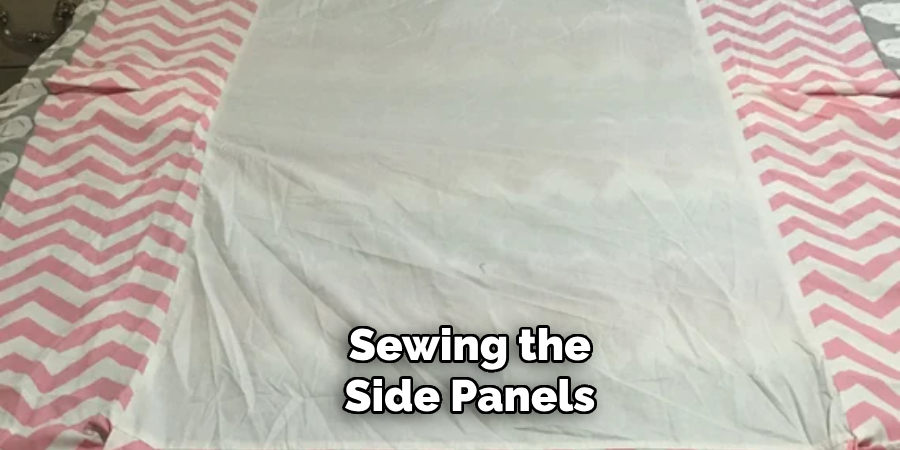
How to Sew a Crib Skirt: Preparing the Fabric Panels
Preparing the fabric panels is a critical step to ensure that your crib skirt looks professional and polished.
Hemming the Fabric Panels:
- Folding the Edges of Each Panel 1/2 Inch and Pressing With an Iron
- Start by folding the edge of each fabric panel inwards by 1/2 inch. Use an iron to press the fold, creating a sharp crease.
- Folding Again to Enclose the Raw Edge and Pressing
- Fold the fabric edge over again, ensuring the raw edge is now enclosed. Press with the iron again to reinforce the new fold.
- Pinning the Hem in Place and Sewing Along the Folded Edge
- Secure the folded edge by pinning it in place with fabric pins or clips. Sew along the inside edge, maintaining a consistent seam allowance to create a neat and secure hem.
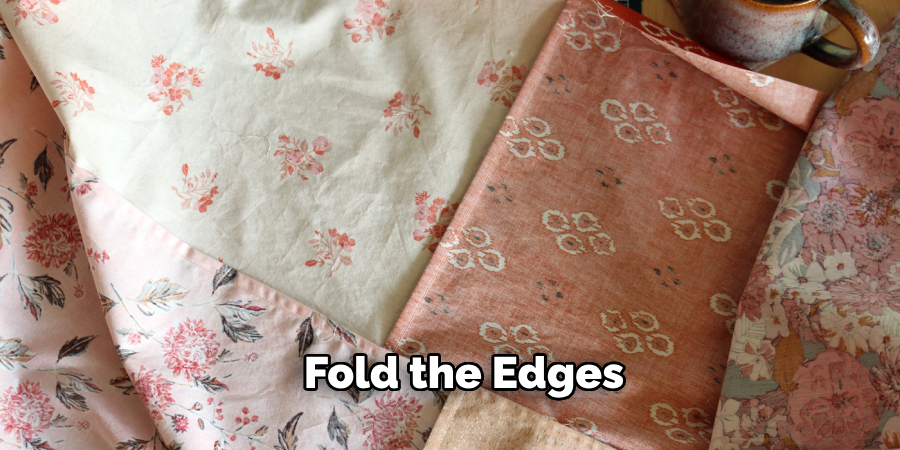
Importance of Pressing the Fabric:
Pressing the fabric as you fold edges is vital for creating crisp, professional-looking hems. Each press helps to set the fabric, making it easier to sew and providing a clean, sharp finish.
Tips for Sewing Straight Hems and Ensuring Even Lengths:
- Ensure your sewing machine is set up correctly, with the appropriate tension and stitch length.
- Use a sewing guide or presser foot to help maintain a straight stitch line.
- Take your time as you sew, avoiding any rushed movements that could lead to uneven hems.
- Consistently check your folded hems to ensure they appear even and uniform.
By following these steps and tips carefully, you can achieve a beautifully finished crib skirt with precise and straight hems.
How to Sew a Crib Skirt: Assembling the Crib Skirt
Attaching the Panels to The Crib Base:
- Placing the Crib Mattress Support in Its Highest Position:
- Begin by raising the crib mattress support to its highest position. This makes it easier to attach the fabric panels without straining or reaching awkwardly.
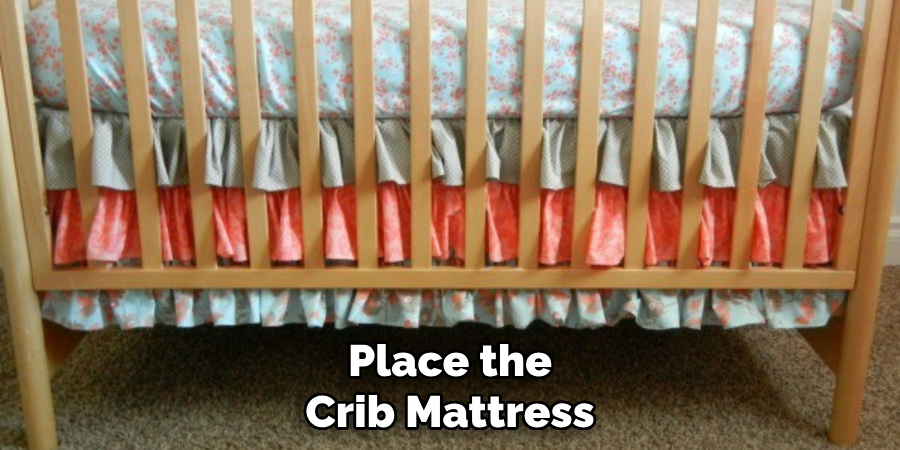
- Aligning the Top Edges of the Fabric Panels With the Top Edge of the Crib Frame:
- Position the top edge of each fabric panel to align perfectly with the crib frame’s top edge. Ensure each panel hangs straight and evenly and covers the desired length.
- Pinning or Clipping the Panels in Place, Ensuring Even Spacing and Alignment:
- Use fabric pins or clips to secure the panels in place. Ensure they are evenly spaced and aligned correctly. Double-check the alignment to make sure the skirt appears uniform from all sides.
Sewing the Panels Together:
- Sewing the Side Panels to the Front Panel at the Corners, Creating a Continuous Skirt:
- Start by sewing the side panels to the front panel at the corners. Ensure that the edges match up precisely for a professional and seamless look. Sew the panels together using a strong, consistent stitch, forming a continuous skirt.
- Ensuring Secure, Reinforced Seams at the Corners for Durability:
- Reinforce the seams at each corner to enhance the durability and longevity of the crib skirt. Double-stitch or backstitch at the corners to prevent fraying or separation over time.
Optional Step:
Use Velcro or Fabric Tape for Easy Attachment and Removal:
- Sewing Velcro Strips or Fabric Tape to the Top Edge of the Fabric Panels:
- If you prefer a removable crib skirt, sew Velcro strips or fabric tape along the top edge of each fabric panel. This allows for easy removal and washing.
- Attaching Corresponding Strips to the Crib Frame:
- Secure the corresponding Velcro strips or fabric tape to the crib frame where the panels will be attached.
- Pressing the Velcro or Fabric Tape Together to Secure the Skirt:
- Align and press the Velcro or fabric tape strips together to attach the crib skirt to the frame firmly. This method ensures that the skirt remains in place yet can be removed effortlessly for maintenance.
By meticulously following these steps, you can assemble a crib skirt that is both functional and stylish, enhancing the beauty and practicality of your nursery.
Finishing Touches and Installations
Pressing the finished crib skirt:
- Ironing the Fabric Panels to Remove Any Wrinkles or Creases
- Before installation, take the time to iron the fabric panels thoroughly. This step ensures that any wrinkles or creases accrued during the sewing process are smooth, providing a pristine, polished look.
- Ensuring Hems and Seams Are Flat and Even
- Focus on pressing the hems and seams flat to achieve a professional finish. Ensuring that these areas are even and smooth will contribute to the crib skirt’s overall neatness.
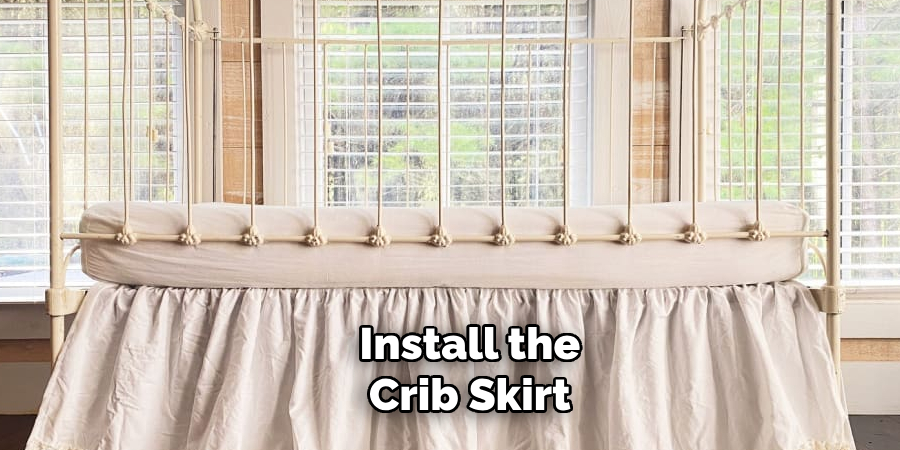
Installing the Crib Skirt:
- Placing the Crib Mattress Support in Its Desired Position
- Lower the crib mattress support to its intended height. This ensures that once the crib skirt is installed, it will cover the desired area effectively.
- Aligning the Crib Skirt Panels Around the Crib Frame
- Carefully wrap the crib skirt panels around the crib frame, aligning the top edges with the frame’s upper boundary. Ensure that the panels are evenly distributed for a balanced appearance.
- Adjusting the Panels for a Snug, Even Fit
- Make any necessary adjustments to the panels to ensure they hang evenly. Smooth out any bunching or uneven areas to maintain a symmetrical look.
Tips for Making Adjustments to Ensure the Crib Skirt Hangs Evenly and Smoothly:
- Gently tug and straighten the fabric panels after aligning them to maintain an even length all around.
- Step back and view the crib skirt from different angles to identify and correct any irregularities.
- Consider temporarily pinning the fabric while adjusting it to achieve the perfect fit before finalizing the installation.
Customization Ideas
Adding Decorative Elements:
- Adding Trim or Ruffles to the Bottom Edge of the Crib Skirt for a Personalized Touch
- Enhance the visual appeal of your crib skirt by adding decorative trim or ruffles along the bottom edge. Choose from a variety of trims, such as lace, ribbon, or pom-poms, to reflect your nursery’s theme and style. Ruffles can be created by gathering a strip of fabric and sewing it along the hem for a delicate, whimsical finish.
- Using contrasting fabric for a two-tone effect
- Incorporate contrasting fabric to create a striking two-tone crib skirt. Select a secondary fabric that complements the primary material and use it for the bottom portion or to create horizontal stripes. This adds depth and interest to your crib skirt, making it a unique piece.
Creating a Pleated or Gathered Crib Skirt:
- Instructions for Creating Pleats or Gathers for a More Formal or Textured Look
- Consider creating pleats or gathers in your crib skirt for a more formal or textured appearance. To add pleats, fold the fabric regularly and sew the folds in place. Box pleats, knife pleats, or inverted pleats each offer distinct looks. For a gathered skirt, simply sew a basting stitch along the top edge and pull the thread to gather the fabric evenly before attaching it to the crib base.
Embellishing with Appliques or Embroidery:
- Ideas for Adding Personalized Designs or Monograms
- Personalize your crib skirt further by embellishing it with appliques or embroidery. Choose designs that coordinate with your nursery’s theme, such as animals, flowers, or geometric shapes. Alternatively, add a monogram or name to make the crib skirt uniquely yours. Both appliques and embroidery can be sewn or ironed onto the fabric, contributing to a bespoke look.
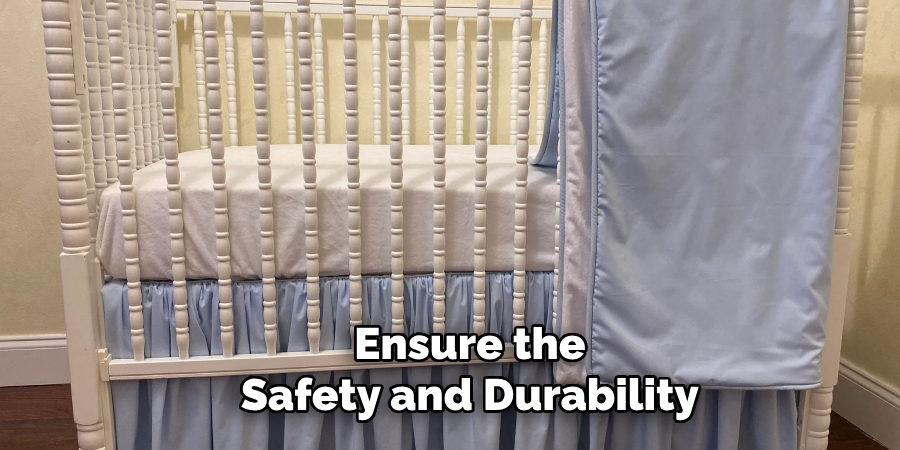
Tips for Ensuring Decorative Elements Are Securely Attached and Safe for Use in A Crib:
- Ensuring the Safety and Durability of Decorative Elements
- Use strong, durable threads and reinforce stitching where necessary to ensure decorative elements are securely attached and safe. Avoid decorations that could easily detach or be pulled off by a curious infant. Always double-check that all embellishments are securely fastened and pose no choking hazards, prioritizing the safety and well-being of your baby.
Conclusion
In conclusion, sewing a crib skirt involves several crucial steps to achieve a professional and polished look. Begin by gathering materials such as fabric, thread, and necessary sewing tools. Next, proceed to measure and cut the fabric to the desired dimensions, ensuring precision in your measurements.
Prepare and hem the panels by pressing, pinning, and sewing the edges for a neat finish. Assemble and attach the skirt by aligning and securing the panels around the crib frame. Add your own style with finishing touches and customization, such as decorative trims, pleats, and embroidery, to make the crib skirt uniquely yours.
Taking on this project is a rewarding way to personalize your nursery and showcase your creativity. Keep in mind final tips like ensuring even hems and seams, using quality materials, and regularly maintaining your creation. Enjoy the satisfaction of learning how to sew a crib skirt and creating a cherished addition to your baby’s nursery.
You can also check it out Raise an Air Mattress Off the Floor