Antique furniture holds a timeless charm and appeal that speaks to the craftsmanship and artistry of bygone eras. These pieces often have rich histories and stories that add character to any space. Updating antique furniture not only helps to preserve its historical value but also enhances its functionality and allows for seamless integration with modern decor. You can maintain their integrity and value by carefully updating these treasured pieces while giving them a fresh, new look.

This guide will walk you through the step-by-step process of how to update antique furniture, ensuring that each piece can be enjoyed and admired for years to come. Careful planning and the right techniques are crucial to maintaining the piece’s original beauty and value while making it suitable for contemporary use.
Assessing the Furniture
Updating antique furniture begins with a thorough assessment of the piece. Evaluating the condition is the first step to ensure that the furniture can be safely and effectively updated. Begin by checking for structural integrity: examine the joints, legs, and overall stability of the piece. Pay close attention to any signs of wobbling or weakness, as these must be addressed before any cosmetic updates. Identifying areas of damage is equally important. Look for scratches, stains, chips, or broken parts that could affect the final appearance and functionality of the furniture.
The next critical step is determining the furniture’s value. Researching the piece’s history and maker can provide valuable insights into its significance and worth. In some cases, consulting with an antique appraiser who can offer a professional evaluation might be worthwhile. This can help in making informed decisions about the extent of the update.
Finally, decide on the extent of the update. Consider whether the piece requires a full restoration, a simple refinish, or just minor enhancements. The decision will depend on the furniture’s condition, value, and your personal preferences. Careful assessment ensures that the updating process is appropriate for the piece, preserving its historical value while enhancing its appearance and functionality.
Cleaning and Prepping the Furniture
Proper cleaning and preparation are essential steps in updating antique furniture. Starting with cleaning the surface ensures that the piece is free from accumulated dirt and grime, which could interfere with further restoration processes.
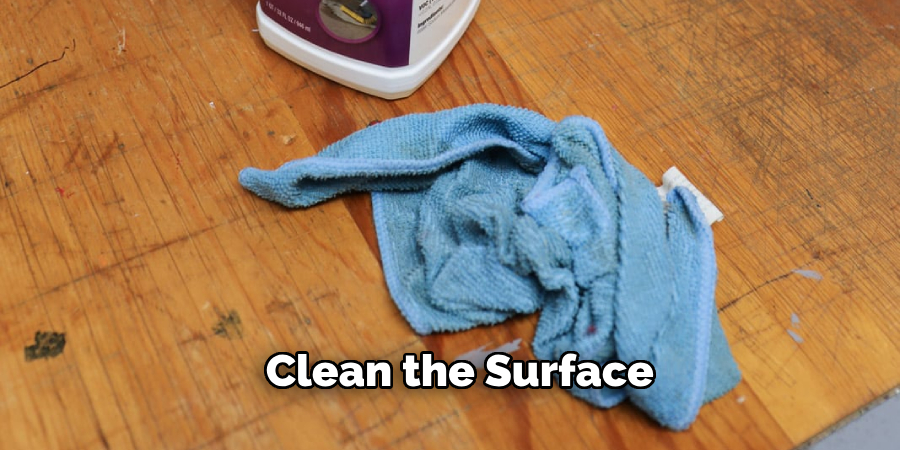
- Cleaning the Surface:
- Use mild soap and water or a specialized wood cleaner to gently clean the furniture, taking care not to saturate the wood. This helps to remove surface dirt without stripping the wood of its natural oils.
- Avoid harsh chemicals, which can damage the original finish or weaken the wood. Instead, opt for gentle, wood-friendly cleaning solutions that preserve the piece’s integrity.
- Use a soft brush to reach into crevices without causing damage to intricate areas or detailed carvings.
- Repairing Any Damage:
- Address any structural issues by gluing and clamping loose joints. Apply wood glue into the joint and hold it firmly in place with clamps until fully set, ensuring a stable structure.
- Fill any cracks or holes using wood filler. Choose a filler that matches the color of the wood or is paintable. Allow it to dry completely before sanding.
- Sand rough or chipped areas with fine-grit sandpaper. Work toward the wood grain to avoid scratches and achieve a smooth surface, ready for refinishing.
- Removing Old Hardware:
- Carefully remove any knobs, handles, or other hardware. Use appropriate tools to avoid damaging the wood or the hardware itself.
- Clean or replace the hardware as per the design plan. Original hardware can be polished to restore its shine, while new hardware can provide an updated look to the piece.
By meticulously cleaning and prepping the furniture, you create a solid foundation for the subsequent steps in updating and refinishing your antique piece.
How to Update Antique Furniture: Stripping and Sanding
Stripping Old Finish (If Necessary)
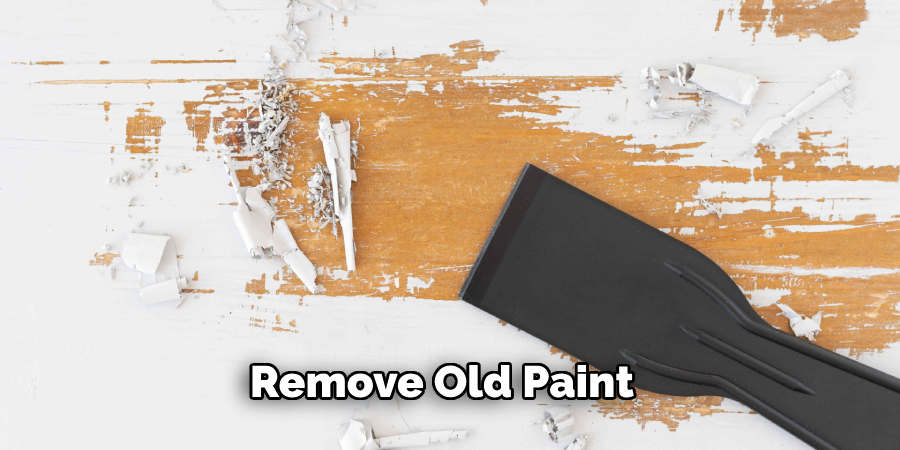
Before applying a new finish, removing the old paint or varnish from the antique furniture may be necessary. Stripping the old finish can be done effectively by choosing the right paint or varnish stripper. Select a stripper based on the type of finish you are removing and the nature of the wood. Look for a product that is safe for antique wood and versatile for various finishes.
- Choosing a Suitable Paint or Varnish Stripper:
- Opt for a wood-friendly stripper that matches the type of finish you intend to remove. Ensure it is suitable for use on delicate antique pieces.
- Applying the Stripper:
- Follow the manufacturer’s instructions on the correct application technique. This often involves applying a thick coat of the stripper with a brush and allowing it to sit for a specified period.
- Once the finish bubbles or softens, use a plastic scraper to gently remove the old finish. Apply even pressure to avoid gouging the wood or causing damage.
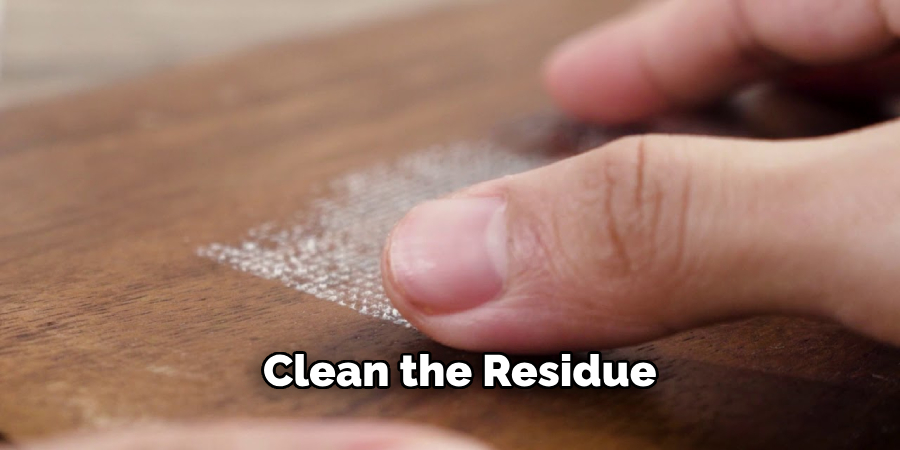
- Cleaning Off Residue:
- After scraping off the old finish, clean the residue with mineral spirits or water. This ensures that no remnants of the stripper remain that could interfere with the new finish. Allow the piece to dry thoroughly before proceeding.
Sanding the Furniture
After stripping the old finish, sanding the furniture is crucial to achieving a smooth and even surface for the new finish. Begin by selecting the appropriate sandpaper grit for the task at hand.
- Starting with Medium-Grit Sandpaper:
- Use medium-grit sandpaper (such as 150-grit) to smooth out any rough areas and remove any remaining traces of the old finish. This initial sanding helps to level the surface.
- Progressing to Fine-Grit Sandpaper:
- Gradually switch to finer grits of sandpaper (such as 220 grit) to refine the surface. This helps to achieve a buttery smooth finish, which is essential for applying a new coat of paint or varnish.
- Sanding in the Direction of the Wood Grain:
- Always sand in the direction of the wood grain to prevent scratches and achieve an even look. This technique respects the wood’s natural patterns and enhances its appearance.
- Wiping Down the Piece:
- Use a tack cloth to remove all dust and fine particles resulting from sanding. This step is essential to ensure the new finish adheres properly and the result is free of blemishes.
By carefully stripping and sanding the antique furniture, you prepare the piece meticulously for the next stages of updating, ensuring a flawless base for the new finish.
How to Update Antique Furniture: Refinishing the Surface
Choosing a New Finish
Selecting the right finish for your antique furniture is crucial for achieving the desired look and preserving the wood’s integrity. Depending on your aesthetic, you can choose between a stain, paint, or clear finish.
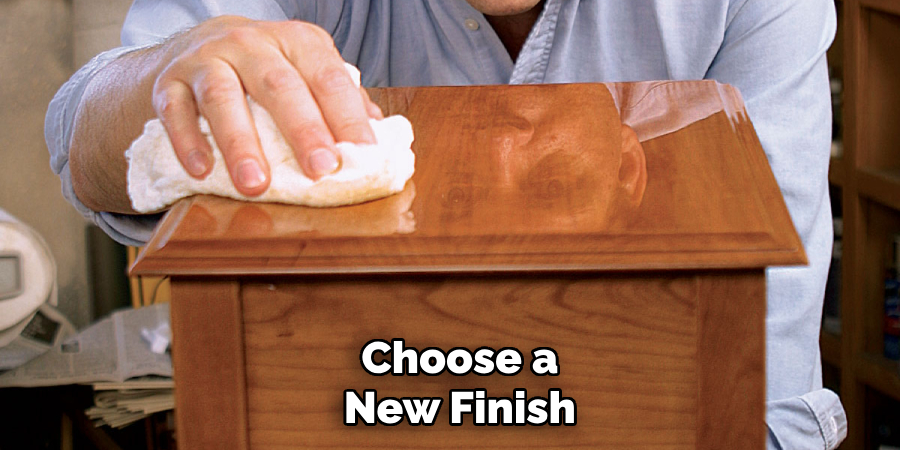
- Deciding Between Stain, Paint, or Clear Finish:
- Stain: If you want to enhance the natural grain of the wood, opt for a stain. Stains penetrate the wood, adding color while revealing its unique patterns.
- Paint: Choose paint for a more modern or vibrant update. Paint offers a fresh appearance that can completely transform the piece.
- Clear Finish: Apply a clear finish (such as lacquer or polyurethane) to protect the wood while maintaining its natural beauty. This is ideal if you prefer a more natural look with enhanced durability.
- Considering the Type of Wood and Its Natural Beauty:
- Assess the wood type and its grain patterns. Some woods have beautiful textures that are worth showcasing with a clear finish or stain. Others might benefit more from a paint finish to hide imperfections.
- Applying Stain or Paint
Once you’ve chosen your finish, the application process is crucial for achieving a professional look.- Using a Brush or Cloth to Apply Stain:
- Use a brush or cloth to apply the stain, working toward the wood grain. Apply an even coat and wipe off any excess with a clean cloth to ensure uniform coverage.
- Applying Paint in Thin, Even Coats:
- Apply thin, even coats with a high-quality brush or roller if painting. Allow adequate drying time between coats (as specified by the manufacturer) to avoid streaks or drips.
- Sanding Lightly Between Coats:
- For both stain and paint, lightly sand the surface between coats using fine-grit sandpaper (such as 220-grit). This step ensures a smooth, professional finish.
- Sealing the Finish
Sealing the finish adds durability and protects the piece from wear and tear.- Applying a Clear Protective Coat:
- Based on the finish you’ve applied, choose a clear protective coat such as polyurethane, varnish, or wax. Follow the manufacturer’s instructions for application and drying times.
- Following Manufacturer Instructions:
- Adhere to the recommended drying times and application techniques for the best results.
- Buffing the Surface for a Polished Look:
- If using wax, buff the surface with a soft cloth to achieve a polished, lustrous appearance.
- By carefully refinishing the surface, you can rejuvenate your antique furniture, enhancing its appearance and prolonging its life.
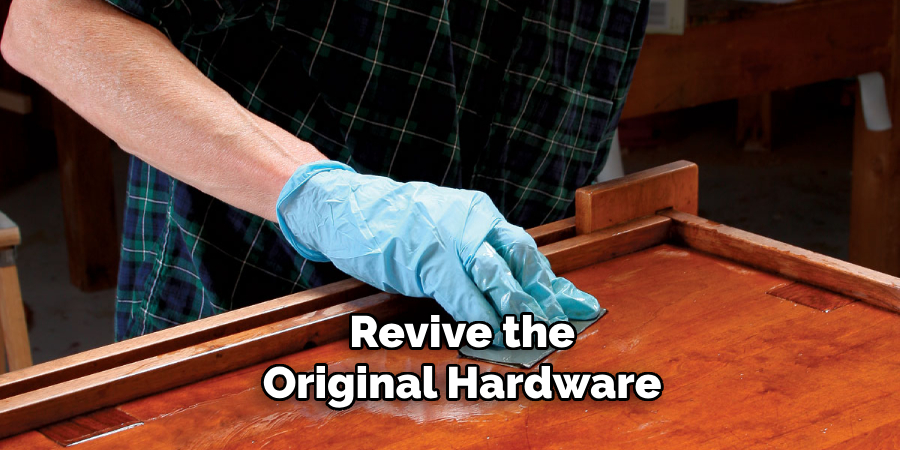
Updating Hardware and Accessories
Cleaning and Polishing Original Hardware
Reviving the original hardware can add an authentic touch to your refinished antique furniture. Start by soaking the pieces in a vinegar solution or using a specialized metal cleaner to remove grime and tarnish. Once clean, polish each item with a soft cloth to restore its original shine, returning its former luster and elegance.
Replacing Hardware
If the original hardware is beyond repair or you desire a new look, replacing it is an excellent option. Select new knobs, handles, or hinges that complement the updated finish of your furniture. When choosing replacements, consider the style and era of the piece to maintain a cohesive look. Ensure the new hardware fits the existing holes to avoid unnecessary damage, or carefully drill new ones if required. Precision and patience are key to maintaining the integrity of the wood during this process.
Adding Decorative Elements
Enhance the character of your antique furniture by adding decorative elements. Attaching appliques or trim can introduce intricate details that elevate the overall design. Consider incorporating fabric or wallpaper inlays on flat surfaces like drawer fronts or panels for a unique touch. These additions personalize the piece and create a truly one-of-a-kind statement.
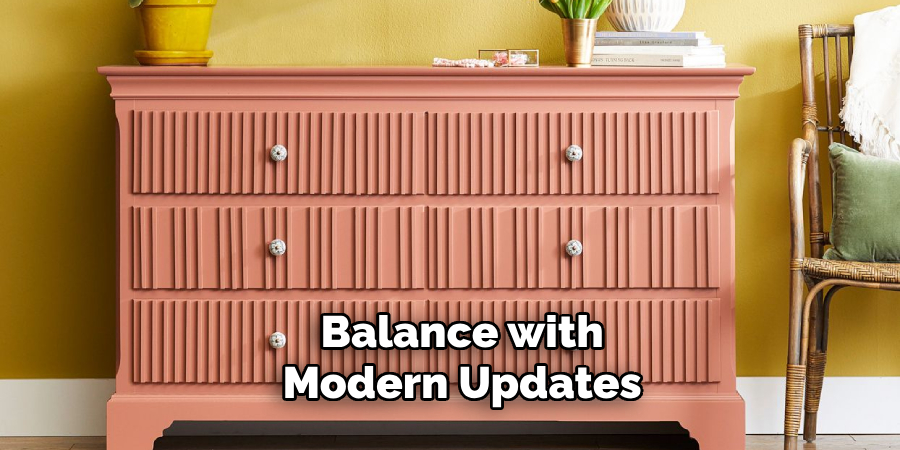
Adding Modern Touches
Integrating Modern Elements
Updating your antique furniture with modern touches can create a striking balance between vintage charm and contemporary style.
- Painting the Furniture in Trendy Colors or Using Bold Patterns:
- Consider painting your piece in trendy colors like navy blue, sage green, or even a sleek matte black to give it a fresh, modern look. Using bold patterns, such as geometric designs or stripes, can further enhance its visual appeal and make a statement.
- Adding Stenciling or Decals for a Contemporary Look:
- Stenciling or applying decals can instantly transform an antique piece. Opt for contemporary shapes and motifs, such as abstract designs or botanical prints, to create an eye-catching effect that feels both sophisticated and current.
- Enhancing Functionality
Incorporate modern functionality to make your antique furniture beautiful and practical.- Modifying Drawers or Shelves for Better Storage:
- Add dividers, organizers, or additional shelving to enhance your furniture’s storage capabilities. This not only increases usability but also breathes new life into old pieces.
- Adding Caster Wheels for Mobility or Cushion for Comfort (e.g., on Chairs):
- Adding caster wheels to items like dressers or tables can make them more mobile and versatile. For seating, consider reupholstering chairs with modern fabrics and adding cushions for added comfort and style.
- Balancing Antique Charm with Modern Updates
To maintain the character of the piece while incorporating modern updates:- Preserve distinctive features like original wood grain or intricate carvings.
- Blend new elements subtly, ensuring they complement rather than overpower the antique essence.
- Aim for harmony between old and new, creating a cohesive look that celebrates the history and enhances functionality.
Conclusion
Updating antique furniture is a rewarding journey that encompasses several key steps: assessing the piece, thoroughly cleaning it, making necessary repairs, refinishing the surface, updating hardware and accessories, adding modern touches, and maintaining its condition. By following this comprehensive guide on how to update antique furniture, you can rejuvenate cherished pieces while preserving their historical value.
The process not only enhances the appearance and functionality of your furniture but also offers a sense of accomplishment and creativity. Breathing new life into antique items allows you to create unique, personalized decor that merges the charm of the past with contemporary style. Embrace the satisfaction and benefits of undertaking furniture updating projects, knowing that you are contributing to preserving and appreciating treasured heirlooms for future generations.
You can also check it out to Build Basement Storage Shelves